Runme in VS Code
Make sure you followed the installation process for Runme in VS Code. Next, in the VS Code file Explorer create a new README.md file by right clicking or using the File->New File menu. When you open it, you should get an empty canvas, like this:

Adding Markdown
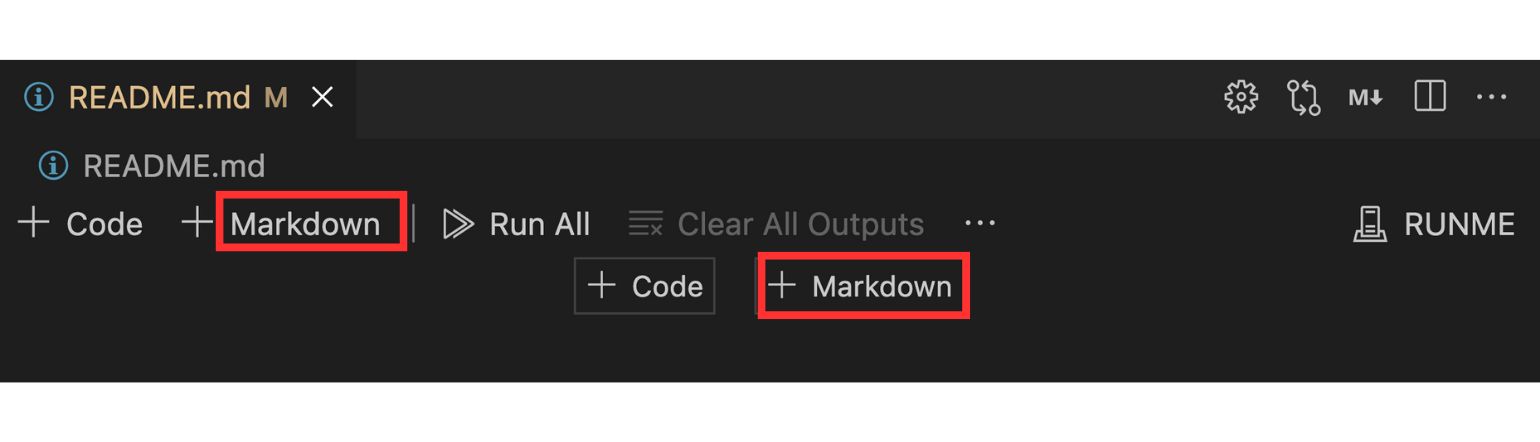
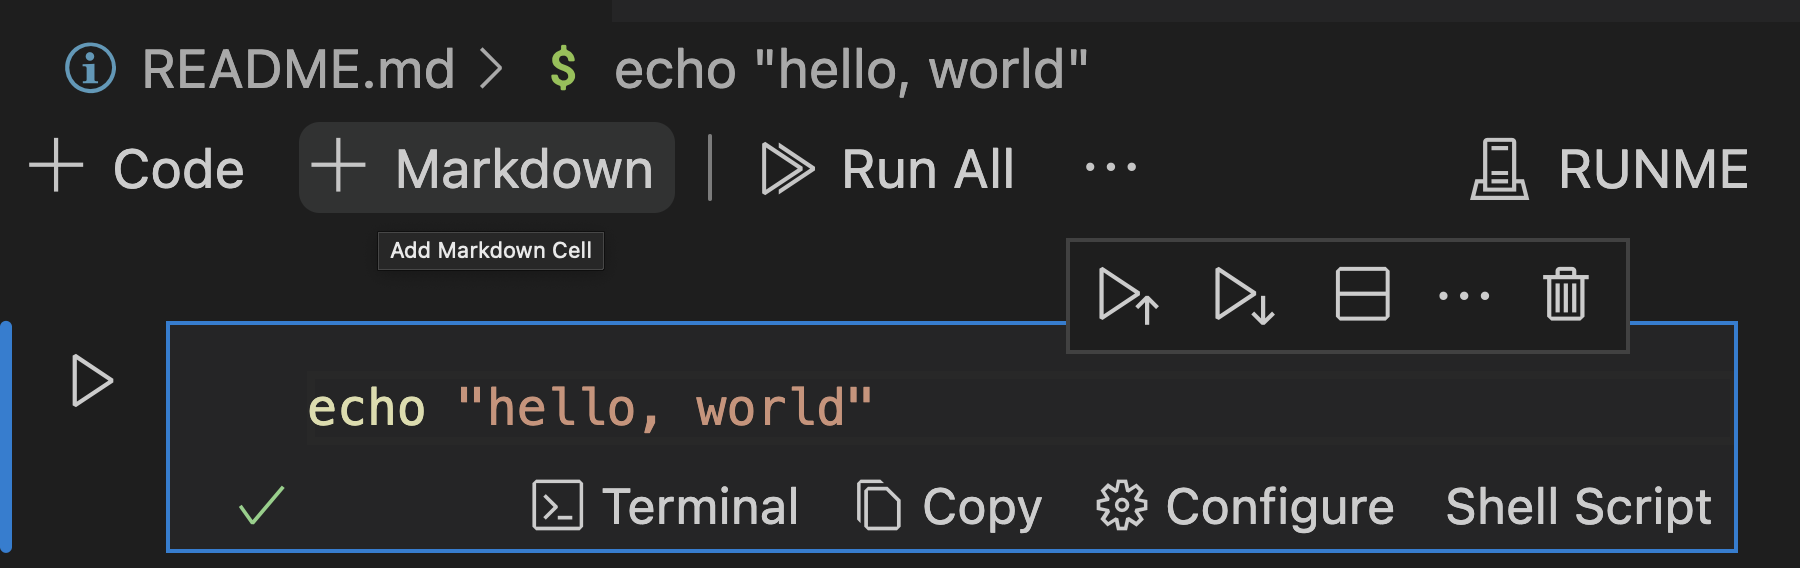
To add a new Markdown section, click the "+ Markdown" button in the top left or center:
You can then edit the Markdown cell directly:
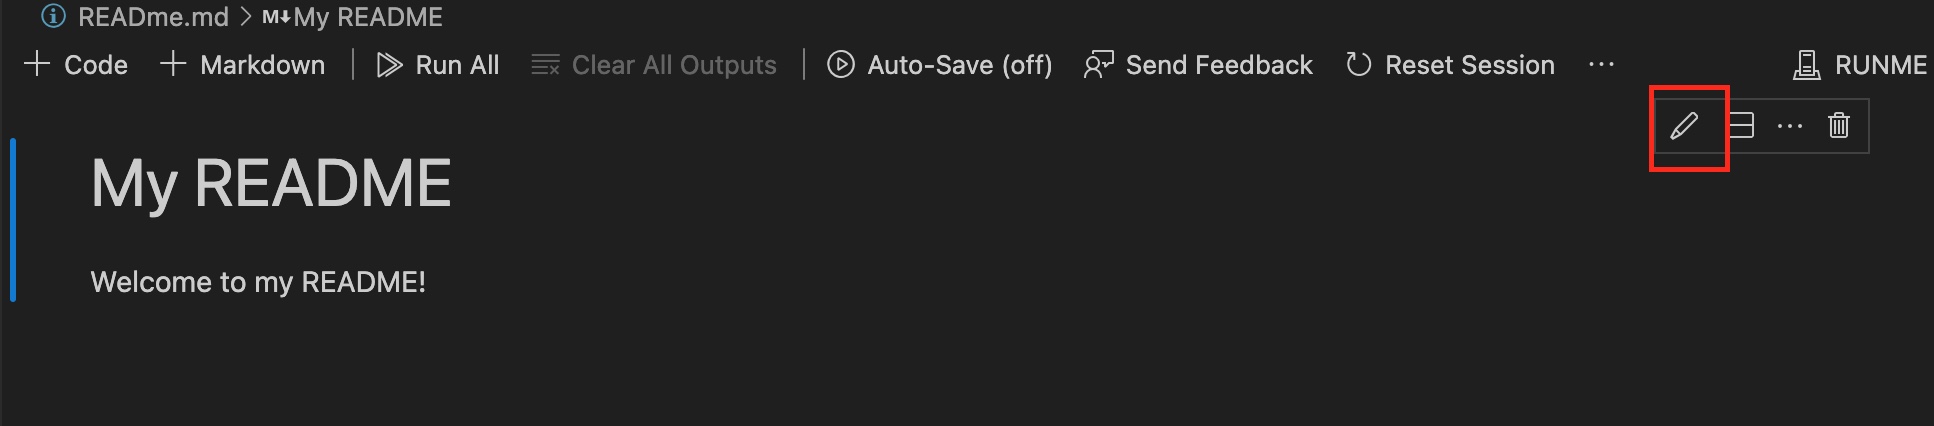
As shown in the image below, once you're done editing a cell, use the check icon (the one with the checkmark):
![]()
To edit the cell again, use the edit cell icon:
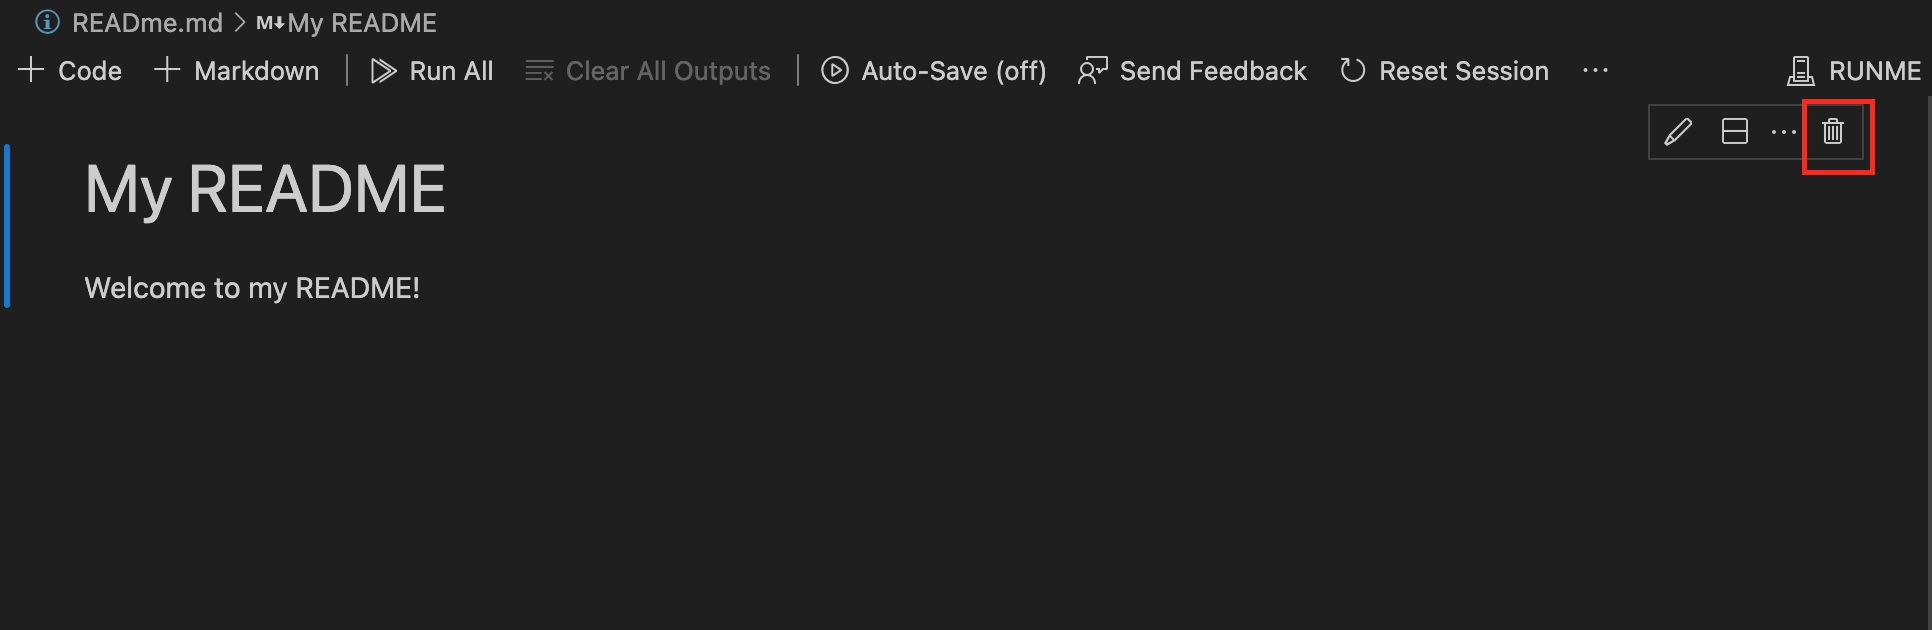
Finally, you can remove a cell at any time using the delete cell icon:
Note that the usual shortcuts (like Ctrl + Z) work perfectly in this environment too!
Sidenote
Other shortcuts you can use are:
ESCorCtrl+Enterto quickly finish editing a cell.Enteron its own to start editing a selected cell.CMD+Deleteto quickly remove a cell.
Adding Code
Code cell blocks work similarly to Markdown blocks and can be edited, saved, or deleted in the same way.
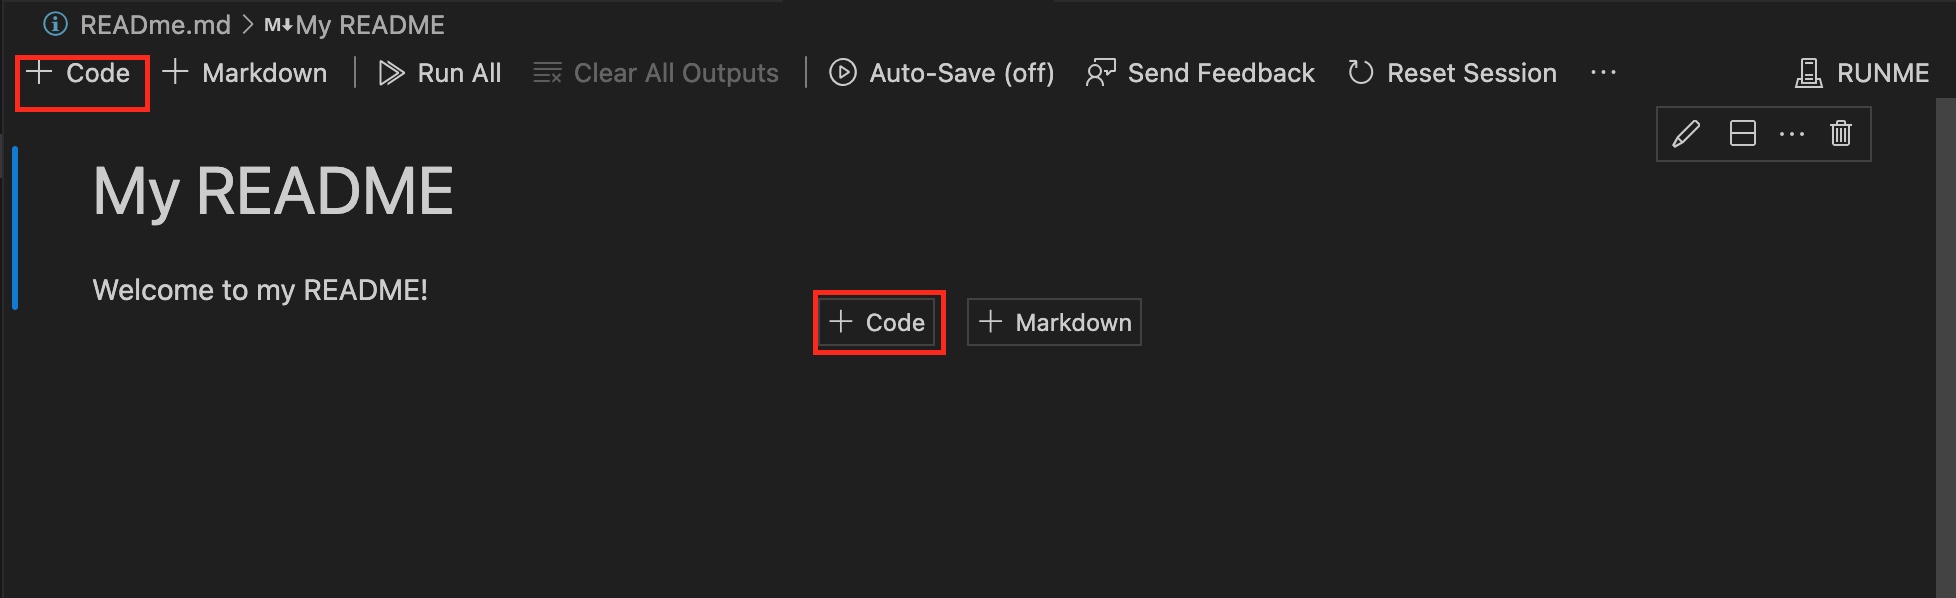
To create a new code block, use the + Code button in the top left or center:
You can then freely add runnable code:
Running Scripts
All bash commands added to the Notebook will become runnable. This makes getting started with a new project a breeze - say goodbye to annoying copy-and-pasting!
To run a script, click the Run button on its left-hand side:
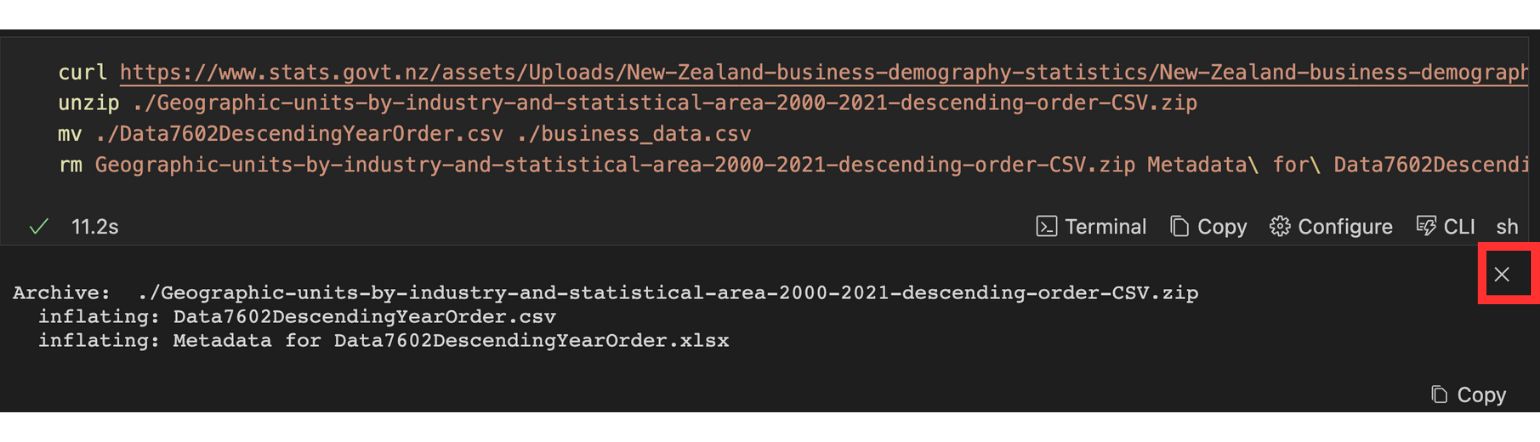
As you can see, we have downloaded the business_data.csv file, which contains business statistics about New Zealand in the years 2000-2021. It's a pretty big file!
Command Output
After running cells you will see their output displayed below the cell
For example:
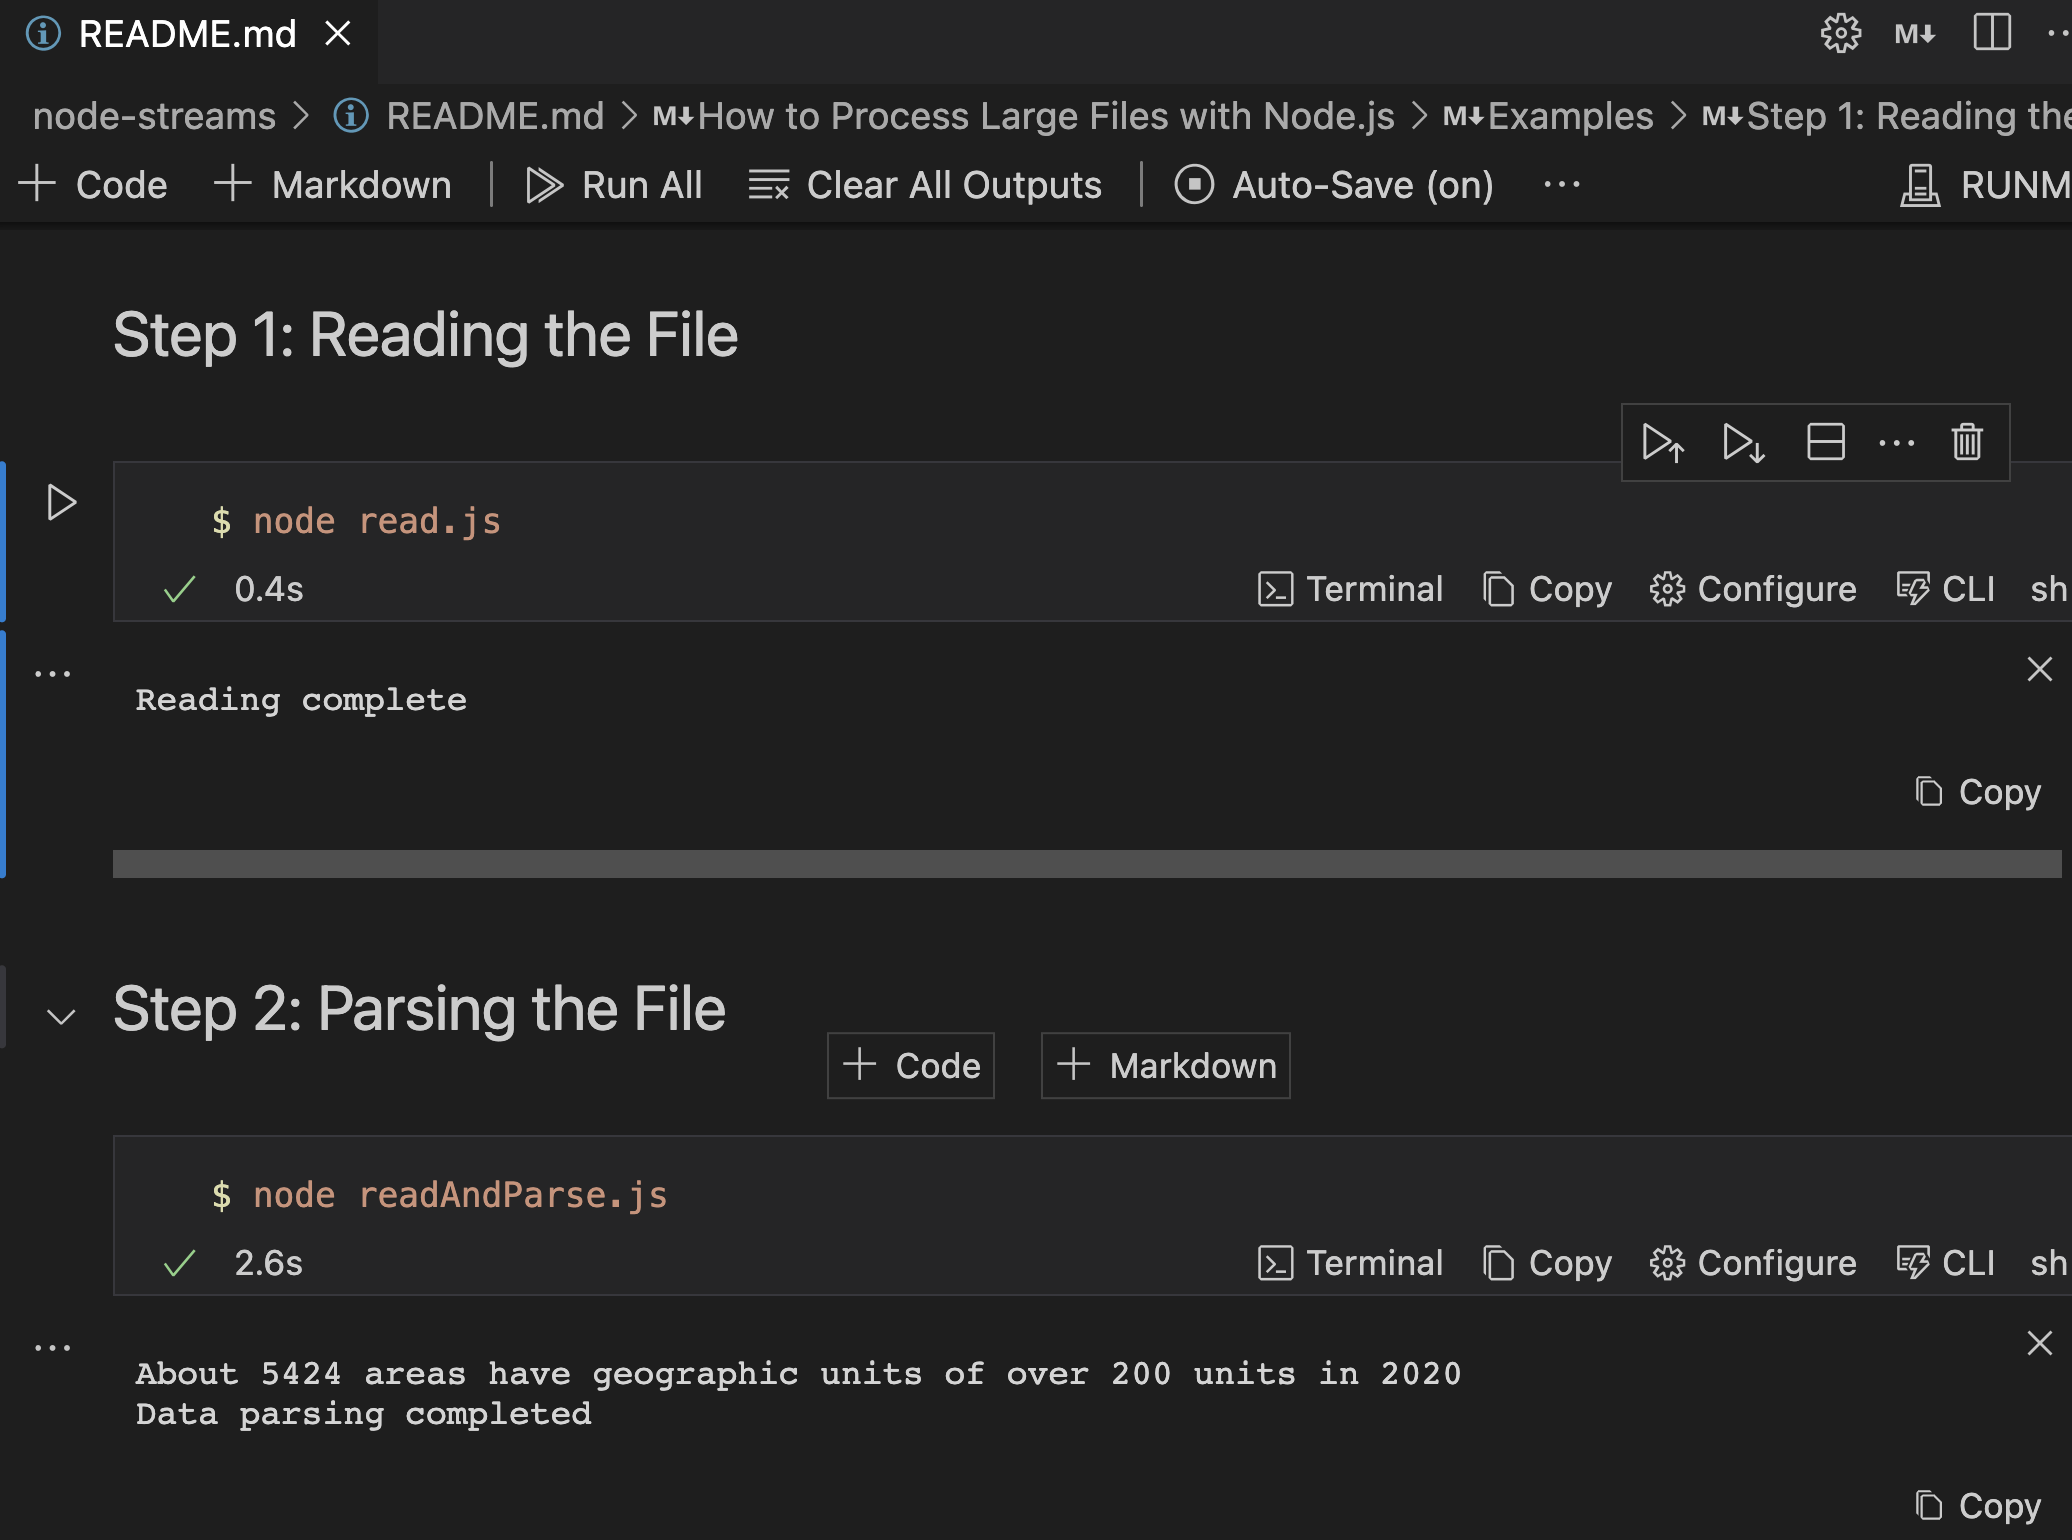
Great! You can see the terminal output from each command beneath its respective cell. Our Node.JS script was able to parse that massive file with no problems!
Successful Execution
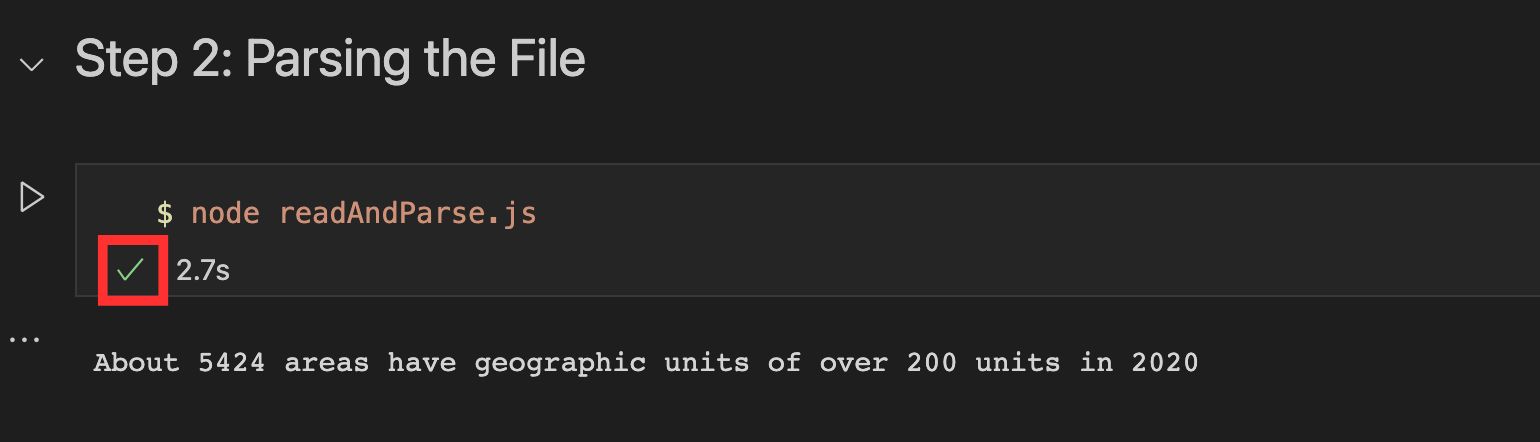
Wondering how you know when a command is finished executing? Look out for the checkmark in the bottom left:
If the command fails, it will be an "X" mark instead!
Copying Output
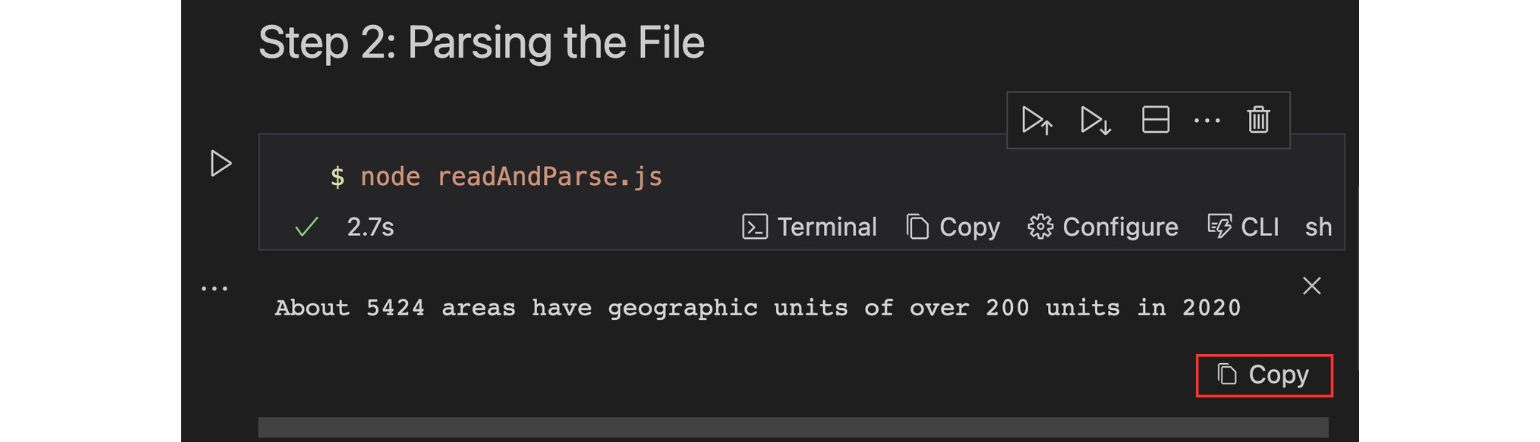
Runme provides a handy "copy" button to easily copy the output of a command!
Clearing Output
Sometimes, the output of a command can clutter up the screen. To prevent this, use the "Clear Cell Outputs" menu option.
Alternatively, select the output and use the Option+Delete shortcut.
Congratulations on running your first Runme notebook! 🎉. While you've understood the basics, there's more to discover about Runme's powerful features. Let's get ready to dive deeper.
Interactive Mode
What is an interactive runbook without interaction?
By default, our script will run in “Interactive Mode”. This mode enables you to interact with interactive scripts in the output terminal. It will run the script in a separate terminal window rather than in the notebook itself.
If we just try to run this as it is, we will experience the following:
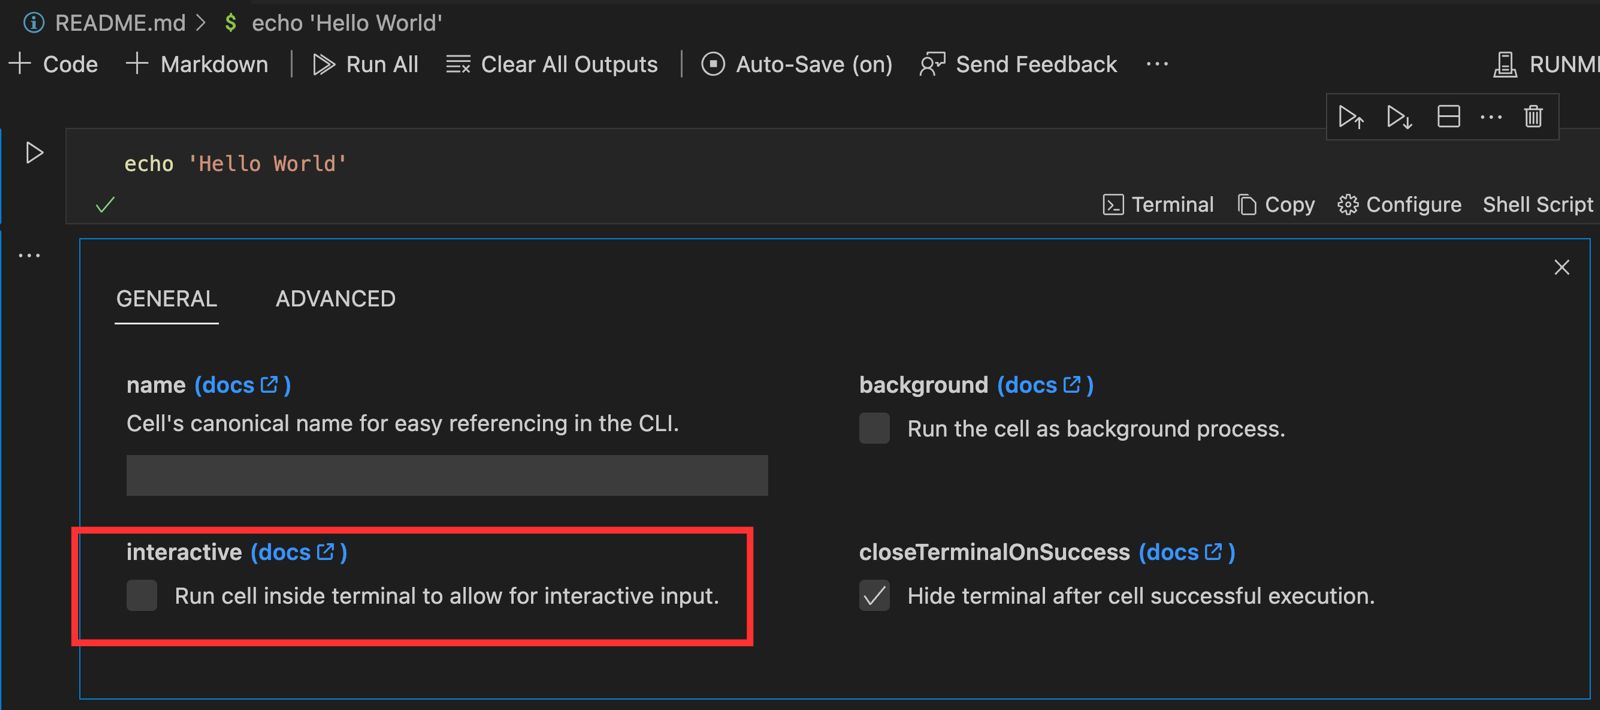
However, when you disable interactive mode from the configuration setting, you cannot interact with your scripts.
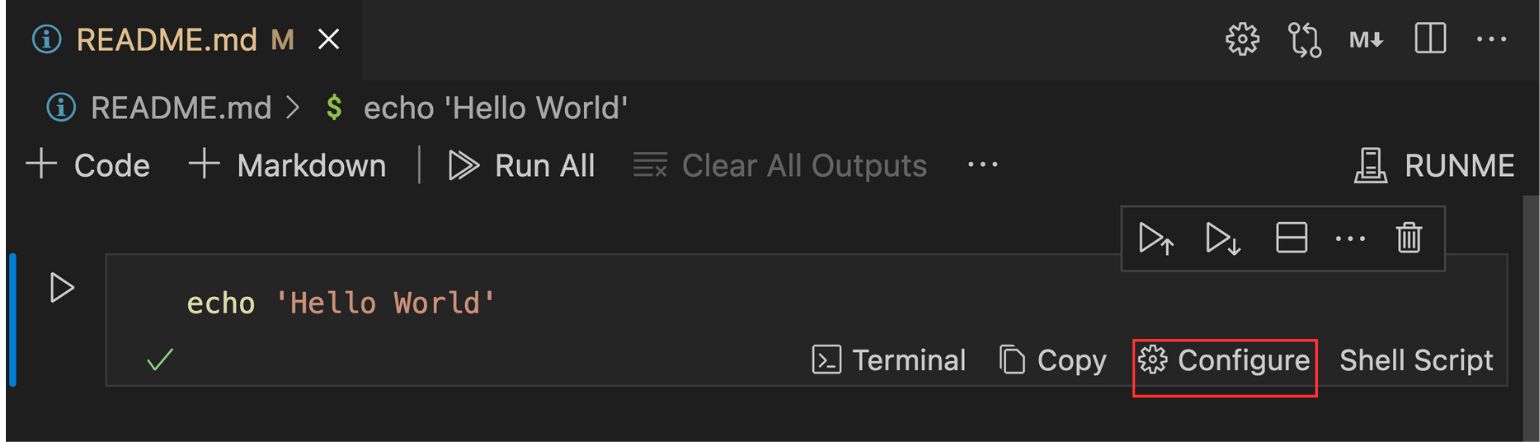
From here, we can easily disable interactive mode:
Our code block will now display its output exactly as below:
Frontmatter
Frontmatter is a common occurrence in Markdown documents. At the moment Runme won’t break your frontmatter, but we also haven’t yet implemented an interface for managing or editing it from within the notebook. Stay tuned!
Awesome Runme Configurations for VS Code
In the VS Code settings, several configurable settings influence general Runme behavior and enable experimental functionality. They include:
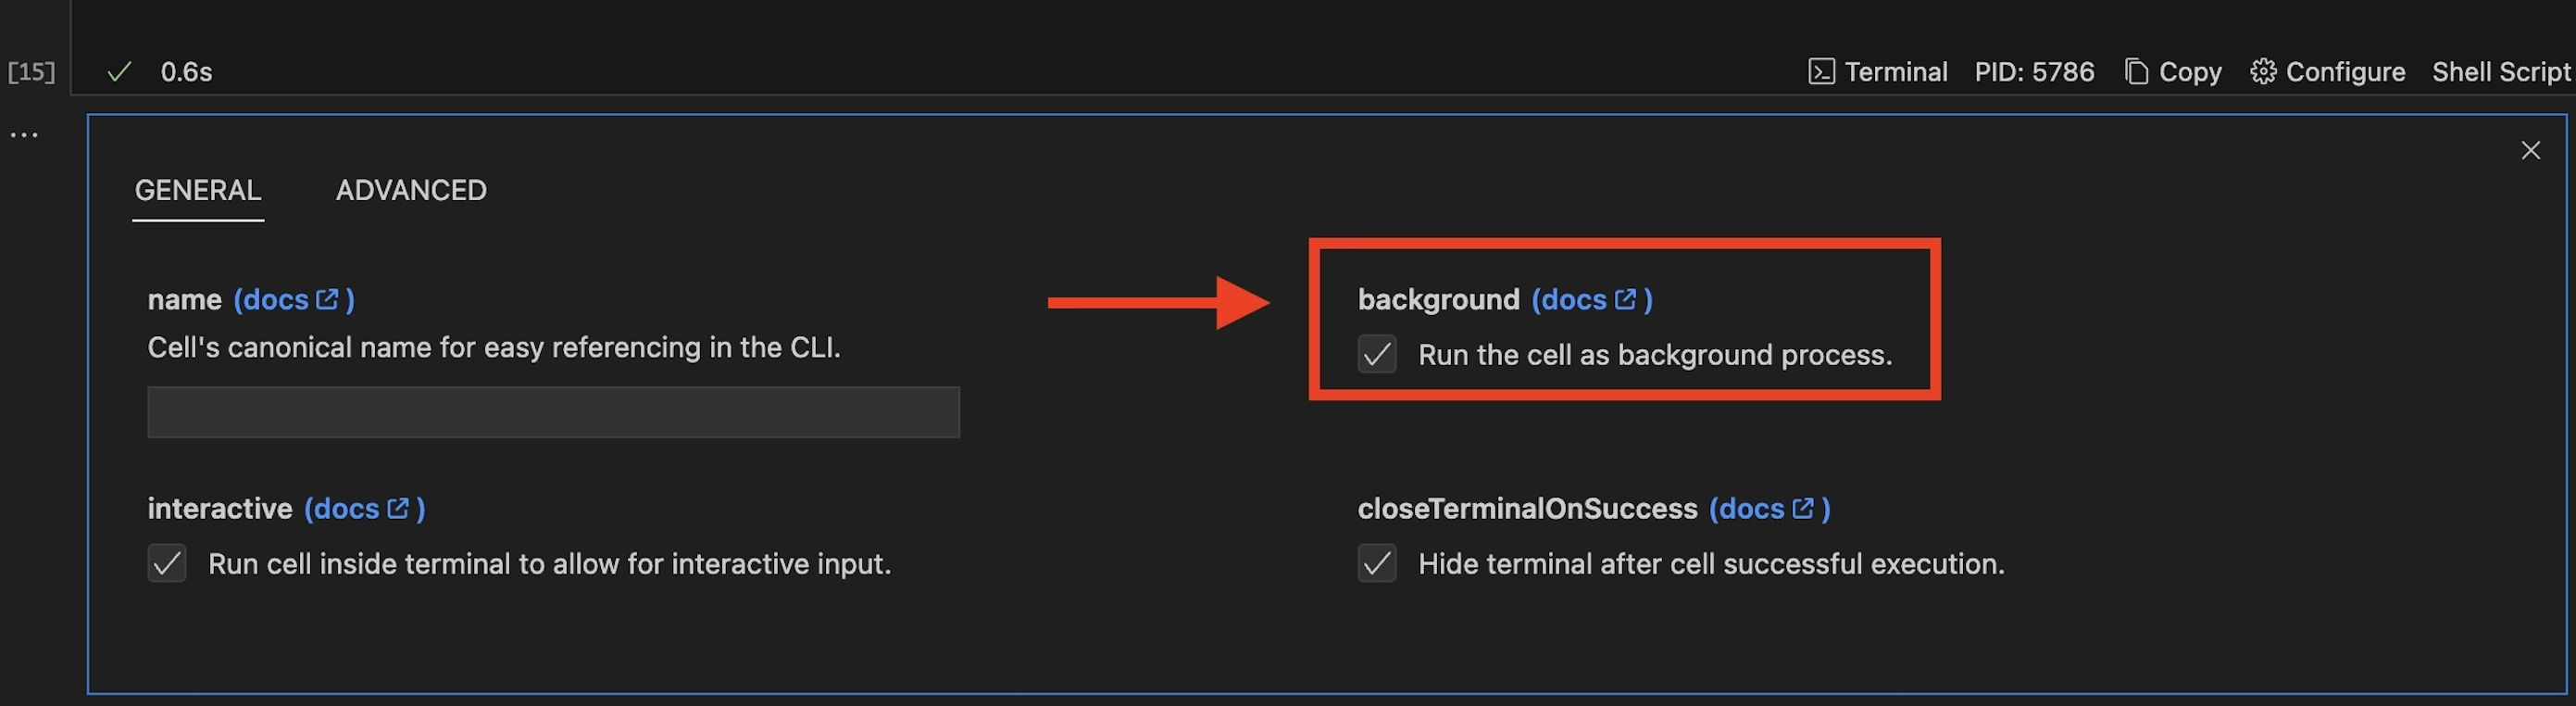
Background Processes
This handles scripts that you will love to run in the background.
Warning!
Background mode only works in tandem with Interactive mode!
Now, when you run the script, it will be part of a long-running terminal session:
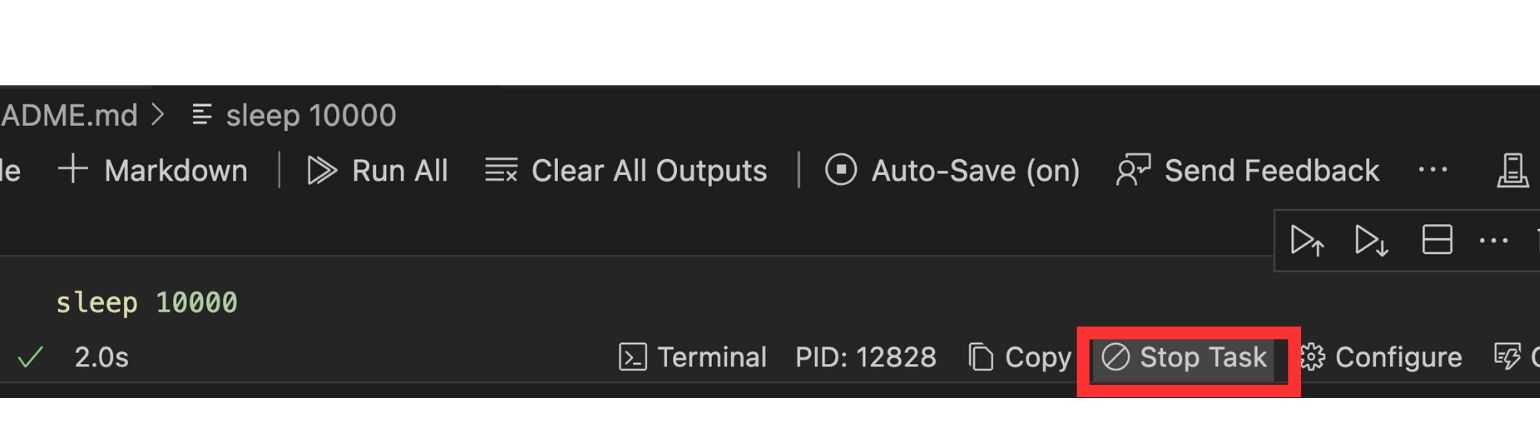
As is demonstrated by the previous video, background tasks are delineated by the "Background Task" label:

Background Task also has a Stop Task button to end their execution long after starting:
Markdown Script Metadata
Configuration fields like background and interactive are set using Markdown's script metadata feature:

Warning!
Be sure not to strip this data if you want to use it!
Feedback
At this point, we believe you now feel comfortable creating and using Runme on VS Code! We would appreciate your feedback. You can send us feedback directly from VS Code, simply click “Send Feedback” button on your Markdown file in your code editor.

Useful Tips & Tricks
Here are some useful tips and tricks to enable you to use Runme in your VS Code editor without hassle.
How to ensure Runme is working properly?
It’s easy. Open your project README file and see it is now opened as a Notebook file! Check that shell commands are now rendered as runnable blocks. That’s pretty nice. Finally, you’re seeing the future of running your README files now. We bet you won’t want to return to plain markdown viewers.
How to open a README file as a markdown file?
Sometimes, you will want to see the file as a regular Markdown file, and you don’t need to disable or uninstall Runme. You can right-click on the file and pick one of the options displayed when clicking Open with. You can select the built-in text editor or Markdown preview for such cases.
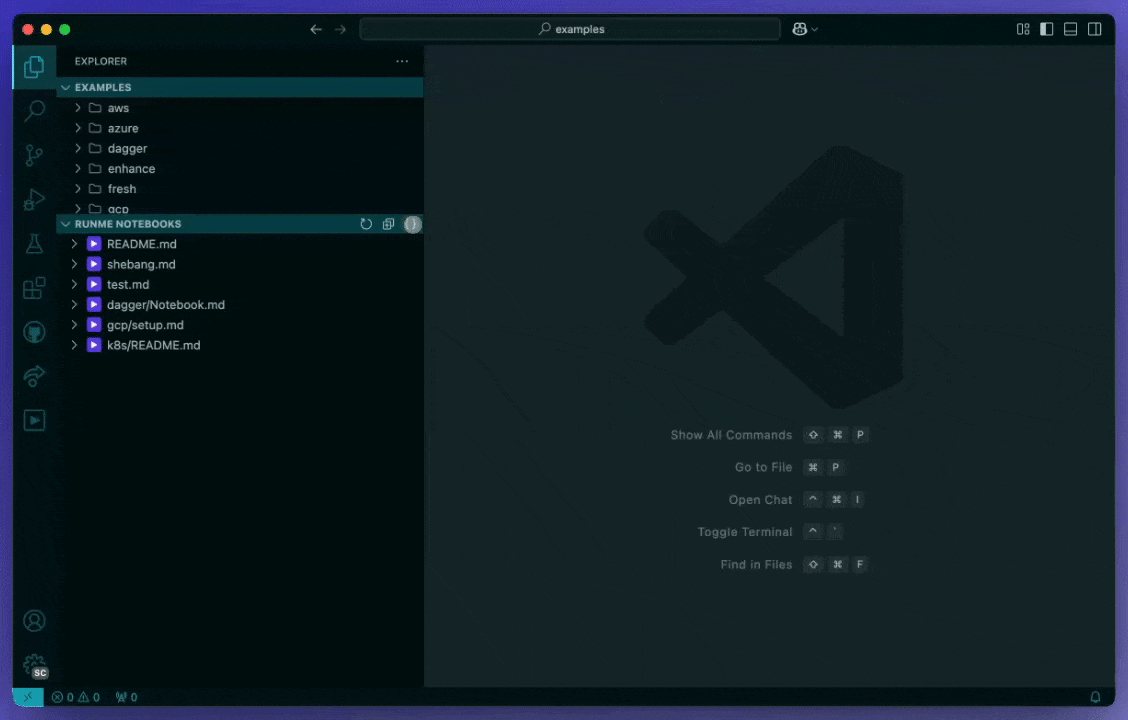
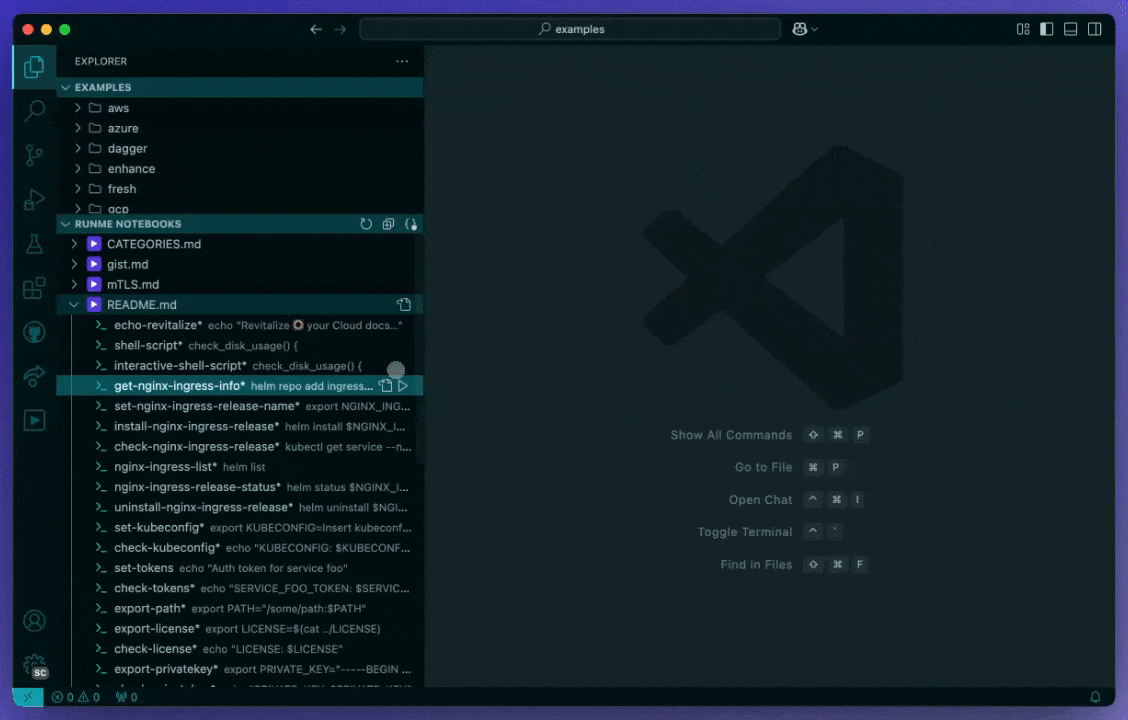
Notebook Explorer
To help you navigate the Markdown files in your project, Runme adds a super handy Runme Notebooks panel. It allows you to open and run cells quickly:
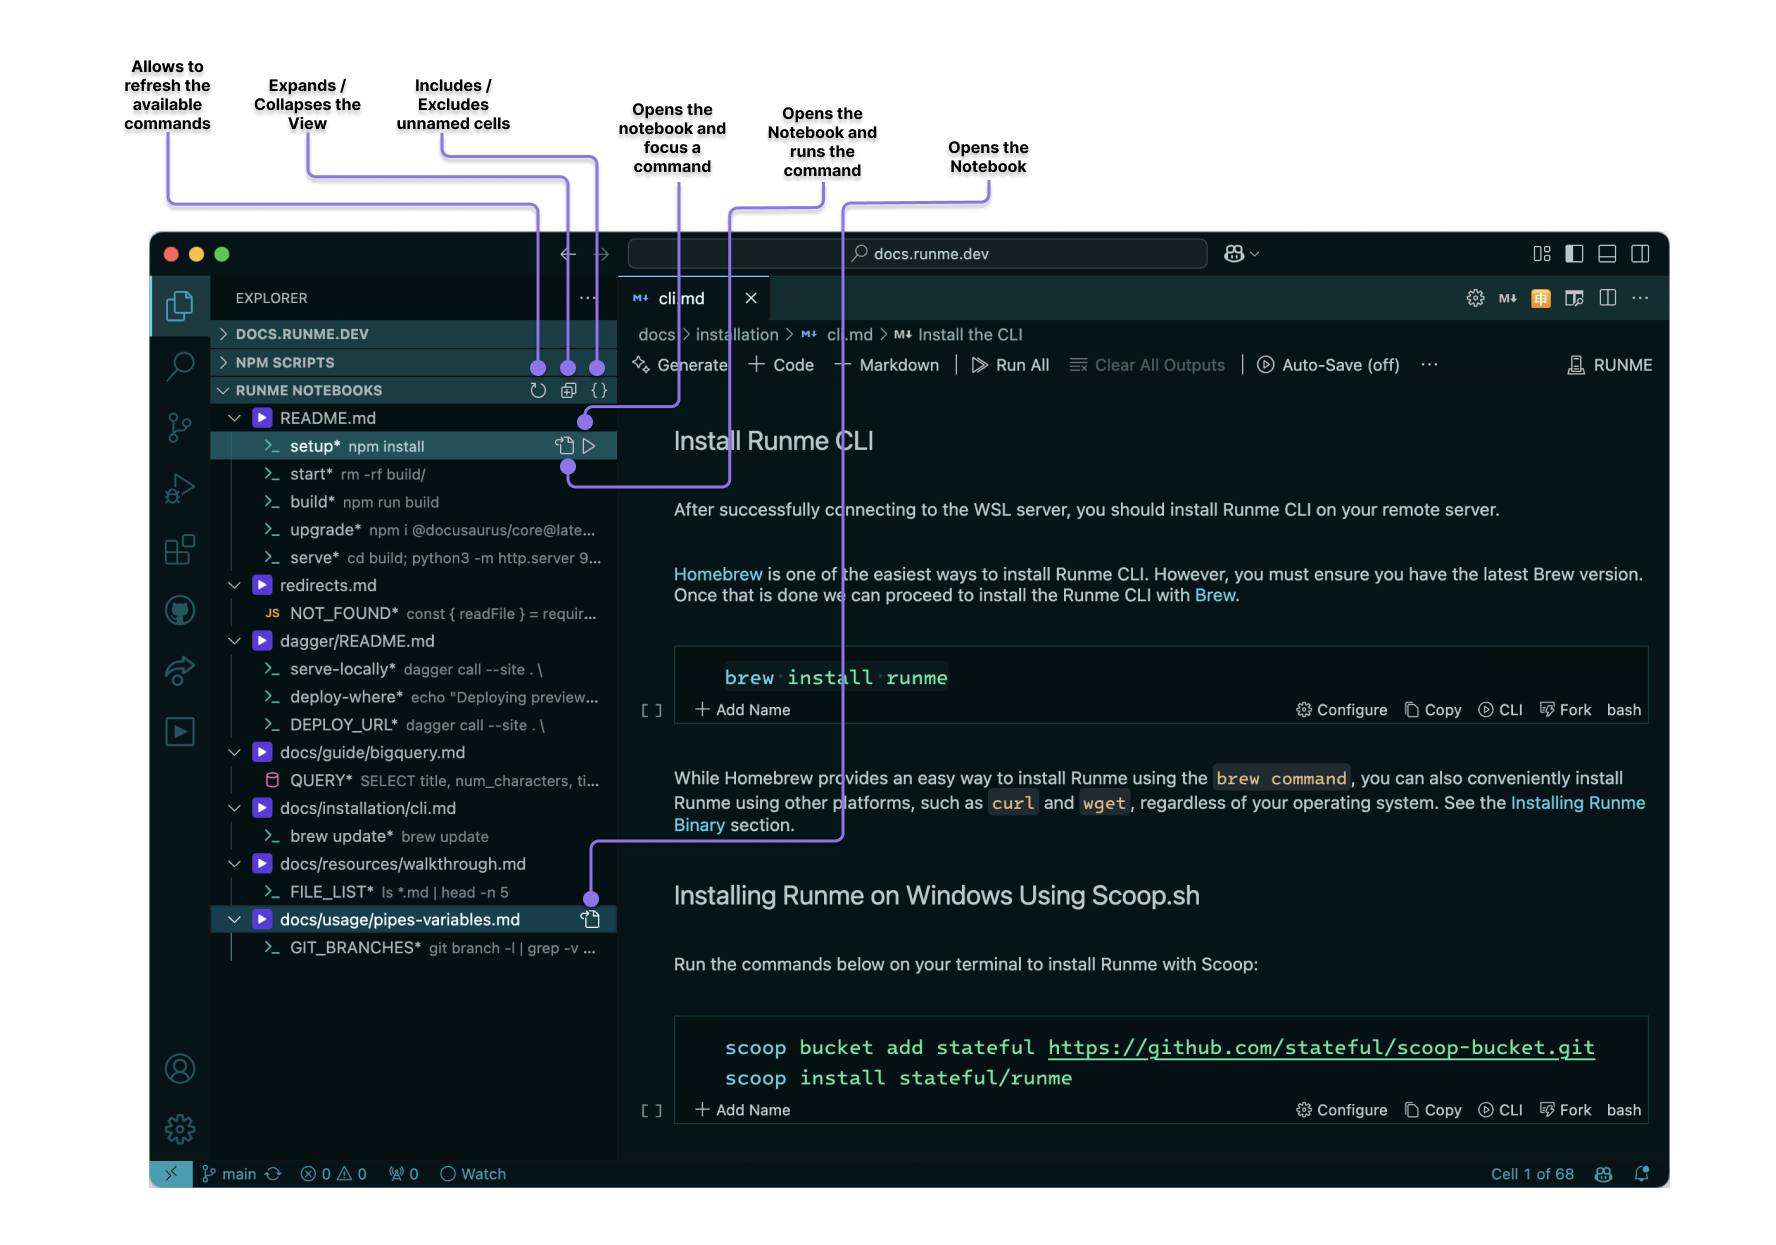
Include or Exclude unnamed cells
Open and Run cells
Next Steps
Congratulations!
We believe, at this point, you have gotten an advanced understanding of how Runme works on VS Code. Now, it’s time to begin using Runme in VS Code for all your automation and documentation processes.
We have provided an FAQ page, which we constantly update to address common questions you may have about Runme.
If you run into any issues kindly file a ticket or tell us about it on Discord. We are open to hearing your suggestions on how we can improve Runme.