Cell-level Options
Cell-level options allow you to configure the commands and their behvaior in your Markdown file by cell.
Some of the specific commands you may want to configure
- File-watchers for compilers & bundlers should run as background tasks.
- Executors for Interactive and Non-interactive programs & scripts.
- Human-centric output: JSON, text, images, etc.
- Terminal visibility when no errors occur.
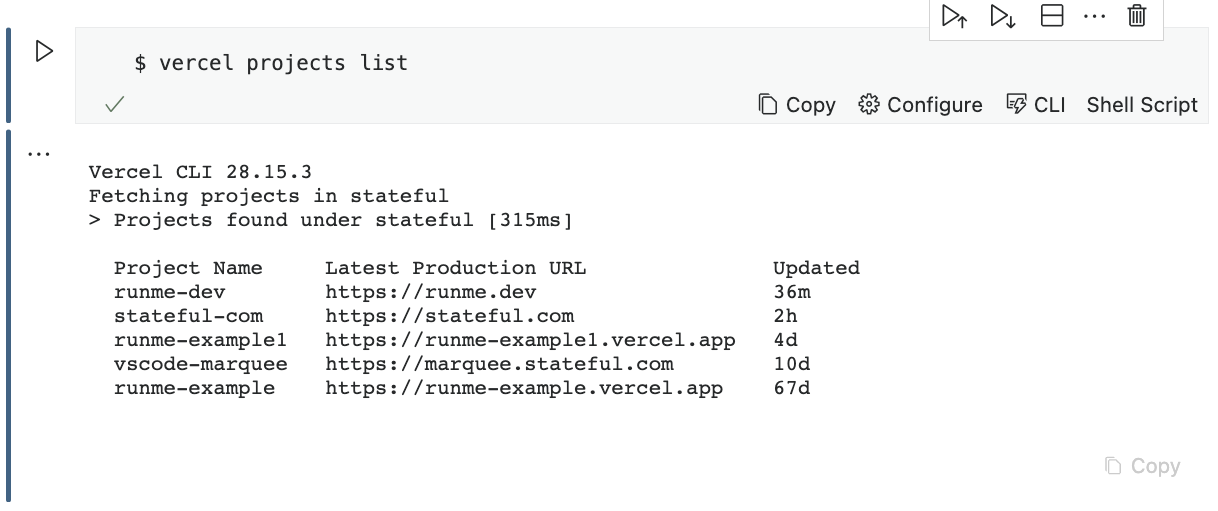
Run a cell
- Navigate to the specific cell you wish to run.
- Click the Run icon on the left side of the code block.
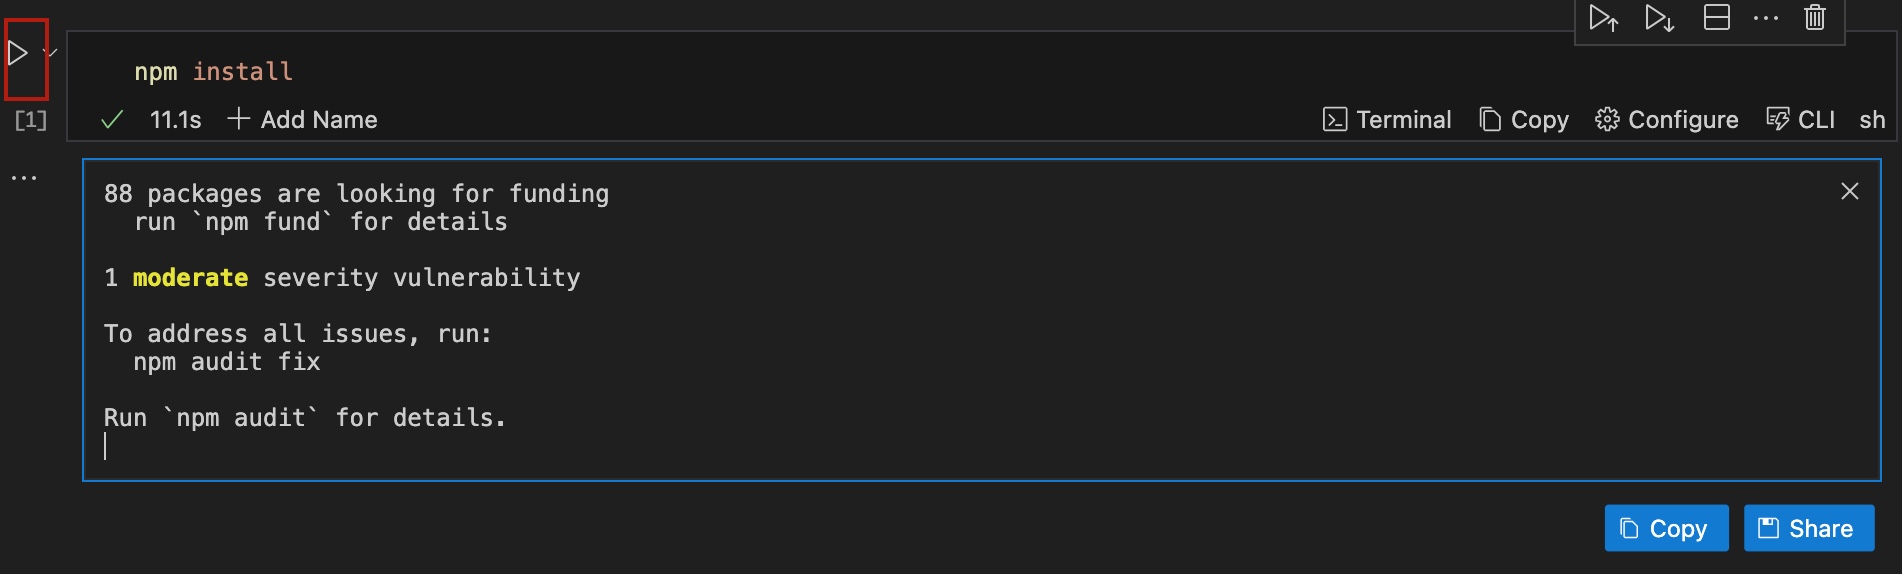
This action will run your command and return an executed output, you can configure how your cell should run using the configuration options.
Cell configuration keys
Cell level options gives users the flexibility to modify the behavior of each executable cell.
| Configuration | Description | Default value |
|---|---|---|
| background | Indicates if the cell should be runned as a background process | false |
| closeTerminalOnSuccess | Hide Terminal after cell successful execution | true |
| tag / category | Execute code cells matching a tag or category (deprecated) | [empty] |
| cwd | Modify current working directory for cell execution | [empty] |
| excludeFromRunAll | Prevent executing this cell during the "Run All" operation | false |
| interactive | Indicates if run should allow interactive input | false |
| interpreter | The program or command line inserted into shebang (aka #!) line | [inferred from languageId] |
| mimeType | If set skips auto-detection and uses specific media (MIME) type | [empty] |
| name | Cell’s canonical name useful for referencing the cell via CLI | [auto-generated] |
| ignore | Ingore code block from CLI and notebook transformation into a runnable cell | false |
| transform | Transform code block into a runnable cell (notebook) and include as task in CLI (inverse of ignore; most relevant for mermaid) | true |
| terminalRows | Number of rows to display in the notebook terminal | [auto-set] |
| promptEnv | Prompt user to set exported environment vars | auto |
| skipPrompts | Bypasses interactive prompts that require inputting environment vars or authentication confirmations. | false |
SkipPrompts
This feature can be used to prevent prompting when exporting an environment variable. By configuring the cell options appropriately, you can streamline your workflow and make your environment setup more efficient.
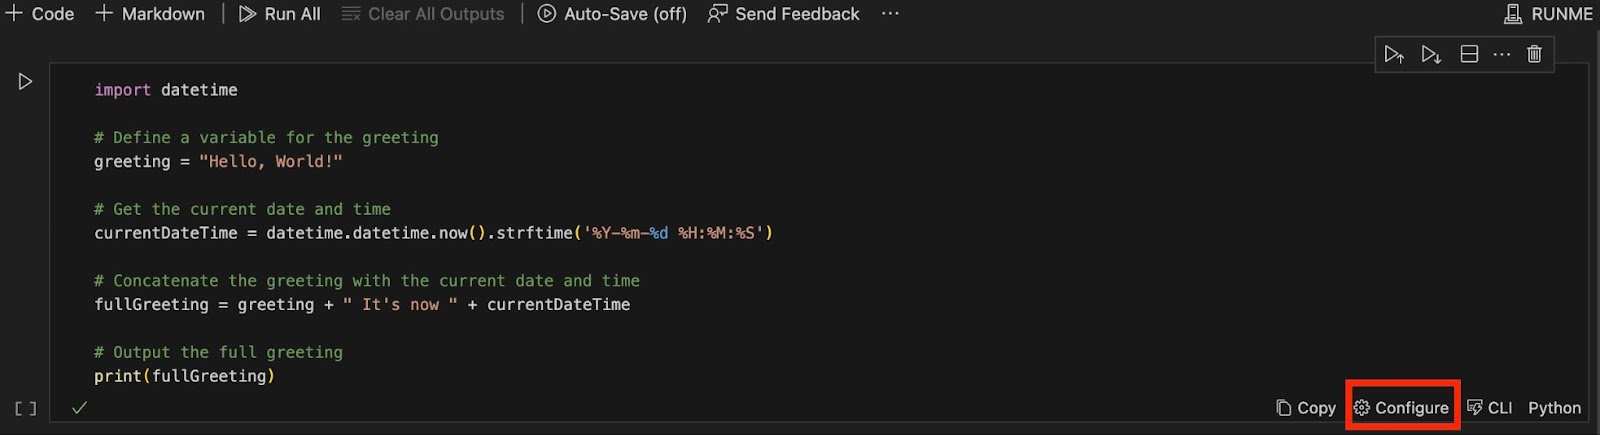
Configuration UX
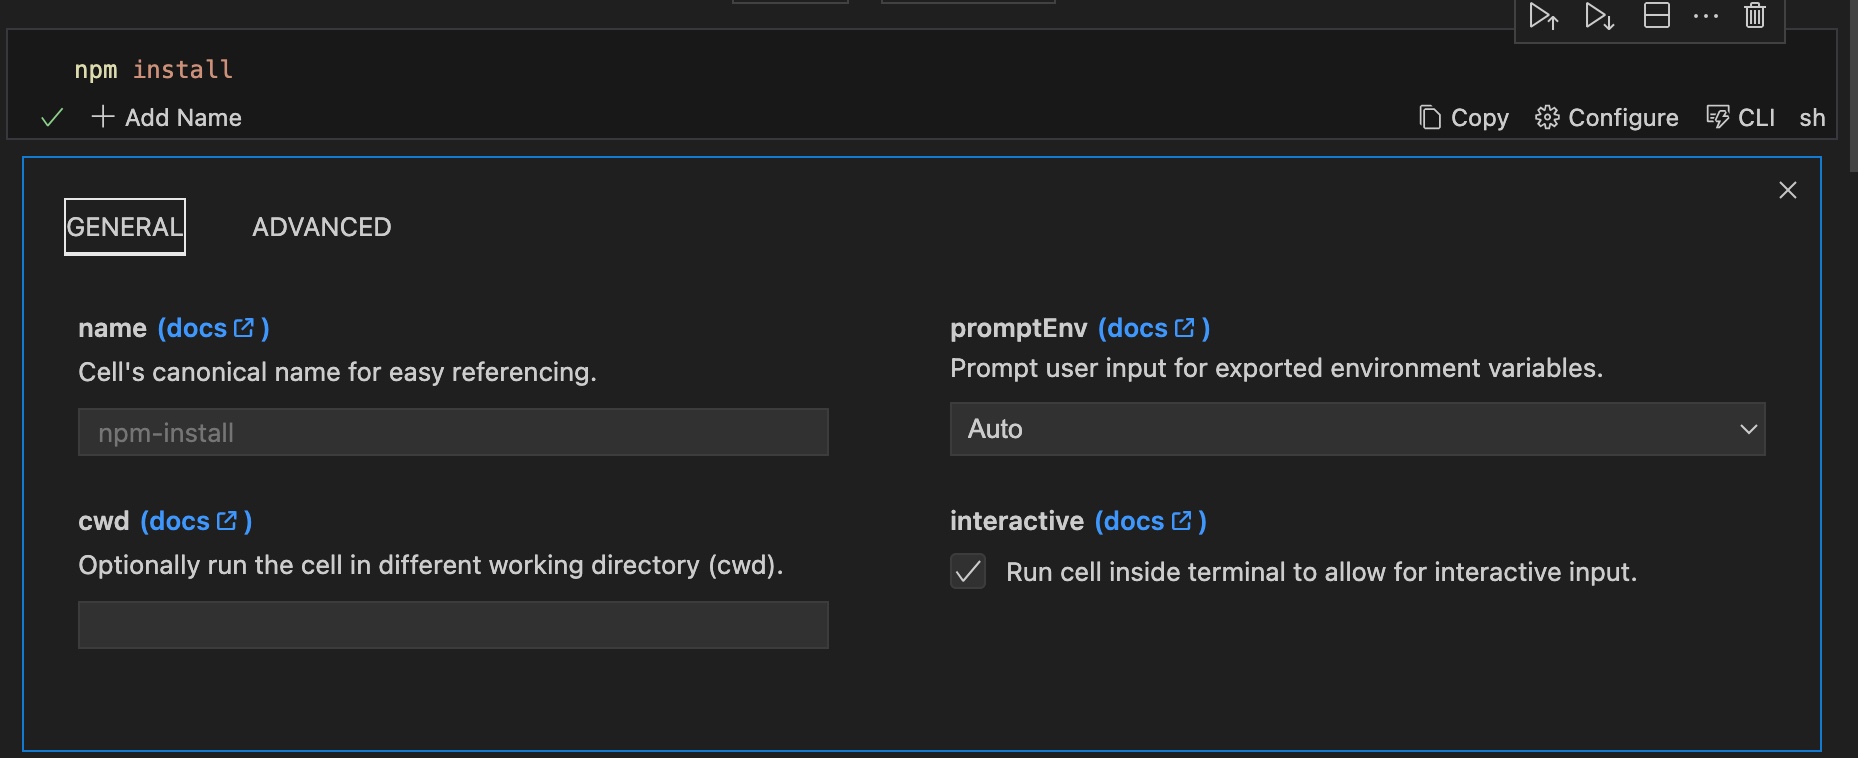
To modify the cell execution behavior of any cell you choose, click Configure on the respective cell.

A new view will open, allowing you to select “general” or “advanced” cell configuration.
Configure using Markdown
If you feel more comfortable editing the Markdown file directly, you can do it using the following configuration options schema:
Consider this example:
```sh {"id":"01HPM33PJFH2Q9R5S123X0HCSC","interactive":"false"}
echo "hello world"
```
The above example uses the echo command to display the text hello world on the terminal. The context {"interactive":"false","name":"echo-hello-world"} indicates that the command is intended for non-interactive execution and has been labeled accordingly.
Another example (HTML-attributes notation):
```sh { interactive=true name=example mimeType=text/plain closeTerminalOnSuccess=false background=false }
echo hello world
To edit the Markdown syntax of your cell in Runme, click on the button indicated in the image below

Your VS Code view will split into two. One side has Notebook view, and the other has the raw Markdown view. On the Markdown view, locate the cell you want to configure and make the necessary configuration edit.
Sidenote
Take a look at more examples available inside the VS Code extension repo for a reference on how to apply these code block attributes in different use cases!
Running code in Notebook cells
Runme has a Shebang feature which allows users to specify each cell's programming language inside the Markdown file.
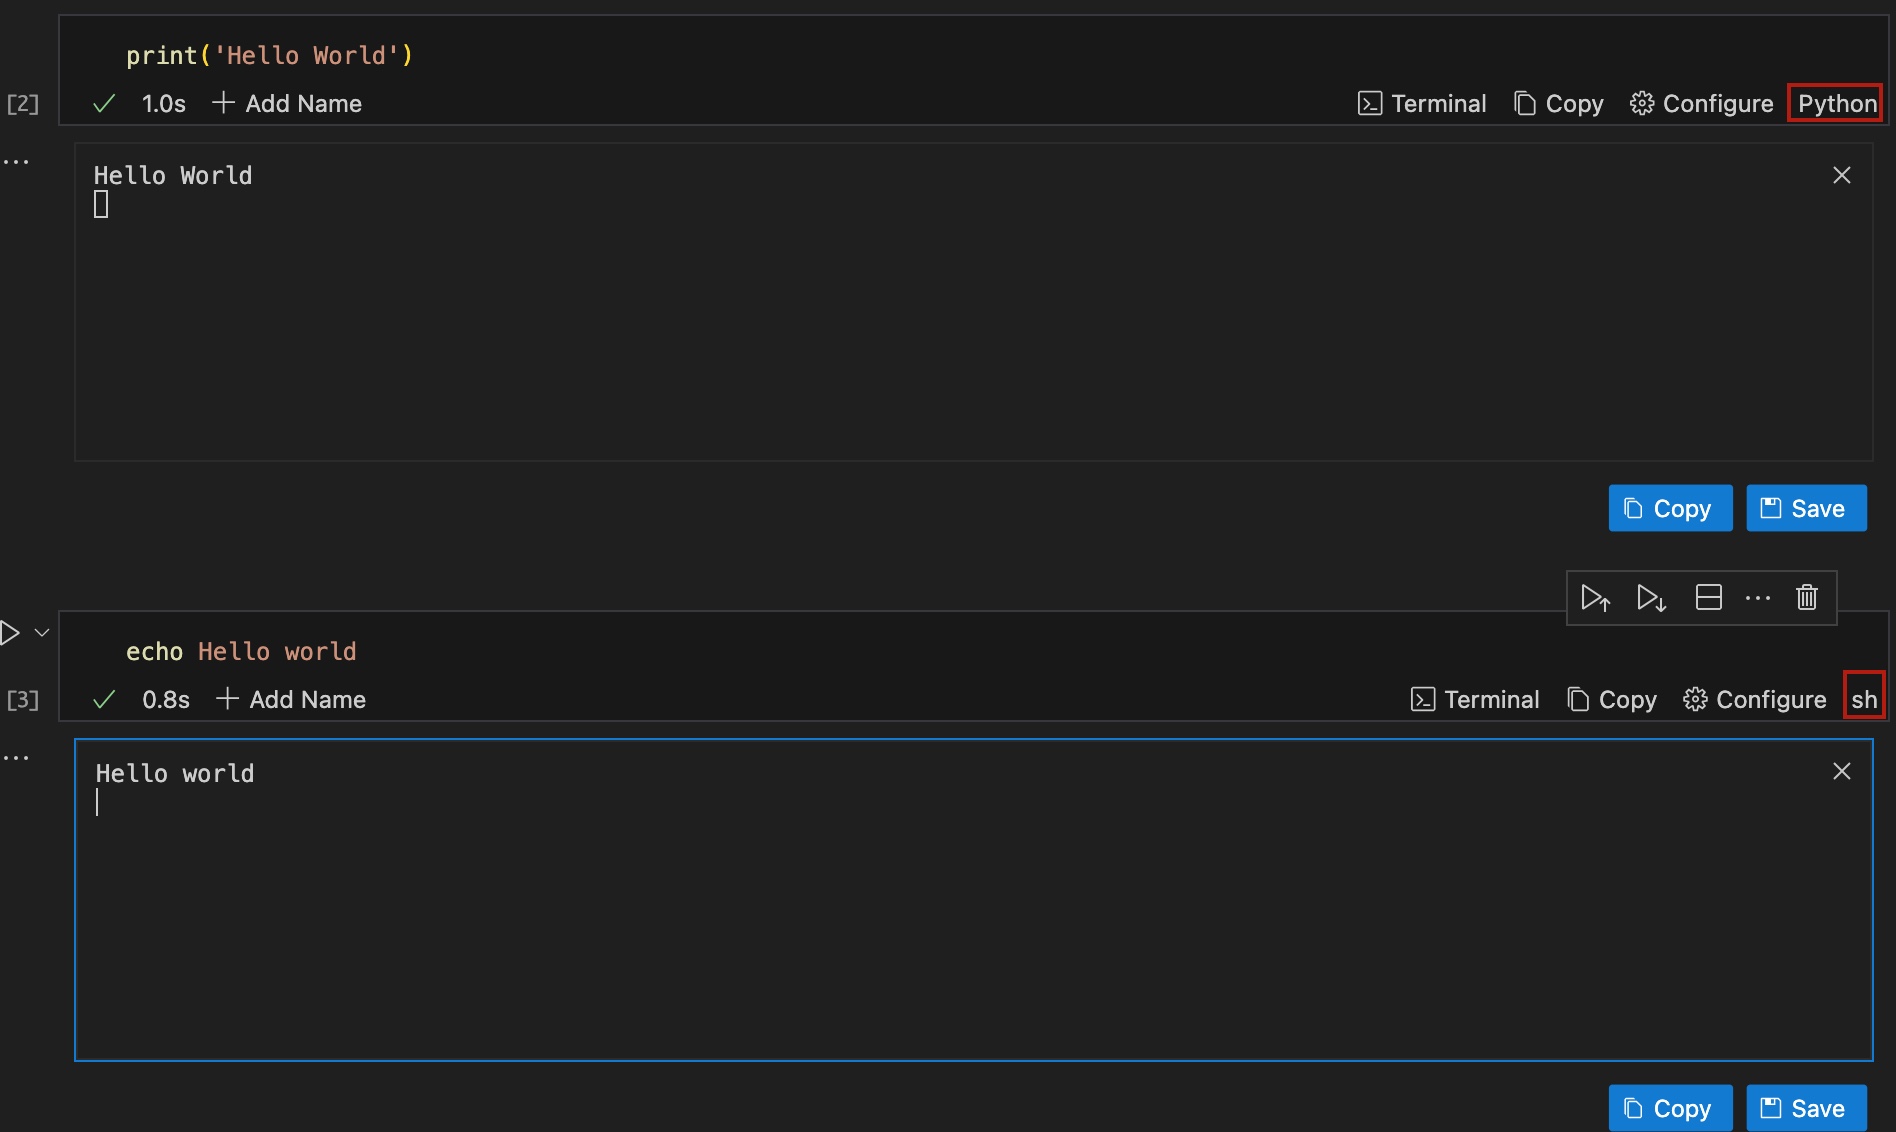
The image above shows that our first code block is in Python, and the next is bash.
If possible, always specify the language according to Markdown standards as illustrated below:
  ```sh {"id":"01HPMBVRXTRHSD52YVAX4K648P"}
echo "language identifier in fenced code block"
Warning!
Out of the box, Runme will leverage the Guesslang ML/AI model with a bias towards Shell to detect the languages for unidentified code blocks.
While this works well in a lot of cases, the accuracy is not perfect.
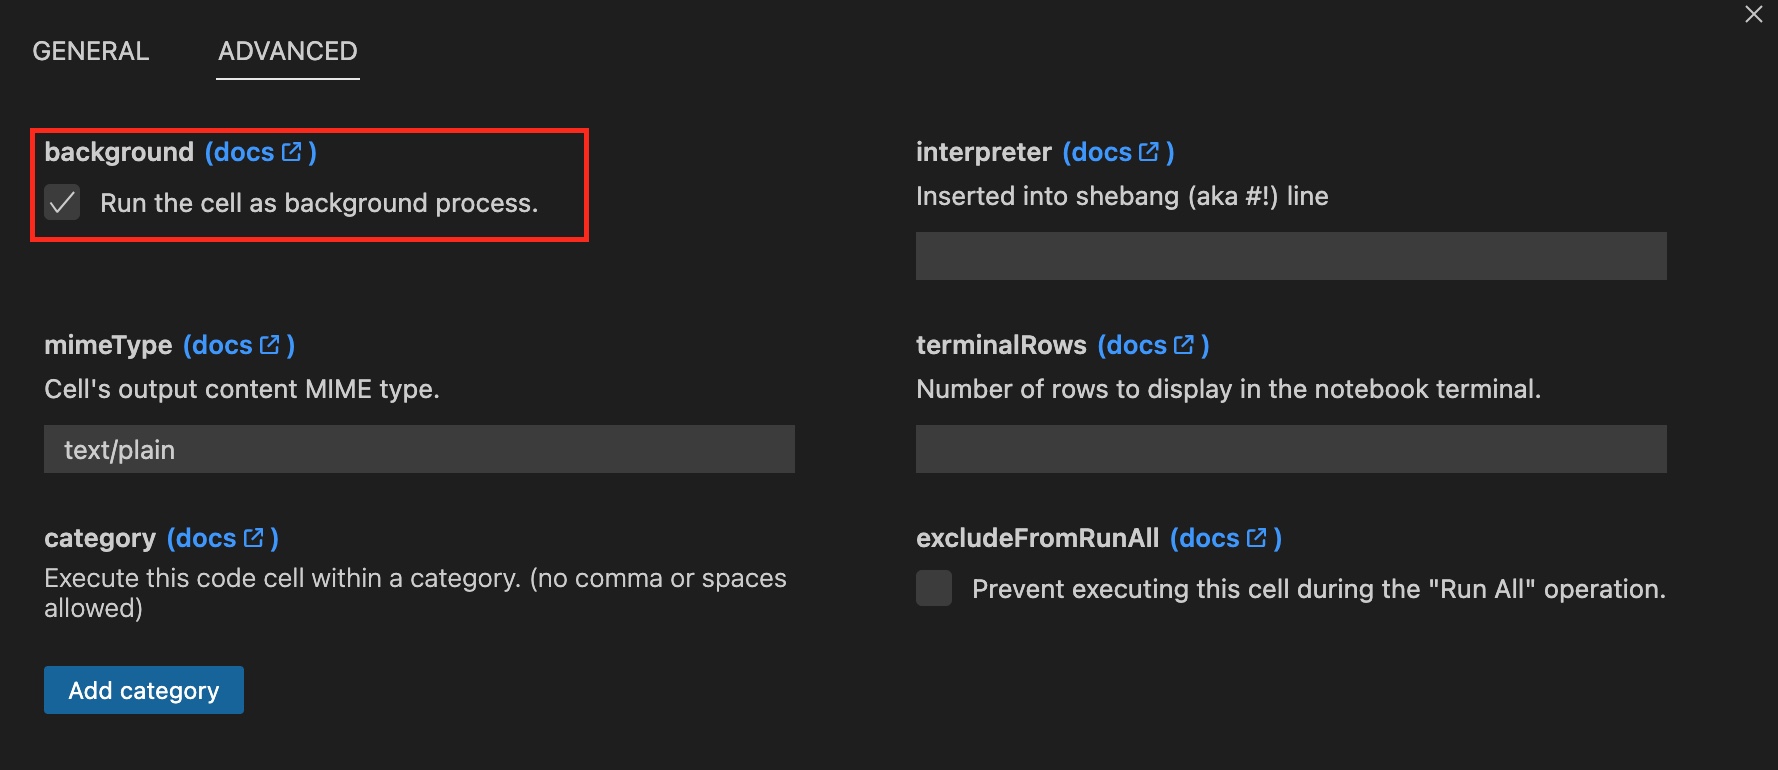
Long-running processes
It is common to use file-watcher-enabled compilers/bundlers (e.g., npm start dev, watchexec, etc.) in the background during development.
For any cell containing an instance of these commands, tick the background cell setting. This will prevent execution from permanently blocking the Notebook UX.
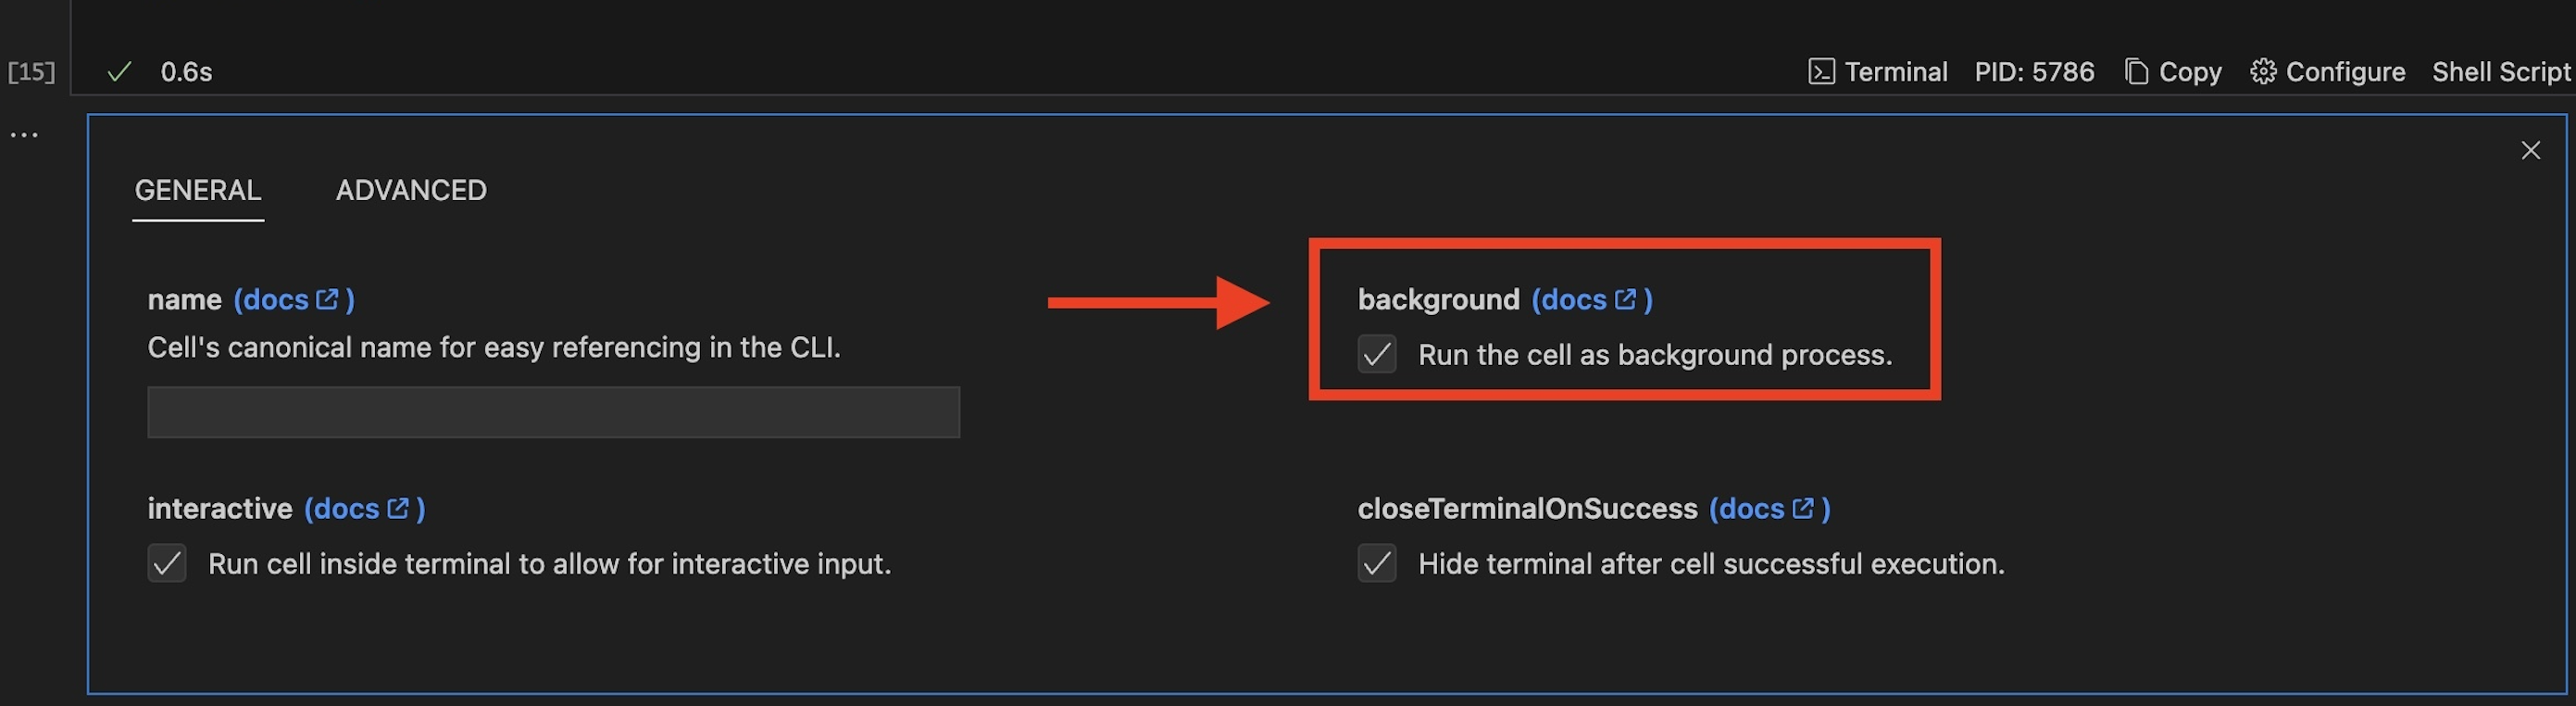
Once ticked notice the "Background Task" label shows up in the cell status bar!
Default: false
Example
```sh {"background":"true","id":"01HPMBT8BF57MJ36JYDKAMZG1K"}
npm run watch

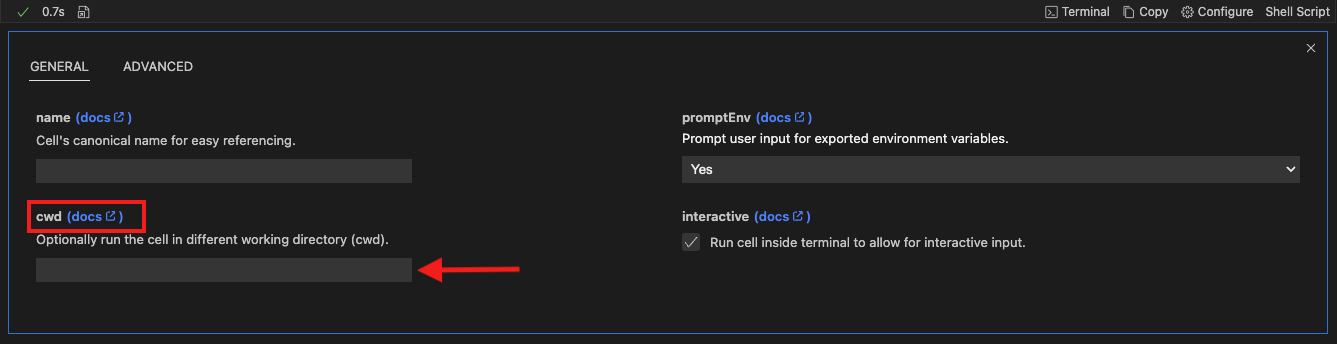
Cell CWD (current working directory)
In most cases, you should set the current working directory at the document level; however, you can also set it per cell.
Click on configure to change the current work directory cwd:
```sh { cwd=.. "id":"01HP475WXX5PVV658023KQJFRE"}
npm run watch #relative path
```sh {"cwd":"/tmp","id":"01HPQ8F2307NFJR3WV1EJRJ0B8"}
echo "absolute path" > dummy_file
Warning!
Please note that if both cwd is set for doc-level and cell, they don't overwrite. They combine. For example, cwd: /tmp/dummy (doc) and cwd: .. (cell) will result in /tmp.
Interactive vs non-interactive cells
If a cell's commands do not require any input from the user it might be a good fit to include the cell's output inside the Notebook. This is useful if the resulting output could be useful as input in a downstream cell. This is what interactive=false is for, and it defaults to true.
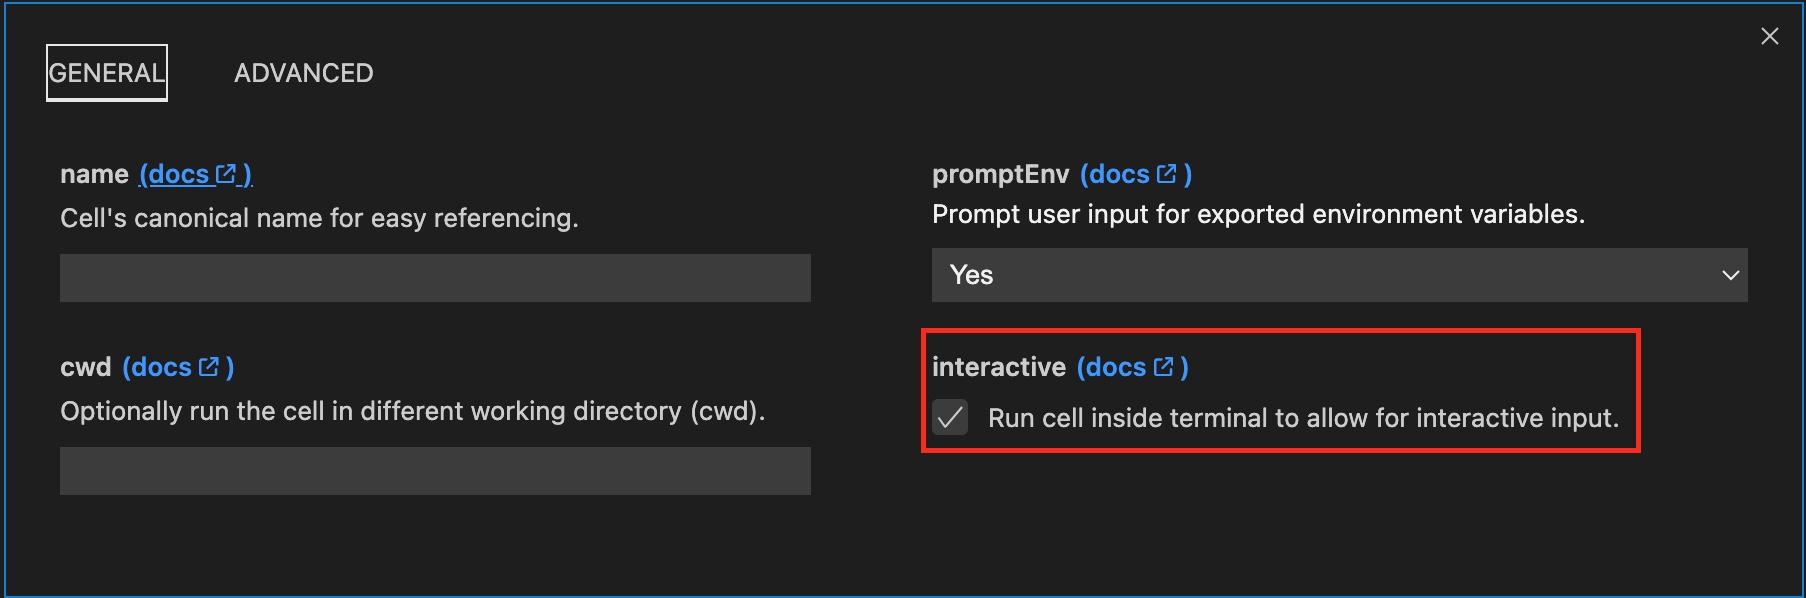
Default: true
Example
openssl rand -base64 32
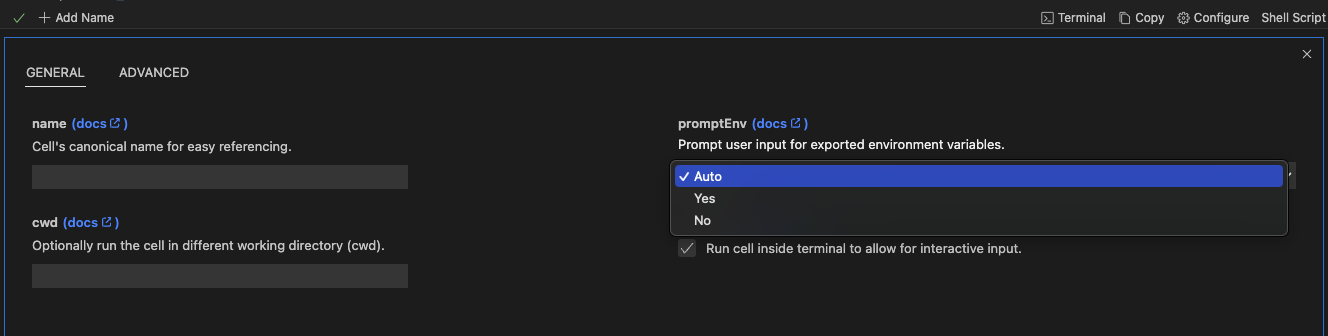
Environment variables
If a cell has exported variables, the user will be prompted to set these variables. This can be useful to have a parameterized cell while not needing to manually modify the cell. Following modes are available:
| Mode | Description |
|---|---|
| auto [default] | Prompt when environment variable has no value (e.g. loaded from .env). |
| always / yes | Always prompt allow for environment variable. Use existing value as placeholder if present. |
| never / no | Never prompt for any environment variables. Evaluate expression and values as is or leave them empty. |
How to Set PromptEnv
- Click on
configure ⚙️in your code cell - Click
promptEnvto set the mode you want the cell to run in
Example
export SLEEP_SECS="0"
sleep $SLEEP_SECS

There are two prompt modes:
- Using a placeholder
- Prompting the user with a message
Here's the difference:
Using a Placeholder
Quotes or double-qoutes will prompt the use the confirm the placeholder value. This is convient when a valid default value is known ahead of time.
export PROJECT_ID="your-project-7f412a"
cli make-call --project-id $PROJECT_ID describe
Using a Prompt Message
When you don't know the default value, you can instead use a prompt message to ask the user for the value. The key difference here is that the message does not act as a value placeholder.
export PROJECT_ID=Enter a valid project ID
cli make-call --project-id $PROJECT_ID describe
Terminal visibility post-execution
A cell's execution terminal is auto-hidden unless it fails. This default behavior can be overwritten if keeping the terminal open is in the interest of the Runme notebook reader. Just untick closeTerminalOnSuccess (false).
Default: true
Example
  ```sh {"closeTerminalOnSuccess":"false","id":"01HPM7MC8MAJB2QCRVPVCN1FTT"}
docker ps | grep runme/demo:latest
Human-friendly output / mimeType configuration
Not all cells’ output is plain text. For example, you can have JSON, text, images, etc, all in your Markdown file.
You can configure to any of your choice in the cell configuration setting.
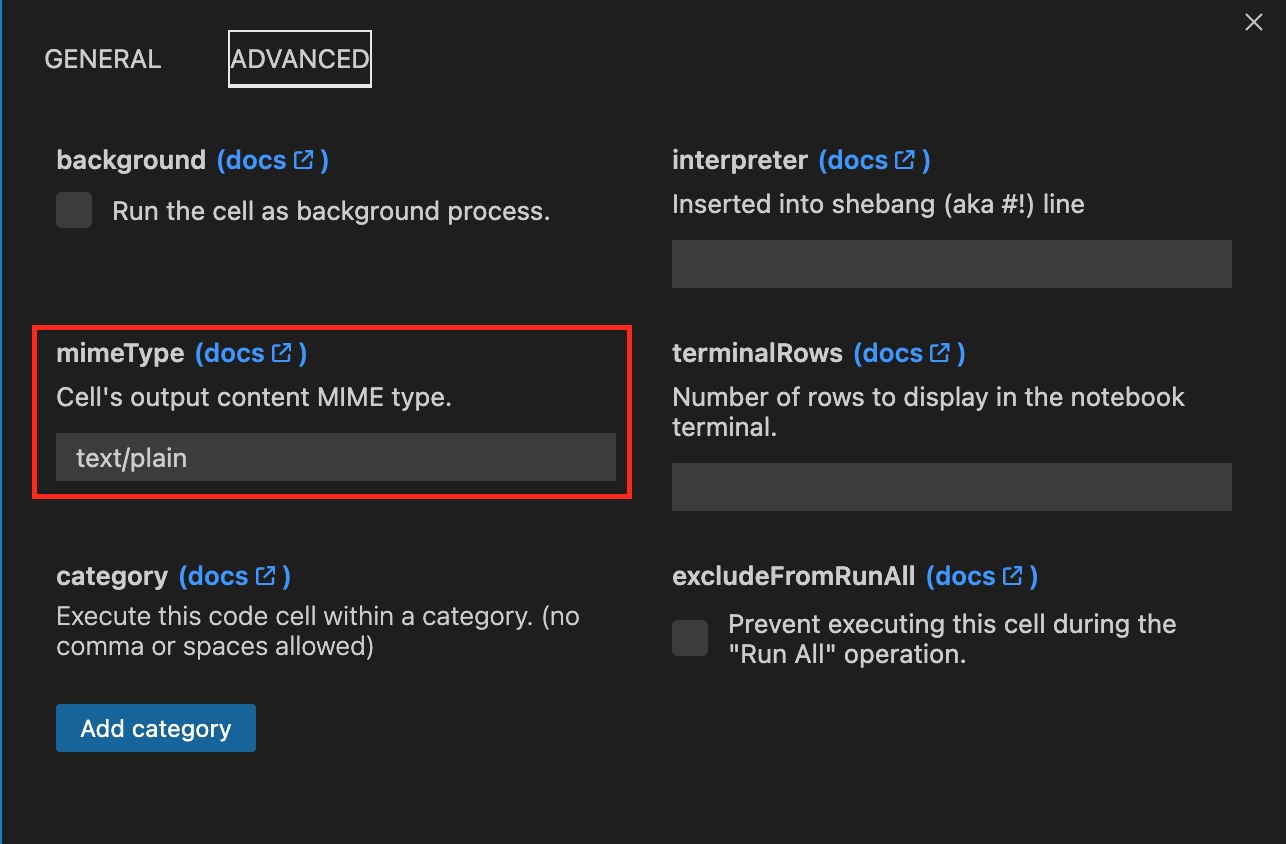
Using the optional mimeType specifier, you can specify the expected output type. Runme Notebooks have a variety of renderers that will display them as human-friendly. The MIME type defaults to text/plain.
When the interactive setting is turned off, and the mimeType value is empty, Runme attempt to auto-detect the MIME Type. This is useful for automatically displaying a cell's output according to the renderers available in your VS Code installation. If you specify a specific MIME Type, it will be used instead of auto-detection.
Runme has a mimeType feature that enables you to render images, CSV-based tables, and other supported content type right inside your Markdown file. Runme supports a wide range of Media types such as text/x-json, text/x-javascript, text/x-html, image/png, image/svg+xml and text/csv.
See in the reference page for the list of supported MIME types!
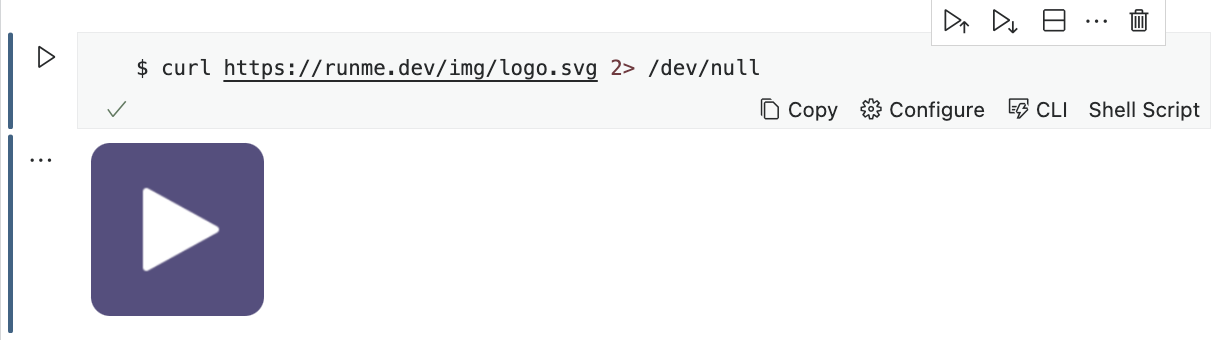
Background Task
If you cannot wait for your code or command to finish execution and you want to run something else simultaneously, the background mode in Runme is the way to go.
Runme has a background mode that enables you to run tasks in the background. To do this, you have to activate the background mode.
Terminal Row
The number of rows an output should be rendered is defined by a setting known as Terminal row. Set the number of rows with which your output should be displayed under a cell, 10 rows is the default.
How To Set Up Terminal Row
The terminal row is a Runme VS Code feature. Therefore, you can set up using your code editor. If you haven’t installed Runme on your VS Code yet, see our installation guide to install Runme in your VS Code editor.
To set up the terminal row on your code editor, follow the steps below:
- In your
.mdfile, click on the “Configure” button at the bottom left of the file.
We have provided a list of configuration settings to upgrade your experience using the Runme extension. You can configure how your Markdown is executed on your code editor using these settings.
- Navigate to “Advanced” >
terminalrow.
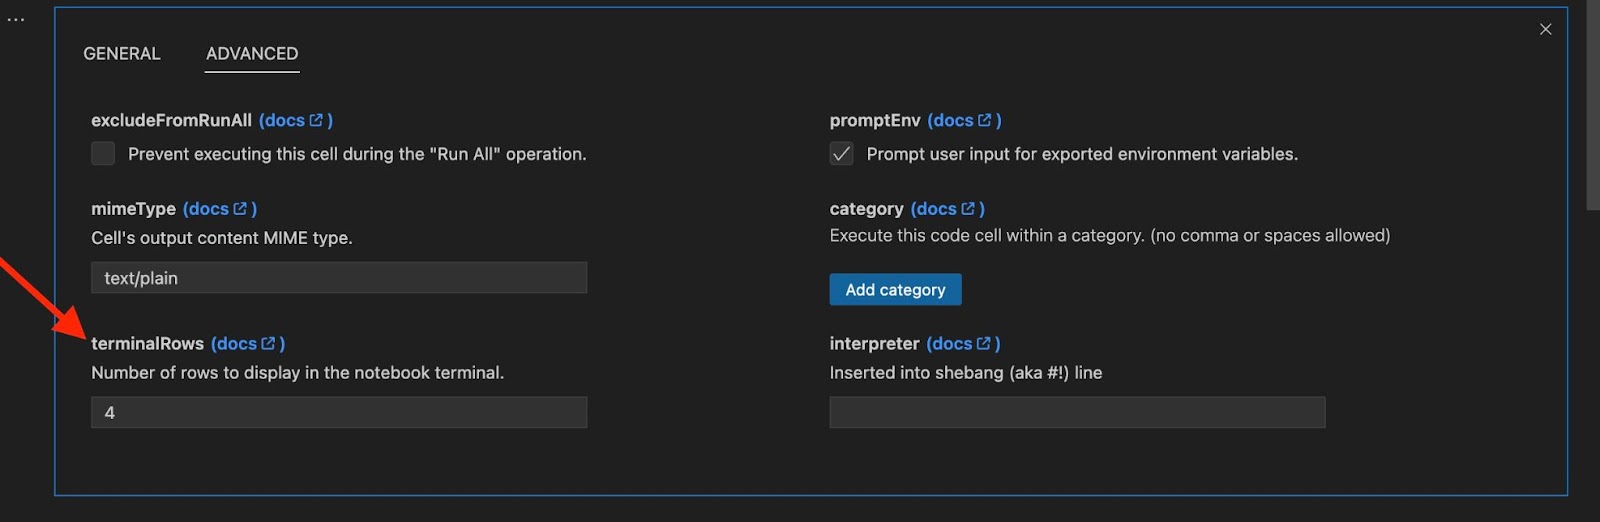
- Lastly, set the number of rows you wish your output to be rendered in.
Unnamed vs Named cells
On Runme cells are unnamed by default. However, you can name a cell directly in your notebook. This will enable you to easily identify the cell using the provided cell name. On the cell you wish to name, simply click on the “Add Name” button on the cell.

You will be directed to enter a preferred name for the cell.
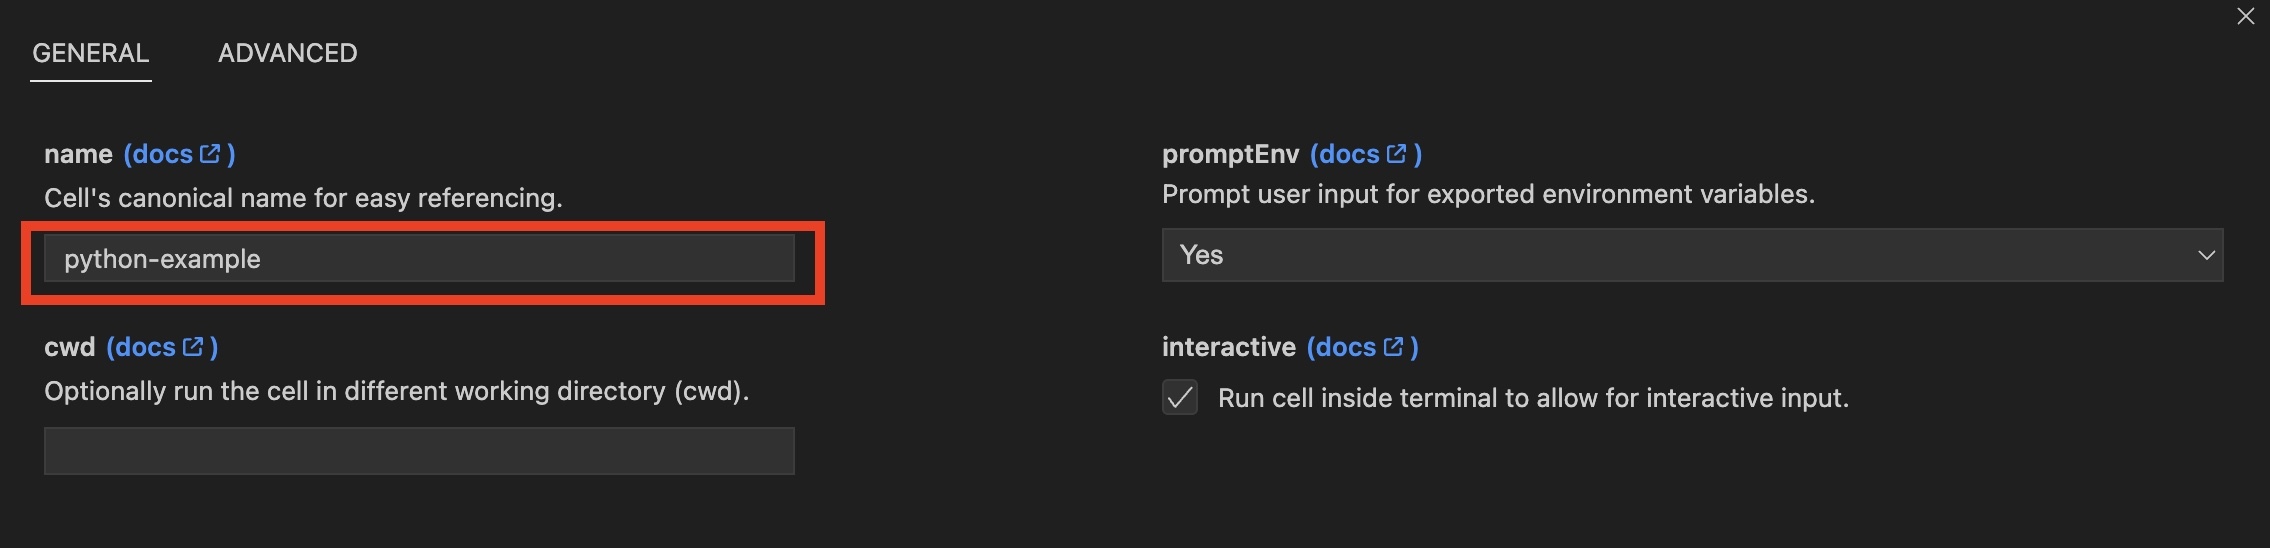
Where a cell is not named, a generated name is provided for each cell. We recommend you DO NOT name a cell when using the CLI mode, you can use the VS Code extension to name the file in the configuration settings.
These examples showcase improved ways you can use Runme in your documentation to enhance your workflow and overall documentation process.
If you feel more comfortable editing the Markdown file directly, you can do it by using the following configuration options schema:
```sh {"id":"01HPM33PJFH2Q9R5S123X0HCSC","interactive":"false"}
echo "hello world"
```
The above example uses the echo command to display the text "hello world" on the terminal. The context {"interactive":"false","name":"echo-hello-world"} indicates that the command is intended for non-interactive execution and has been labeled accordingly.
Try out the previous command

```sh {"id":"01HPMBXN8PNCMJ87Y1BGQ1NKN3"}
echo hello world
The entire configuration schema: as an example
```sh {"background":"false","closeTerminalOnSuccess":"false","id":"01HPM33PJFH2Q9R5SNAQX0HCSC","interactive":"true","name":"example"}
echo "hello world"
Sidenote
Take a look at more examples available inside the VS Code extension repo for a reference on how to apply these code block attributes in different use cases!
Exclude Cell from Run All
Every VS Code notebook allows users to run all available cells. This can be useful if you define a complete runbook in your Markdown file, allowing developers to click the Run All button to get set up and running.
However, sometimes certain cells should be excluded from this workflow. You can configure this behavior by clicking the excludeFromRunAll option.
Default: false
Example
 ```sh {"excludeFromRunAll":"true","id":"01HPM7NRQYMD5T06M4KS6S2DWG"}
 # Do something optional here
Environment Variable Prompts
Runme simplifies the use of environment variables in your notebooks by allowing dynamic settings within each cell block of your notebook. It provides interactive prompts in each cell, tailored to your users' needs. This ensures a smooth and user-friendly experience when incorporating real-time user interaction.
How to Enable PromptEnv
- Click on
configure ⚙️in your code cell - Click
promptEnvto set the condition you want the cell to run in
For instance, in the image below, we configure the SLEEP_SECS environment variable to 10 seconds with a single click on the run cell button. This feature is useful when your runbooks need user-specific values.

This feature allows users to input values directly within the notebook environment, making task execution more efficient. Improve your workflow with the increased flexibility provided by promptEnv feature.