Runme for Dagger
In this guide, we will explain step-by-step how to leverage both Dagger Shell and "Dagger Call" integrations into Runme and how it works.
Runme for Dagger Shell in Action
Getting Started
To proceed with this guide, it is crucial to install both Runme and Dagger first:
- Install Runme
Install the Runme extension in your VS Code editor. Runme also provides other client interfaces where you can run your Markdown file. Once installed, you can make Runme your default Markdown viewer.
- Install Docker (if not already installed)
Get Docker installed and running on your local machine. You can download Docker from the official website. After downloading Docker, you need to keep it running before executing any command.
- Install Dagger
Install Dagger on your local machine. The Dagger installation guide provides more information on how to install Dagger on any platform of your choice. if you have brew installed already run the command below to install dagger
brew install dagger/tap/dagger
Notebooks with Dagger Shell
Dagger shell is the latest interface for interacting with Dagger. If you're looking for dagger call, please see futher down in this guide. While it's up to personal preference, we recommend using Dagger Shell to express your Dagger pipelines. Its syntax is more concise and easier to read. For a complete introduction to Dagger shell, please visit the Dagger docs.
Of course, Runme can always bring up an instance of Dagger shell using the following command. This will drop you into a REPL prompt interface interface.
$ dagger shell
Your first Dagger Shell notebook
While a shell session is great during interactive development, Runme notebooks excel at expressing Dagger pipelines in a self-documenting manner. This is useful to document tasks, workflows, onboarding instructions, or the beaten path of your Dagger pipelines.
There are two ways to get started with the native integration with Dagger shell:
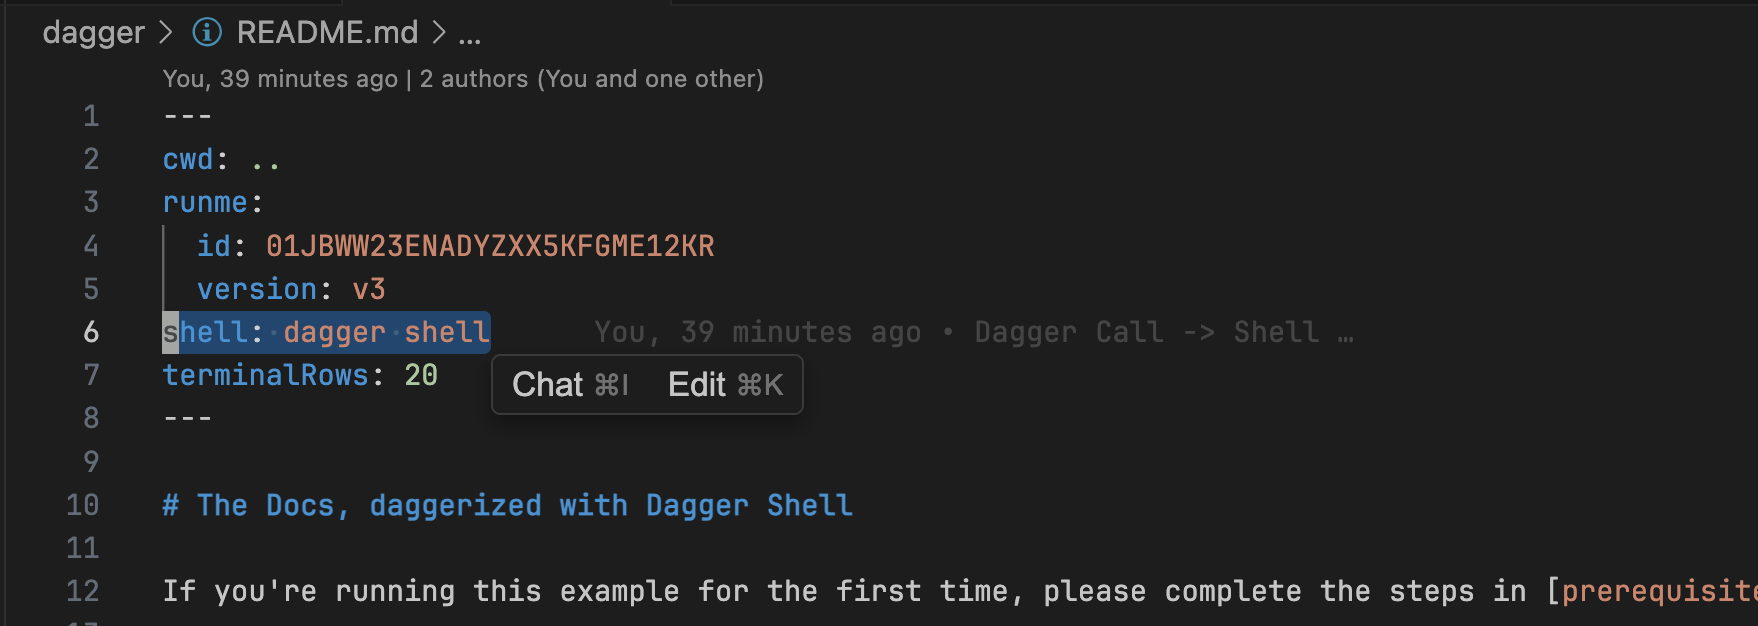
- Add
dagger shellas interpreter in your cell configuration or globally in the notebook document's frontmatter. - Or, create a new
my-notebook.dagnotebook file (in the Runme Extension) in your project which will auto-set the document's frontmatter to usedagger shellas the interpreter.
💡 Note that the
.dagis interchangeable with.mdand both will render to Markdown. The.dagextension is simply a signal to the Runme extension to bootstrap the document with the Dagger shell interpreter.
Running Dagger Shell-native in Notebook Cells
Here's a quick rundown how to run a Dagger Module via the Dagger Shell inside a cell. For a end-to-end example, please see README.md.
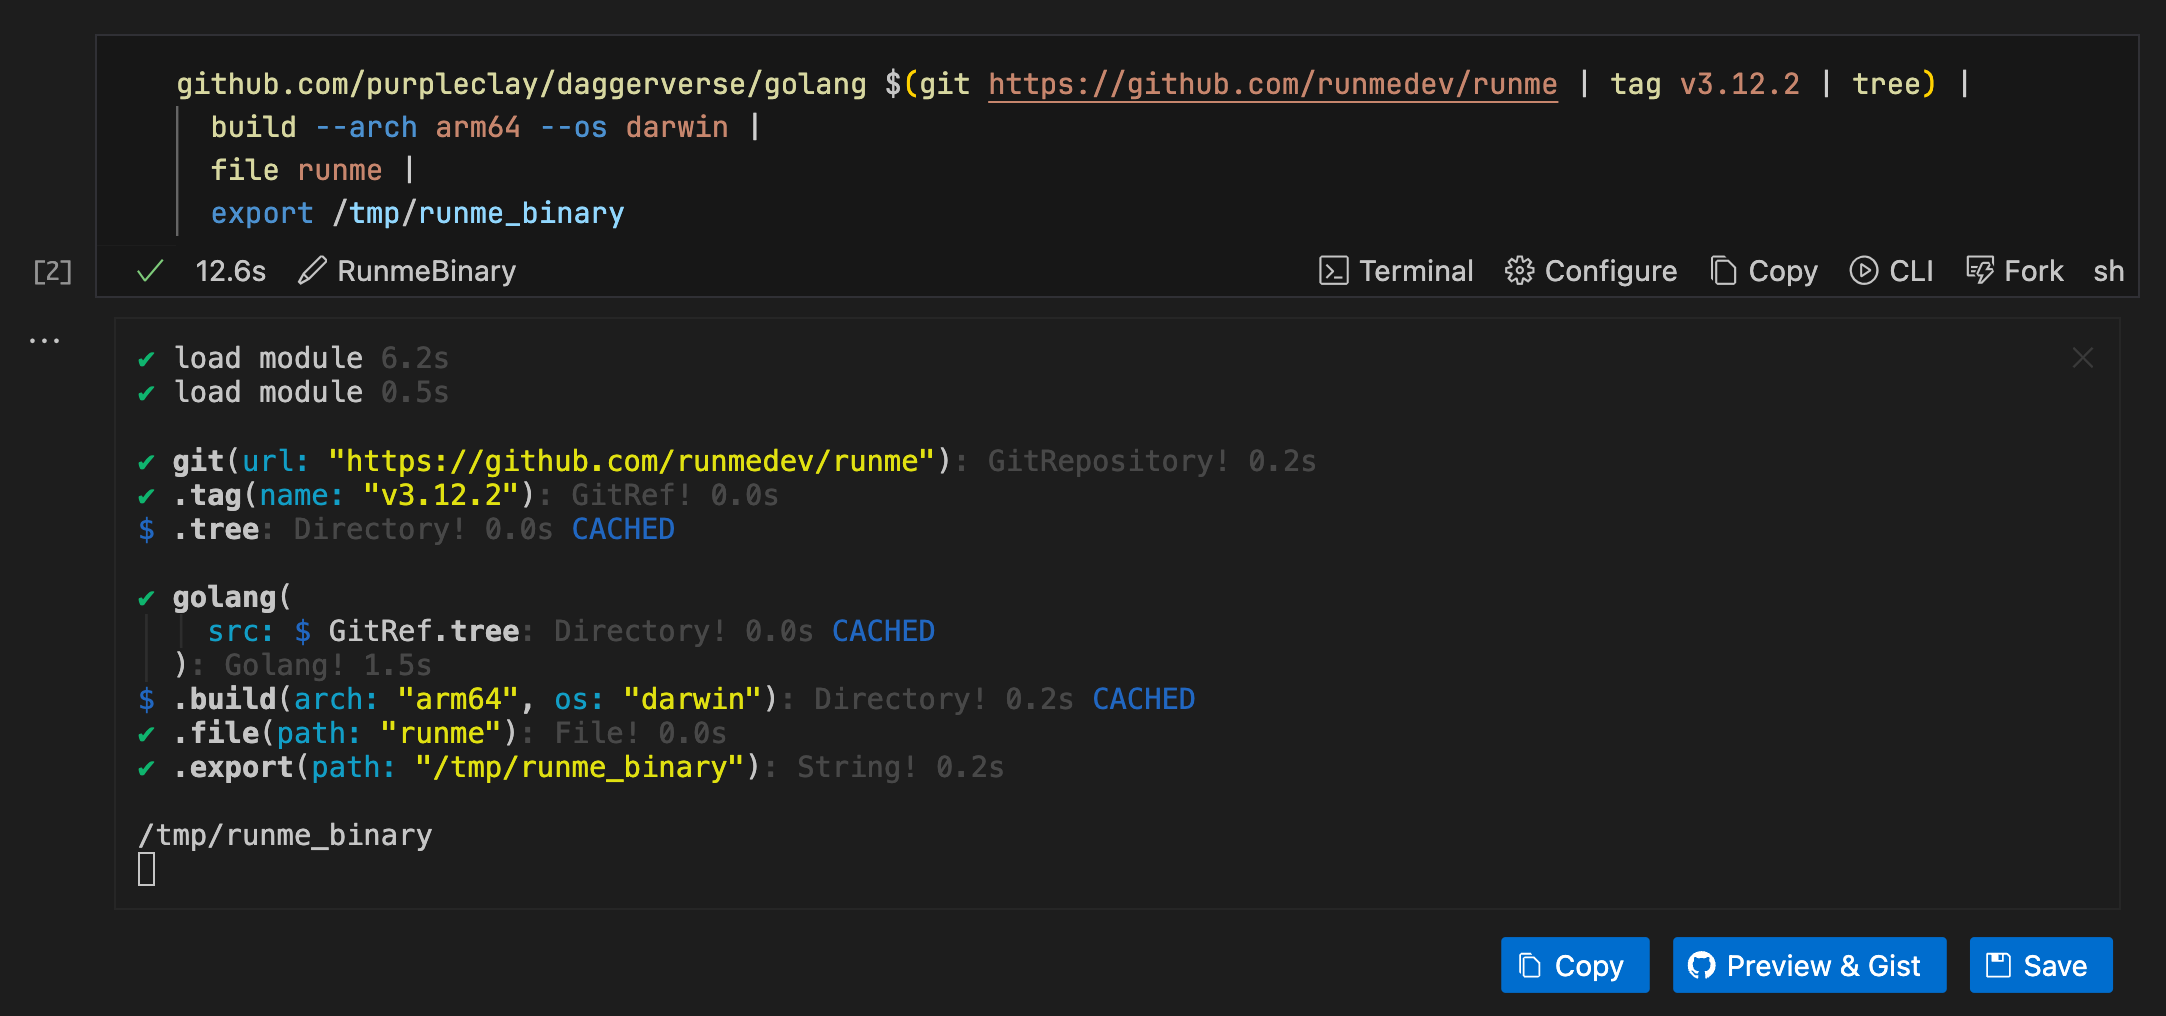
Following simple snippet will build the runme binary for tag v3.12.2 and export it to a temporary file. While the language is Dagger shell, the syntax is standard shell compatible. Much like how bash or zsh are just sh.
### Exported in runme.dev as RunmeBinary
github.com/purpleclay/daggerverse/golang $(git https://github.com/runmedev/runme | tag v3.12.2 | tree) |
  build --arch arm64 --os darwin |
  file runme |
  export /tmp/runme_binary
Running the above snippet will produce the following output and drop a binary at /tmp/runme_binary.
Run the same cell with Runme CLI
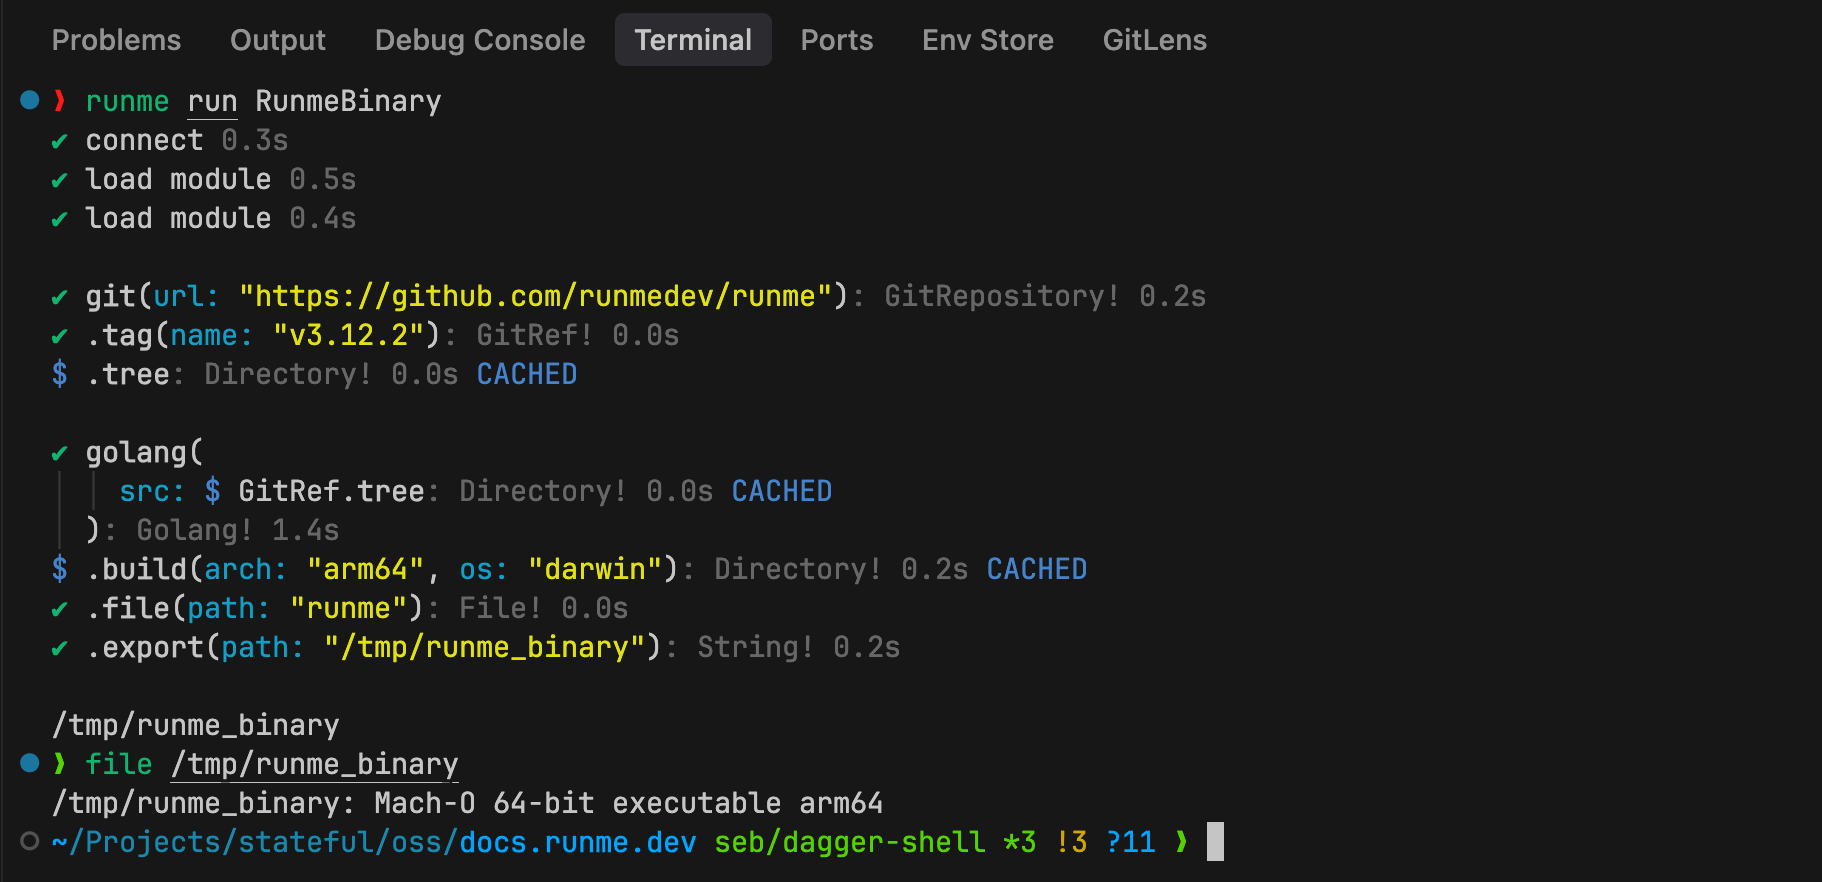
In case where opening the notebook interface is not ideal, you can run the same cell with the Runme CLI by running the following command:
$ runme run RunmeBinary
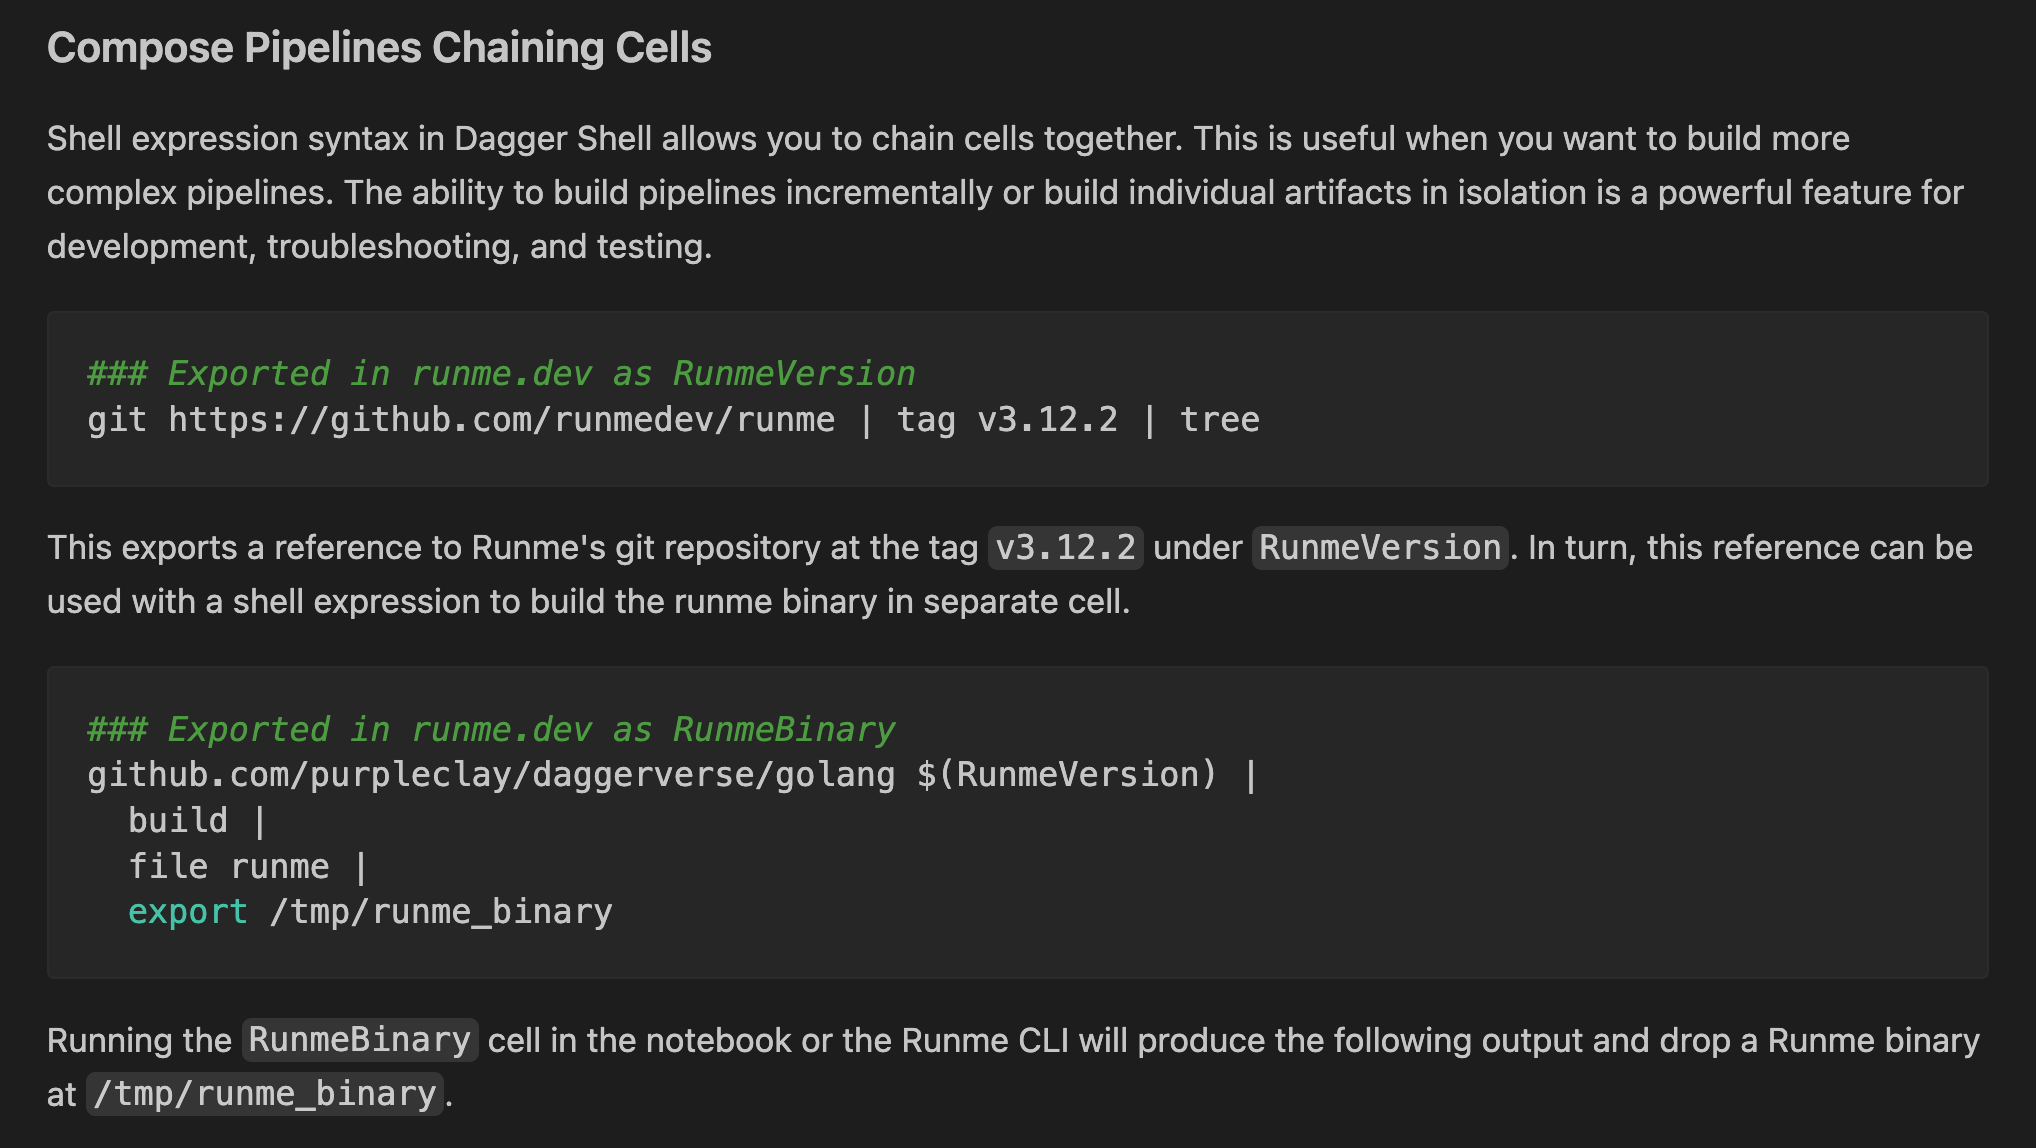
Compose Pipelines Chaining Cells
Shell expression syntax in Dagger Shell allows you to chain cells together. This is useful when you want to build more complex pipelines. The ability to build pipelines incrementally or build individual artifacts in isolation is a powerful feature for development, troubleshooting, and testing.
### Exported in runme.dev as RunmeVersion
# Exported as "RunmeVersion"
git https://github.com/runmedev/runme | tag v3.12.2 | tree
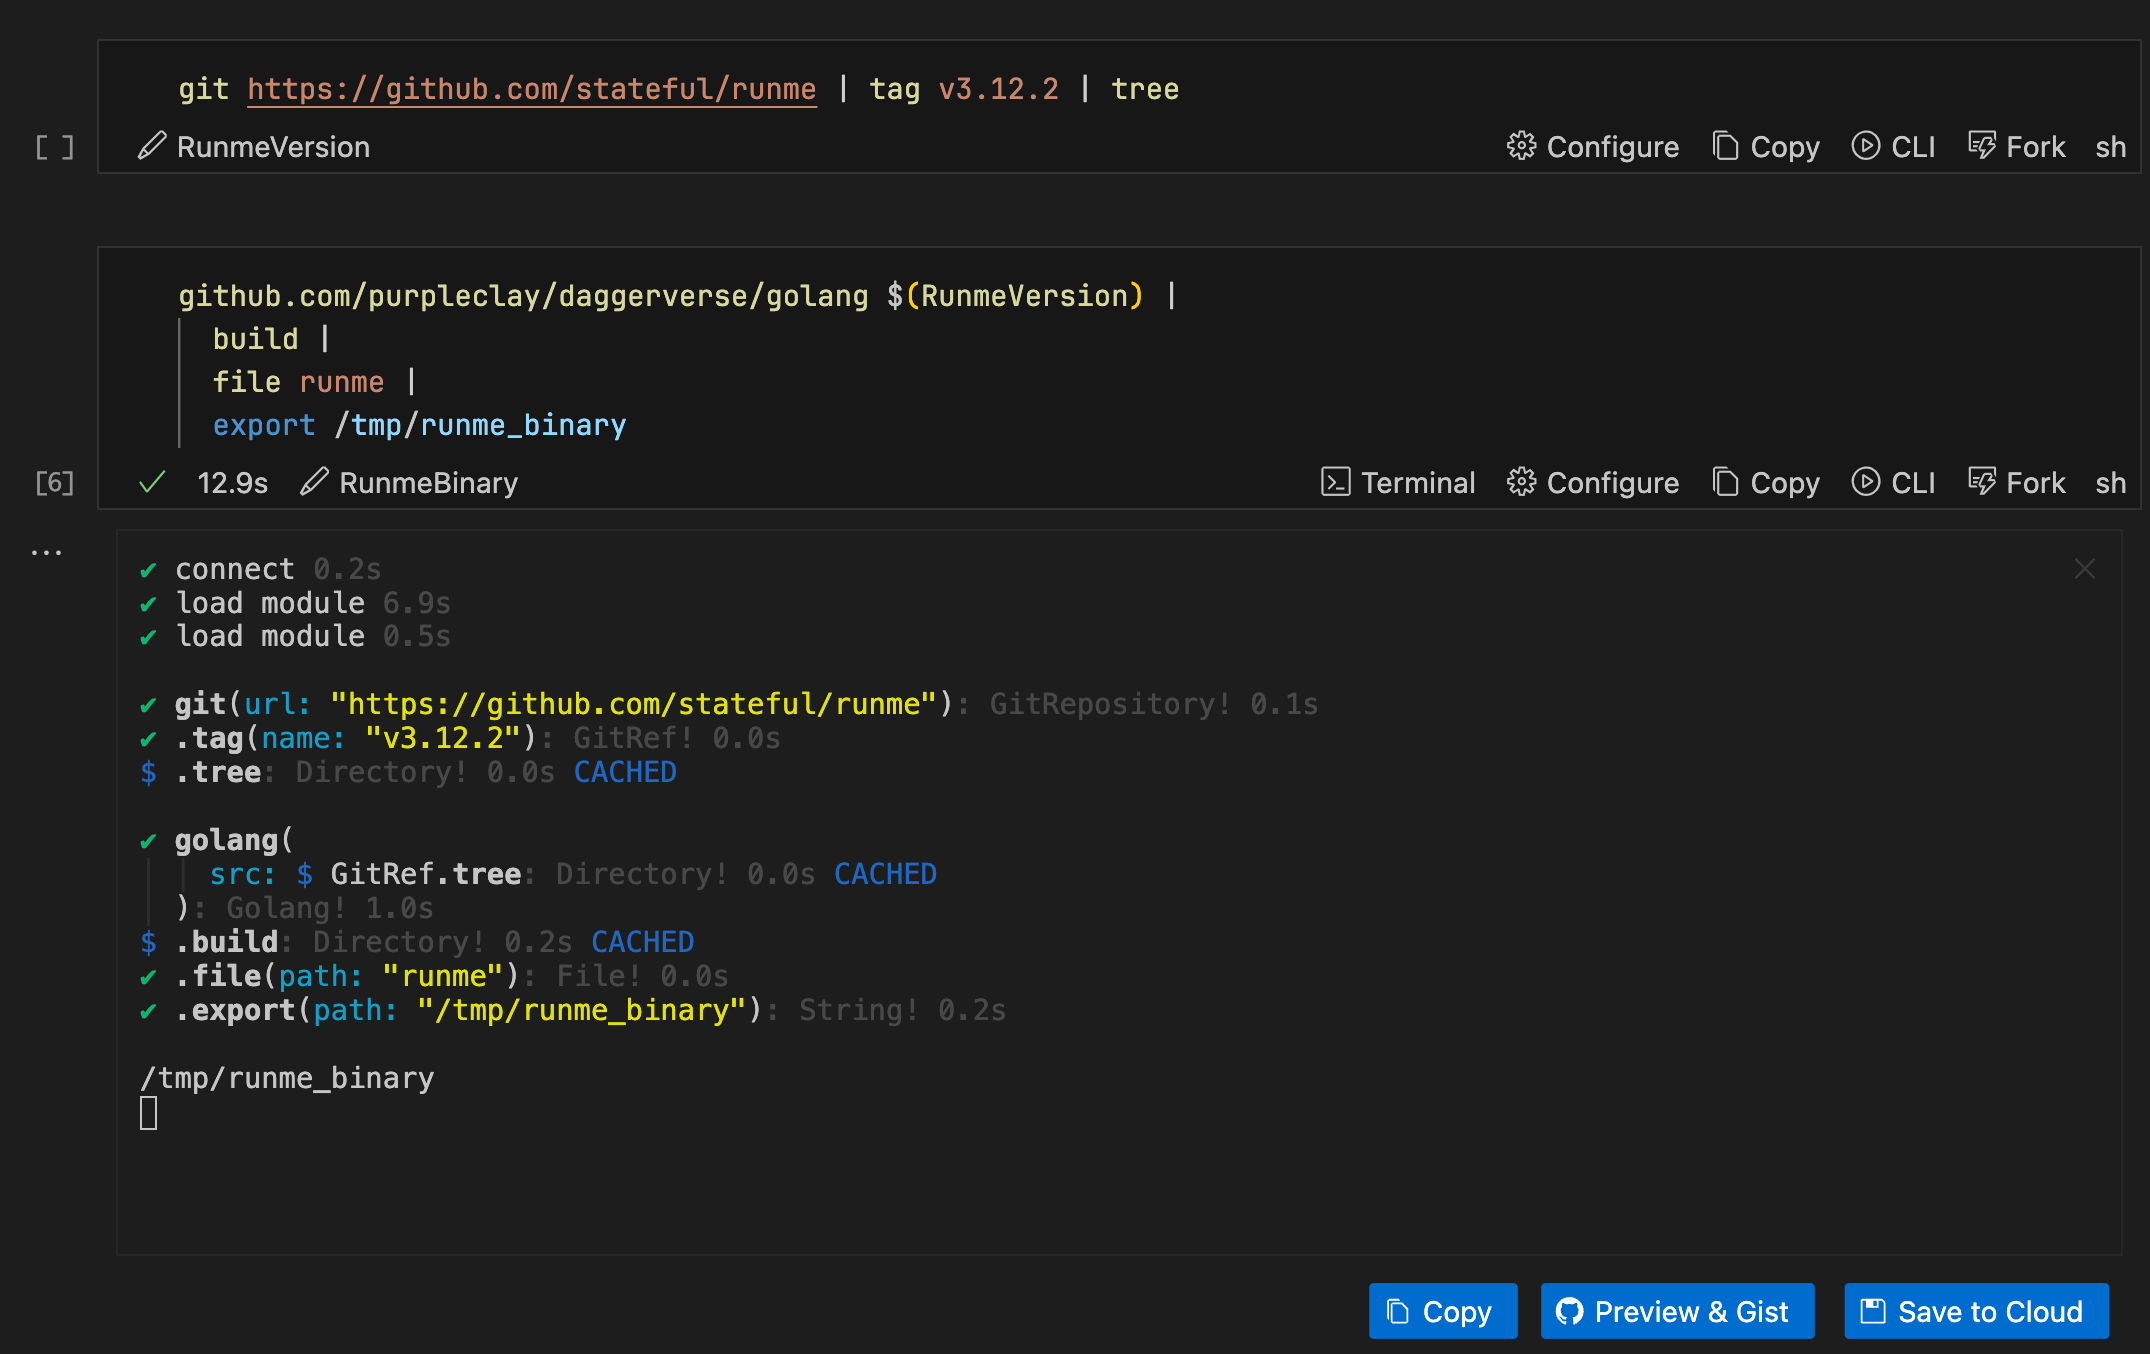
This exports a reference to Runme's git repository at the tag v3.12.2 under RunmeVersion. In turn, this reference can be used with a shell expression to build the runme binary in separate cell.
### Exported in runme.dev as RunmeBinary
# Exported as "RunmeBinary"
github.com/purpleclay/daggerverse/golang $(RunmeVersion) |
  build |
  file runme |
  export /tmp/runme_binary
Running the RunmeBinary cell in the notebook or the Runme CLI will produce the following output and drop a Runme binary at /tmp/runme_binary.
To make the reference names clear, Runme will automatically add comments to a cell's markdown representation.
This allows pipelines to be expressed incrementally, cell-by-cell, and still be clear, readable, and most of all, executable across notebooks, editor, and the CLI.
Please check out the Runme Extension's shell.dag for a more comprehensive example.
Notebooks with Dagger Call
Alternatively to Dagger Shell is "dagger call" which is a core part of the Dagger CLI to call into functions directly from the CLI. You can chain commands and build entire DevOps pipelines by calling dagger functions from the CLI. While we do recommend using Dagger Shell, this CLI interface is still useful depending on your use case.
This section will explore navigating the Dagger CLI in your Runme Notebooks. We will explain how it works in detail.
Calling Dagger modules inside cells
Runme Notebook interface includes a terminal environment with additional features, that gives you the experience of working in your regular terminal and more. With the Runme Notebook interface, you can write and execute Dagger commands.
Let’s explore the code block below.
dagger call \
    -m github.com/purpleclay/daggerverse/golang@v0.3.0 \
    --src "https://github.com/runmedev/runme#v3.12.2" \
    build \
        --arch $(go env GOARCH) \
        --os $(go env GOOS) \
    file \
        --path runme
This code uses the Dagger CLI to build a Go project from the runme GitHub repository using your system's architecture and Operating System. After the build finishes, it holds a reference to the specific build artifact, the runme binary.
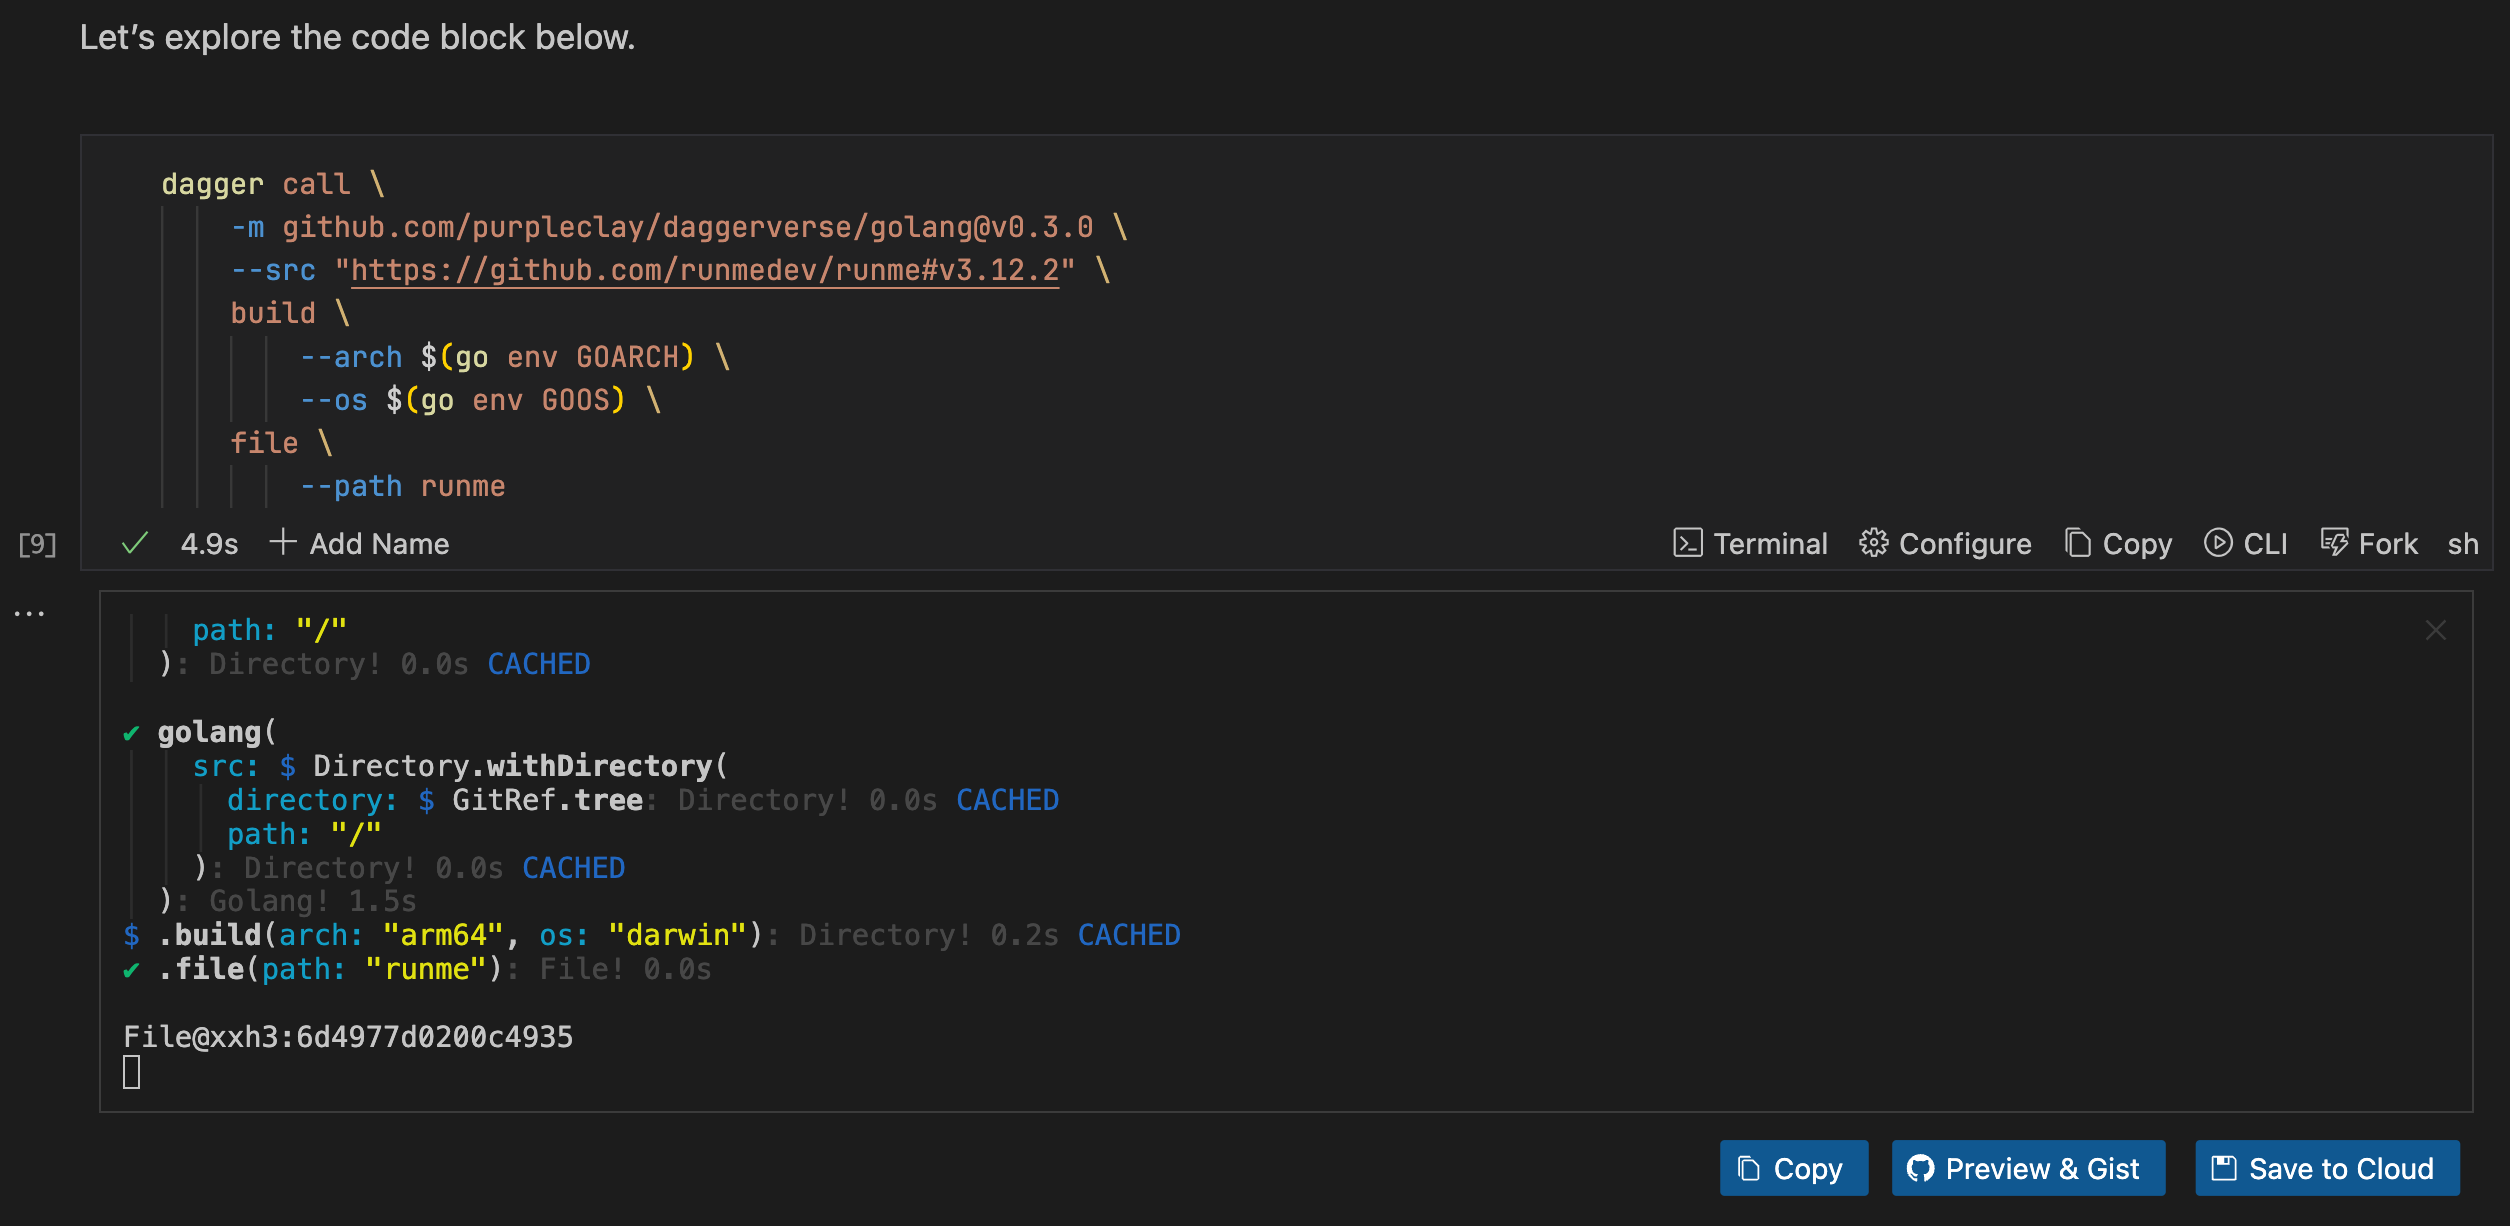
This output shows the steps executed by Dagger, which successfully performed the tasks in the code block and built the runme binary. However, unless explicitly specified, it won't export the binary to your local machine. More below.
Run with Runme CLI
The code block below illustrates how to export the runme binary to your local machine after building it.
# This cell is named "BinaryArtifact", please see raw markdown to inspect the metadata
dagger call \
    -m github.com/purpleclay/daggerverse/golang@v0.3.0 \
    --src "https://github.com/runmedev/runme#v3.12.2" \
    build \
        --arch $(go env GOARCH) \
        --os $(go env GOOS) \
    file \
        --path runme \
    export --path runme
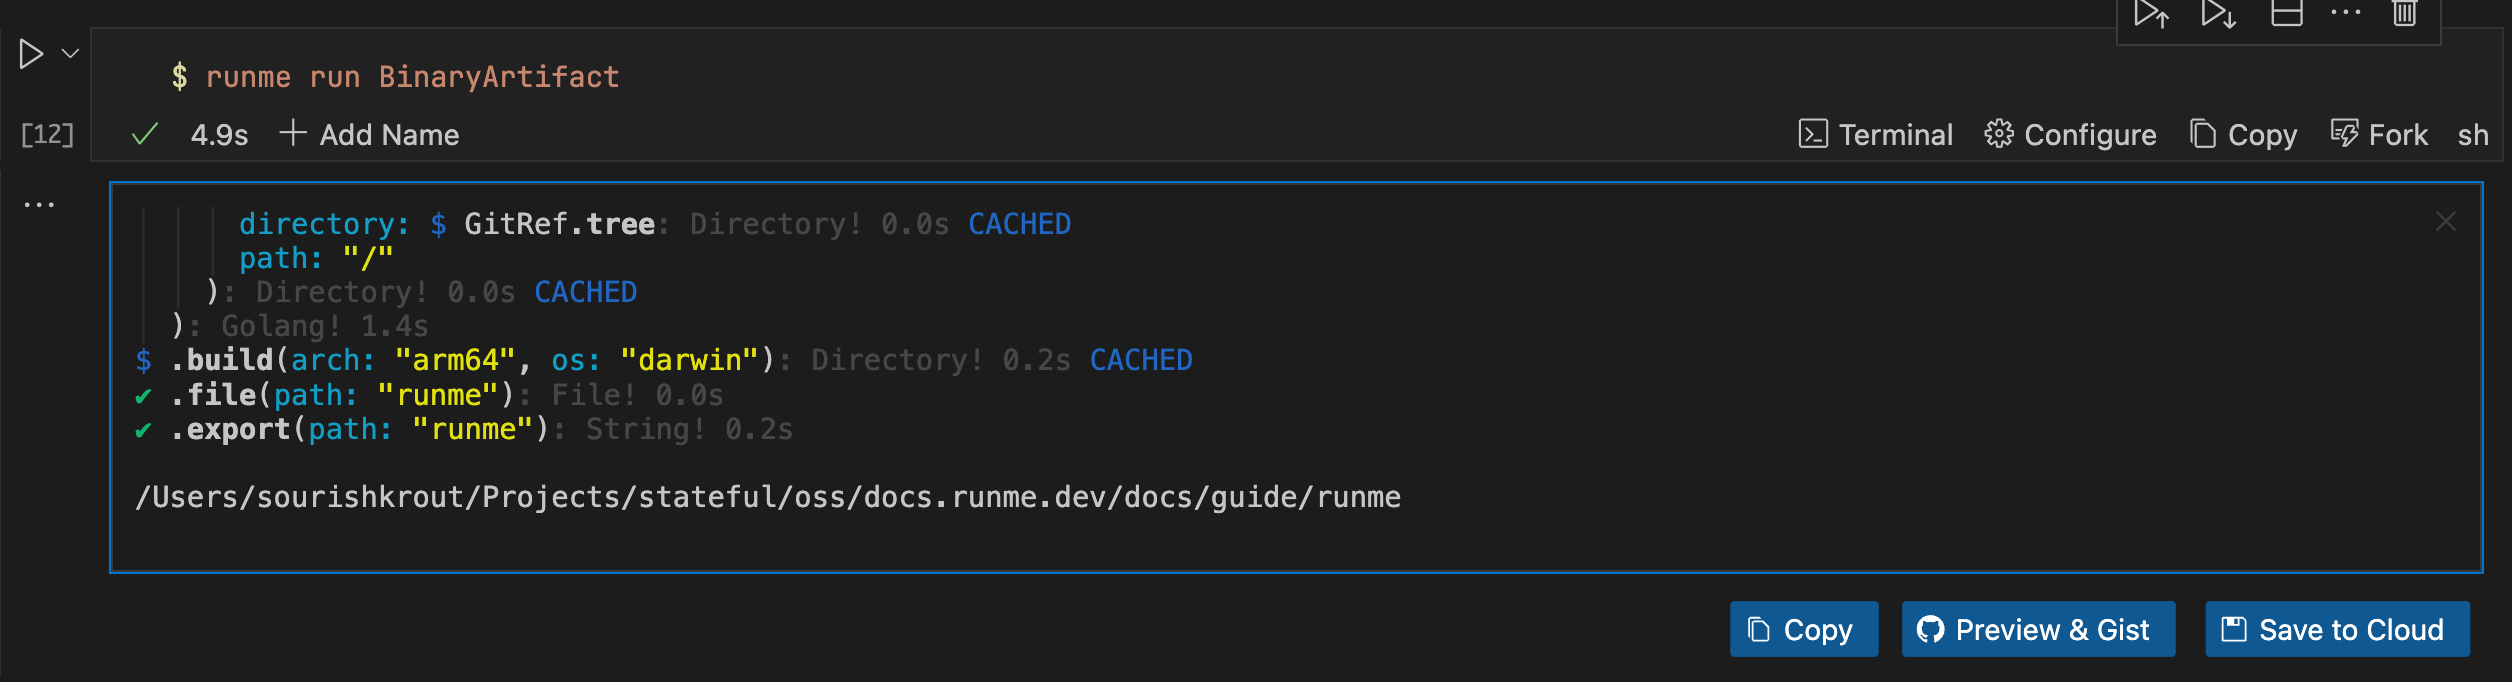
Please note how above's cell is named BinaryArtifact. The name reference is saved inside of the Markdown's fenced code block as metadata. This allows you to run the cell with the Runme CLI.
$ runme run BinaryArtifact
Running Dagger Functions with a Single Click
With the Runme interactive interface, you can run your Dagger functions with a single click. When you set up a function call within a notebook cell, Runme improves the experience by offering follow-up actions tailored to the return type.
This interactive interface makes the execution of complex pipelines easy and eliminates the need to type follow-up commands manually.
Running Dagger Pipelines in Runme (using the CLI)
No matter whether the Dagger Shell or Dagger Call interface are being used. Once you have a notebook with your Dagger pipeline commands written, you can run your pipeline from the terminal by running this command $ runme run --filename my-notebook.md --all --skip-prompts.
You can also run individual cells using the names of the cells or select them individually from Runme’s TUI.
To learn more about how the Runme CLI functions and how to use it for your project, check out our documentation.
Recorded Demo at Dagger Community Event
➡️ Watch the Demo: Dagger Shell notebooks in Action
Additional Resources
To learn more about Runme, see more resources on Runme Integrations: