Install Runme in CDE's
Runme can easily be integrated with Cloud Development Environments (CDEs) like GitHub Codespaces, Gitpod, and Project IDX to enhance development process by creating a ready-to-code environments with an interactive notebook. Experience the ease of dependable documentation and instantly-ready coding setups
In the sections below, we will provide step-by-step instructions for installing Runme in your favorite Cloud Development Environments.
GitHub Codespaces
GitHub codespaces is a cloud-based development environment that speeds up project setup by providing pre-configured environments for users and promotes collaborative development, testing, and debugging directly within GitHub. With the VS Code extension on GitHub Codespace, you can install Runme. This integration helps developers automate routine tasks and execute notebooks directly from your GitHub repository.
In this section, we will walk you through how to install Runme on GitHub Codespaces.
Creating a Codespace
To create a codespace, do the following:
- Navigate to a new repository.
- Click
Code. - Click + in the Codespaces tab to open a new Codespace on your repository.
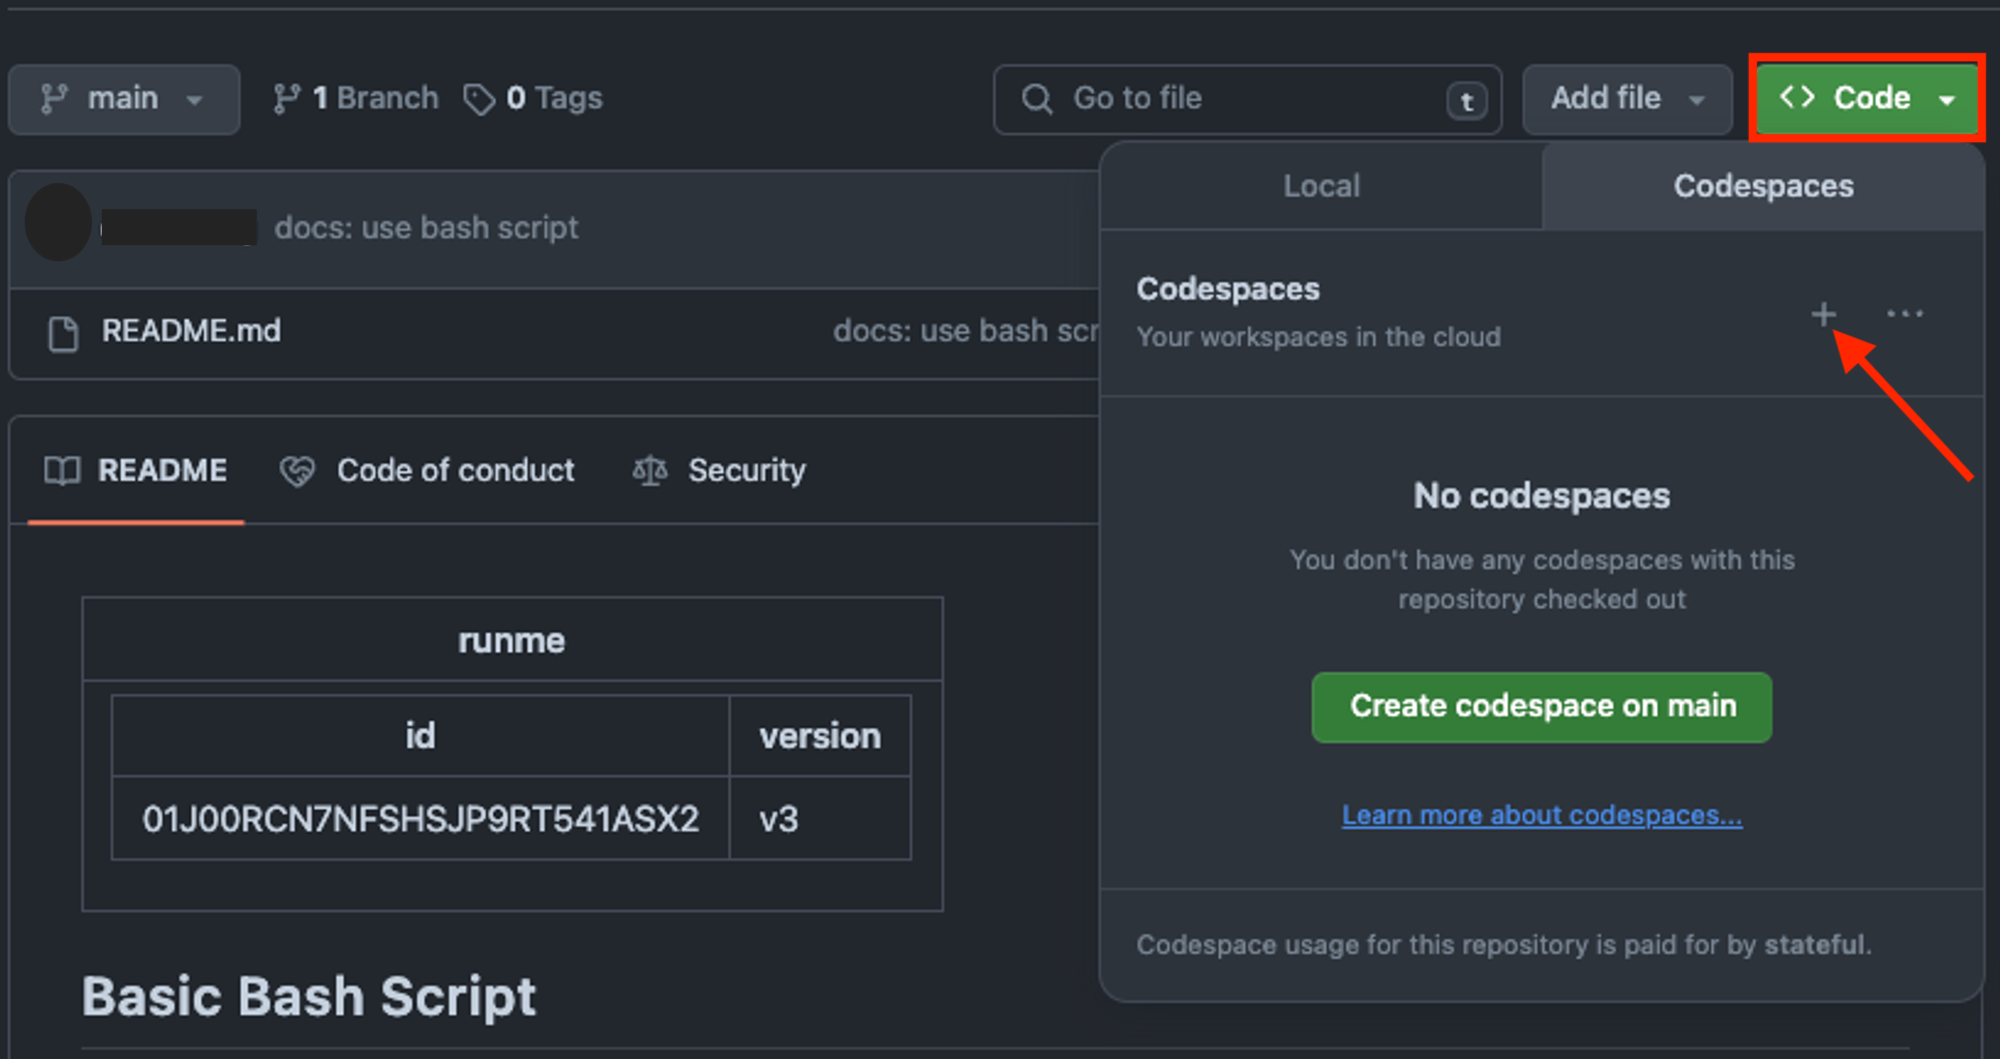
A Visual Studio Code instance will open in your browser with a unique URL and container.
Installing Runme in Codespaces
- Once your Codespace is open, click on the Extensions view icon on the sidebar or press
Ctrl+Shift+Xto open the Extensions view. - In the search bar, type
Runmeand press Enter. - Locate the Runme extension in the search results and click on
Install.

- Once installed, you can use the Runme extension to manage and run your scripts directly from your codebase.
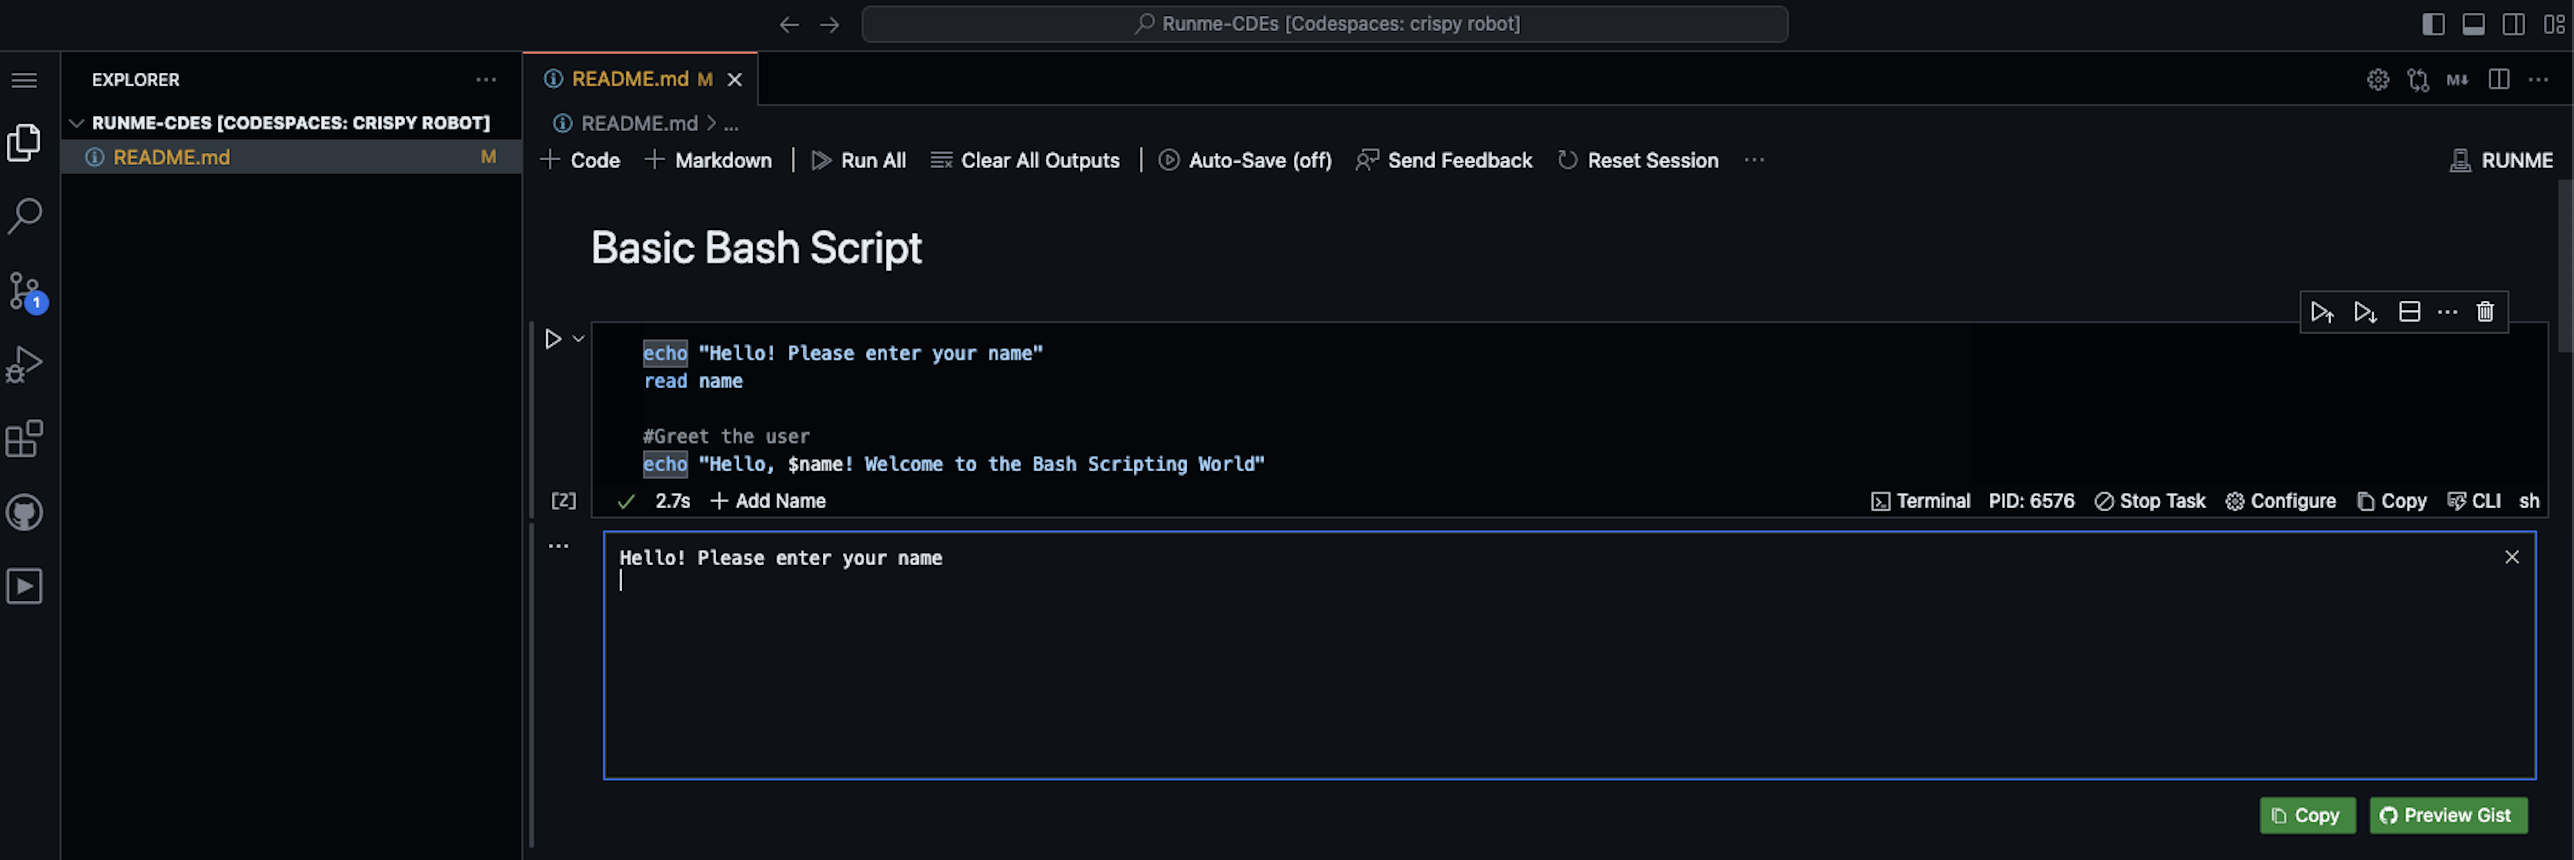
Now, you have successfully installed Runme in your GitHub Codespaces.
Gitpod
Gitpod is a cloud-based development environment that allows developers to launch ready-to-code environments from any Git repository instantly. Thus eliminating the need for manual setup and configuration, saving time and effort.
In this section, we will walk you through how to Install Runme on Gitpod.
Sign Up and Login
The first step is to create an account and sign-in. To do this, go to the Gitpod website, click on ‘Try for Free’ and sign up using your GitHub, GitLab, or Bitbucket account.
Once signed up, log in to Gitpod with the account you used earlier.
Creating a New Workspace
After completing the signup and log-in process, the next step is to create a new workspace. To do this, follow the steps below:
- Navigate to the repository on GitHub, GitLab, or Bitbucket that you want to work on.
- Add
gitpod.io/#before the URL of the repository. For example,https://github.com/user/repobecomeshttps://gitpod.io/#https://github.com/user/repo. - Press Enter, and Gitpod will start setting up your workspace.
open https://gitpod.io/#https://github.com/runmedev/runme-CDEs
Installing Runme in Gitpod
After creating a new workspace for your project, it’s time to install Runme in Gitpod. To do this, do the following:
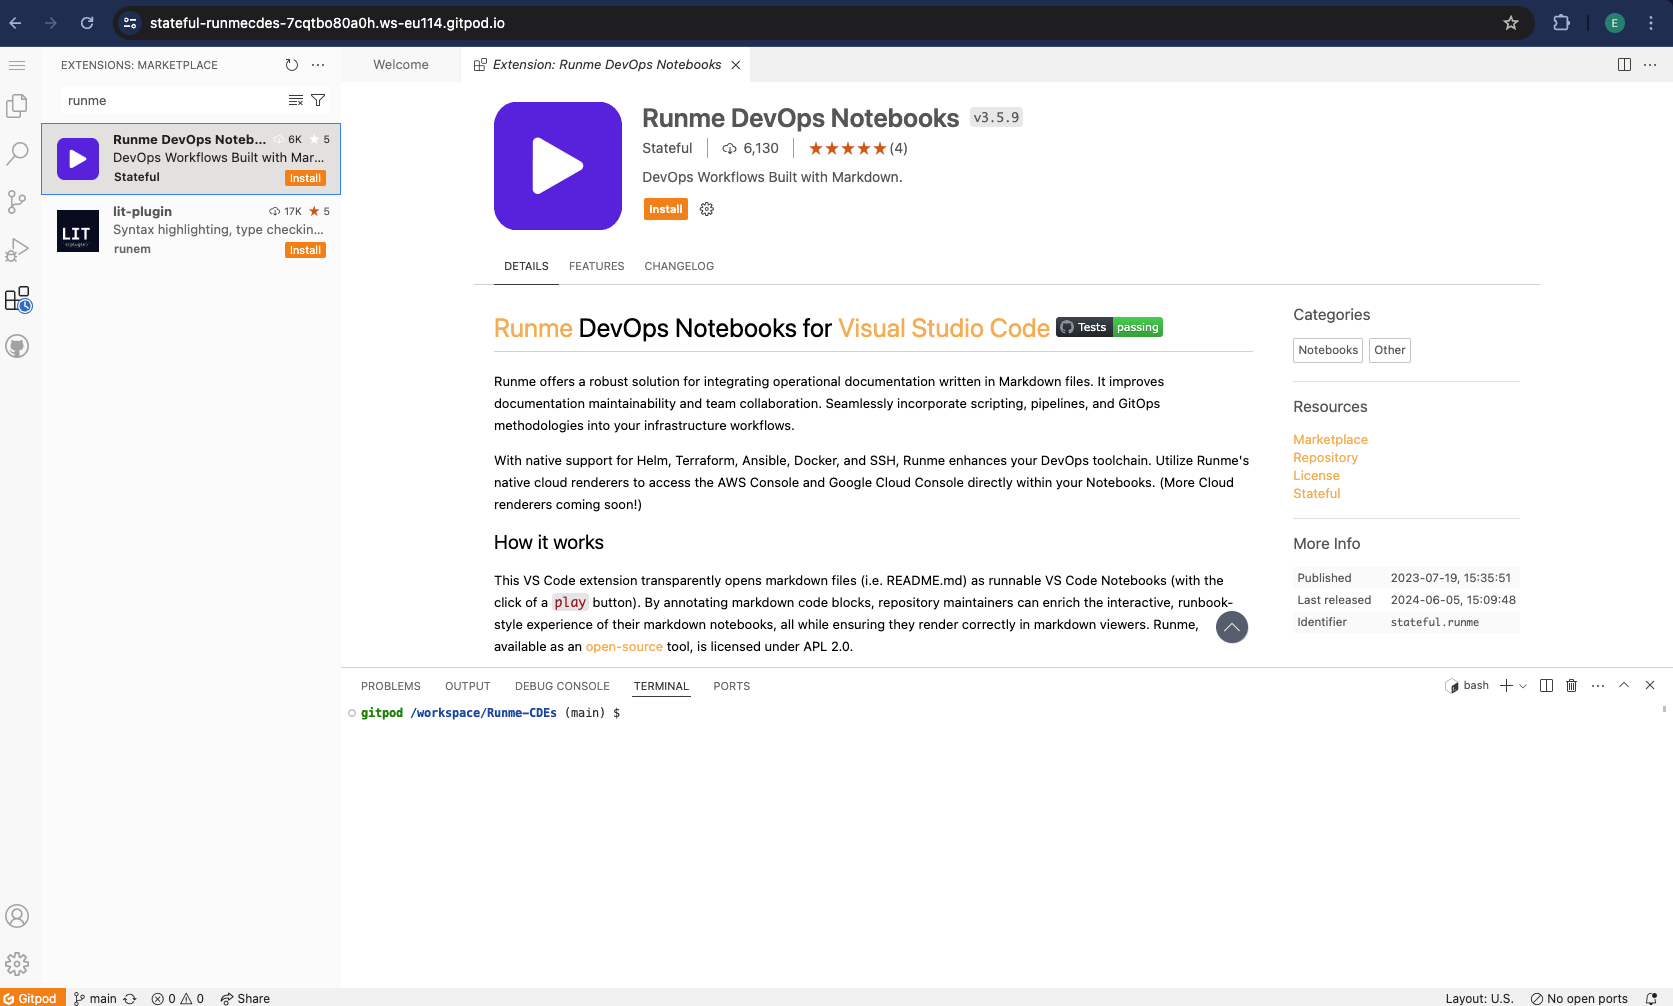
- Once your workspace is open, click on the Extensions view icon on the sidebar or press
Ctrl+Shift+Xto open the Extensions view. - In the search bar, type
Runmeand press Enter. - Locate the Runme extension in the search results and click on
Install.
- Once installed, you can use the Runme extension to manage and run your scripts directly from your codebase.

Project IDX
Project IDX is designed to make building, management, and deployment of full-stack web and multiplatform applications easier. In this section, we will walk you through the process of installing Runme on Project IDX.
Login
The first step is to log in. To do this, go to the Project IDX website and click on ‘Get Started’.
After affirming to the instructions that pop up, you will be logged in.
Project IDX works with your Google account details.
Creating a New Project
The next step is to create a new project. To do this, follow the steps below.
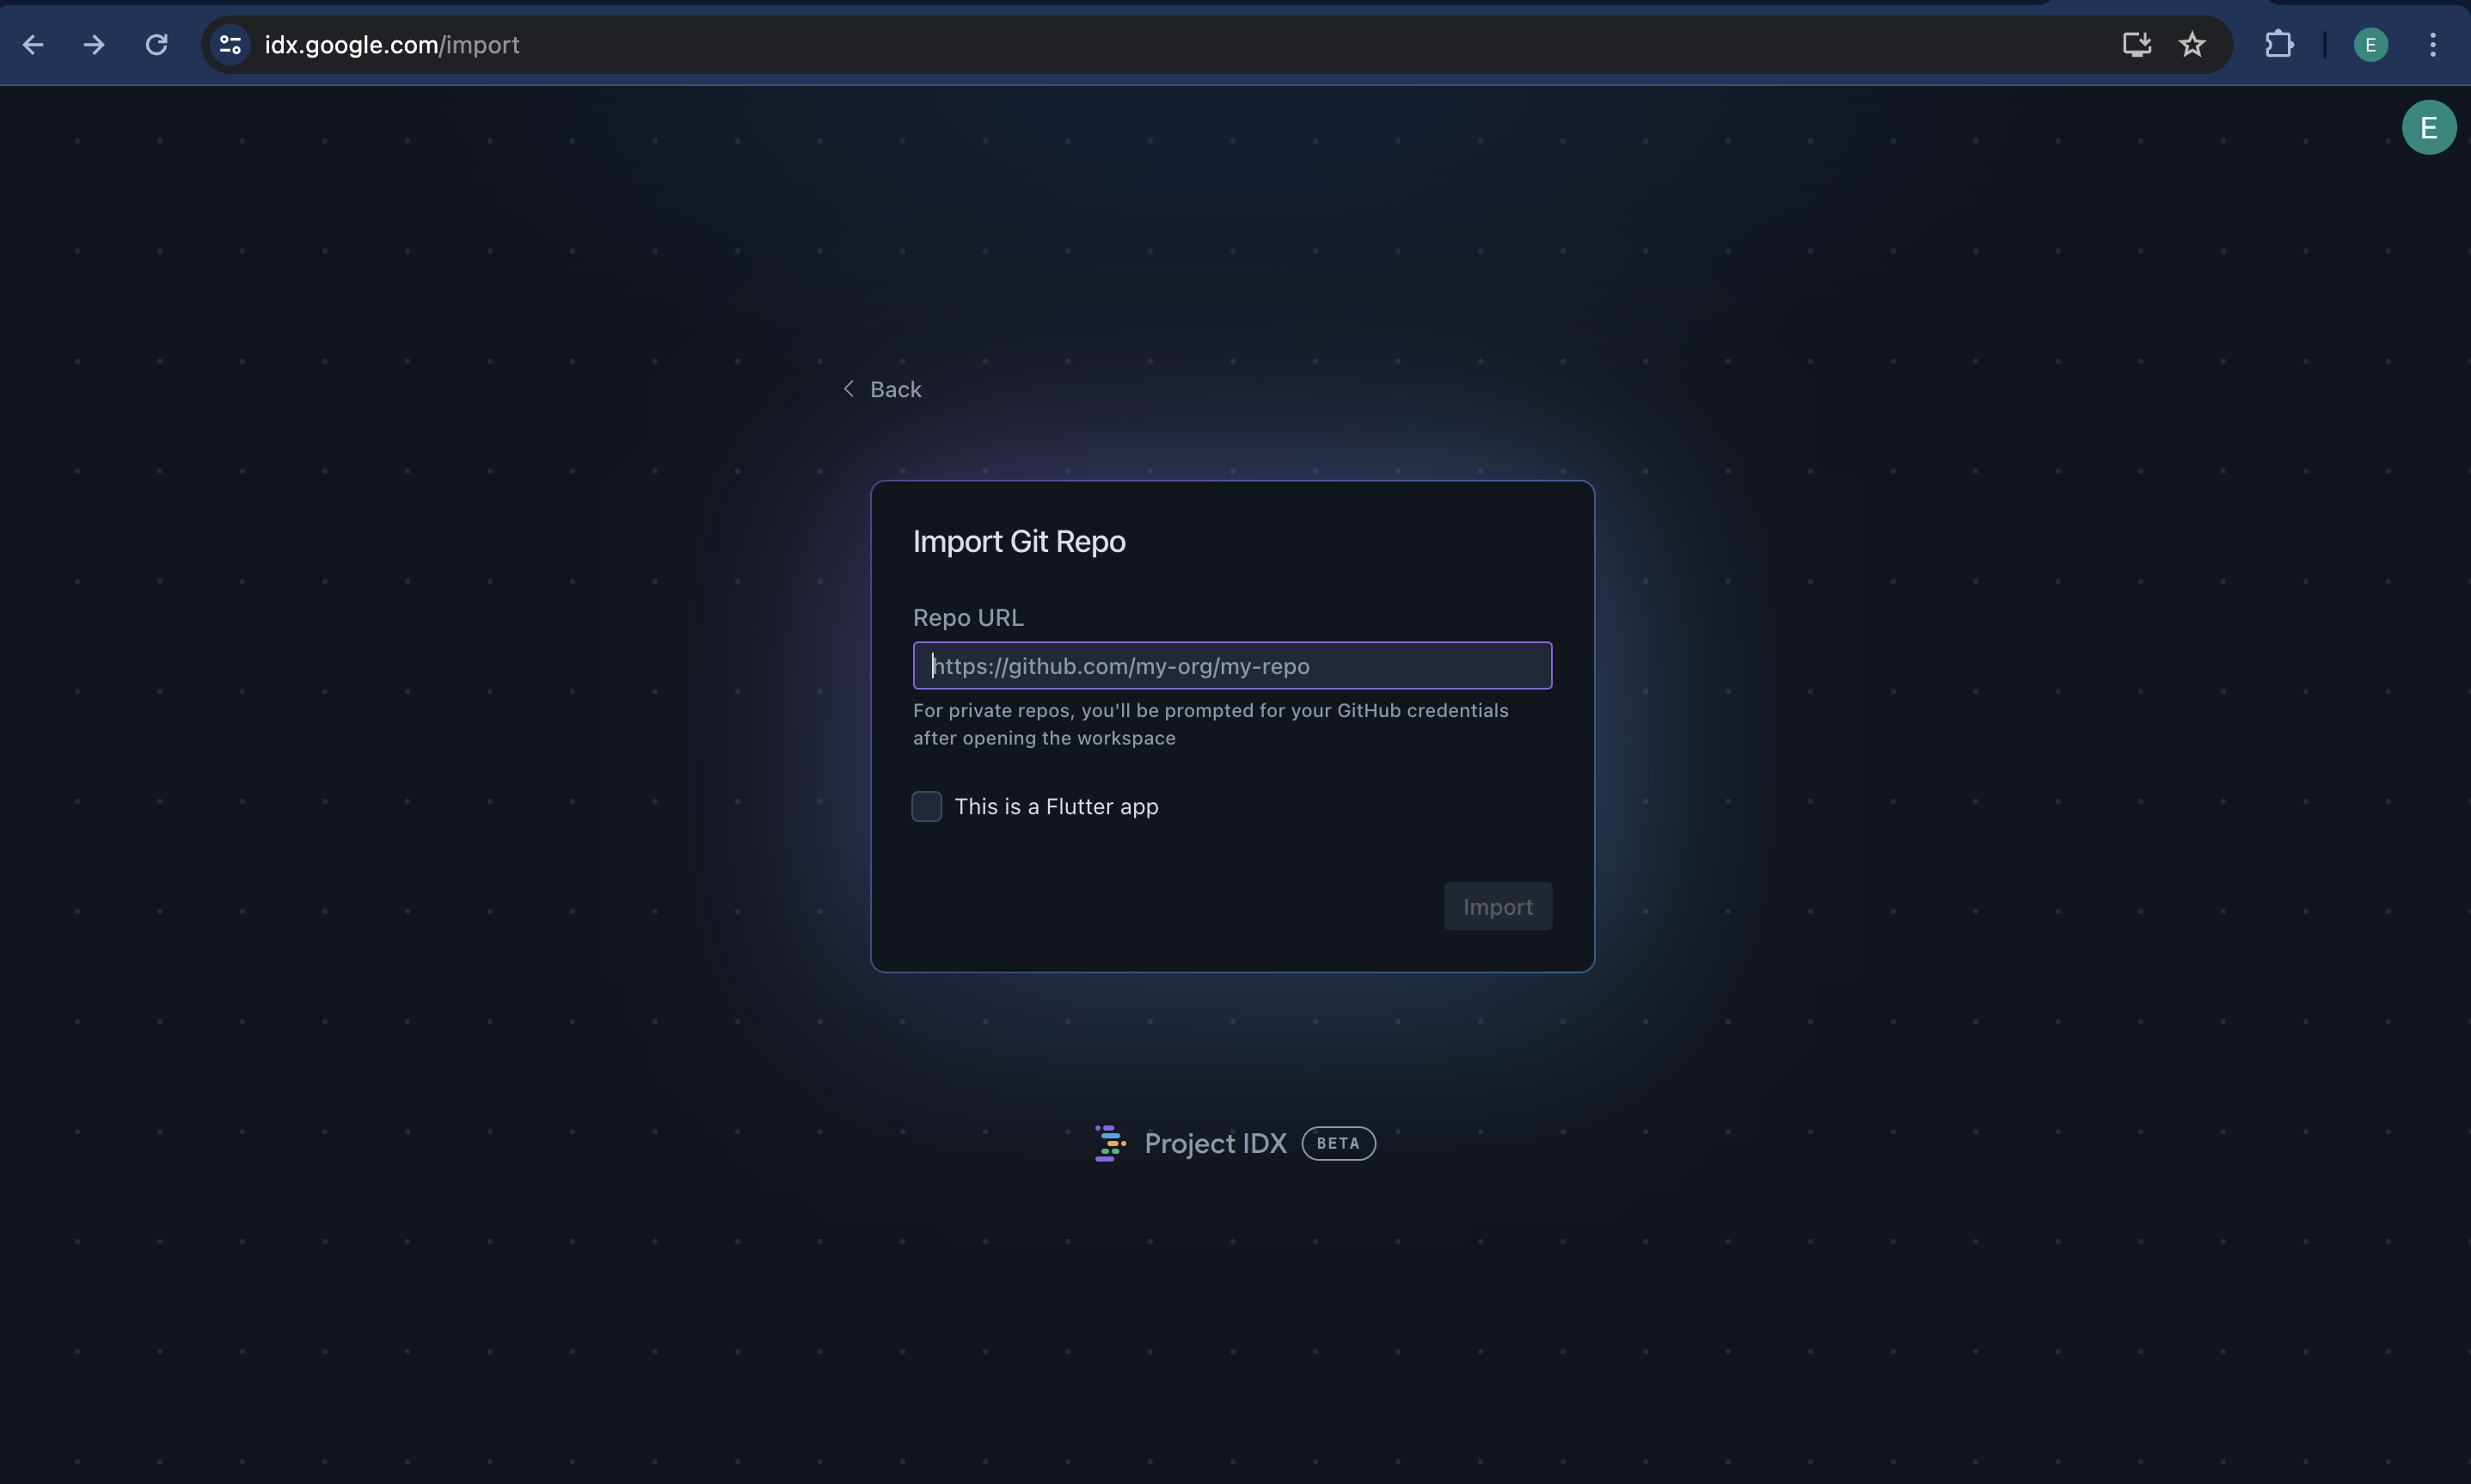
- After logging in, you will see the dashboard.

- You can either start something new from a template based on your programming language or you import an existing project. For this guide, we will import a repo. Once you click on that option, a new dashboard opens up that prompts you to import the repo URL.
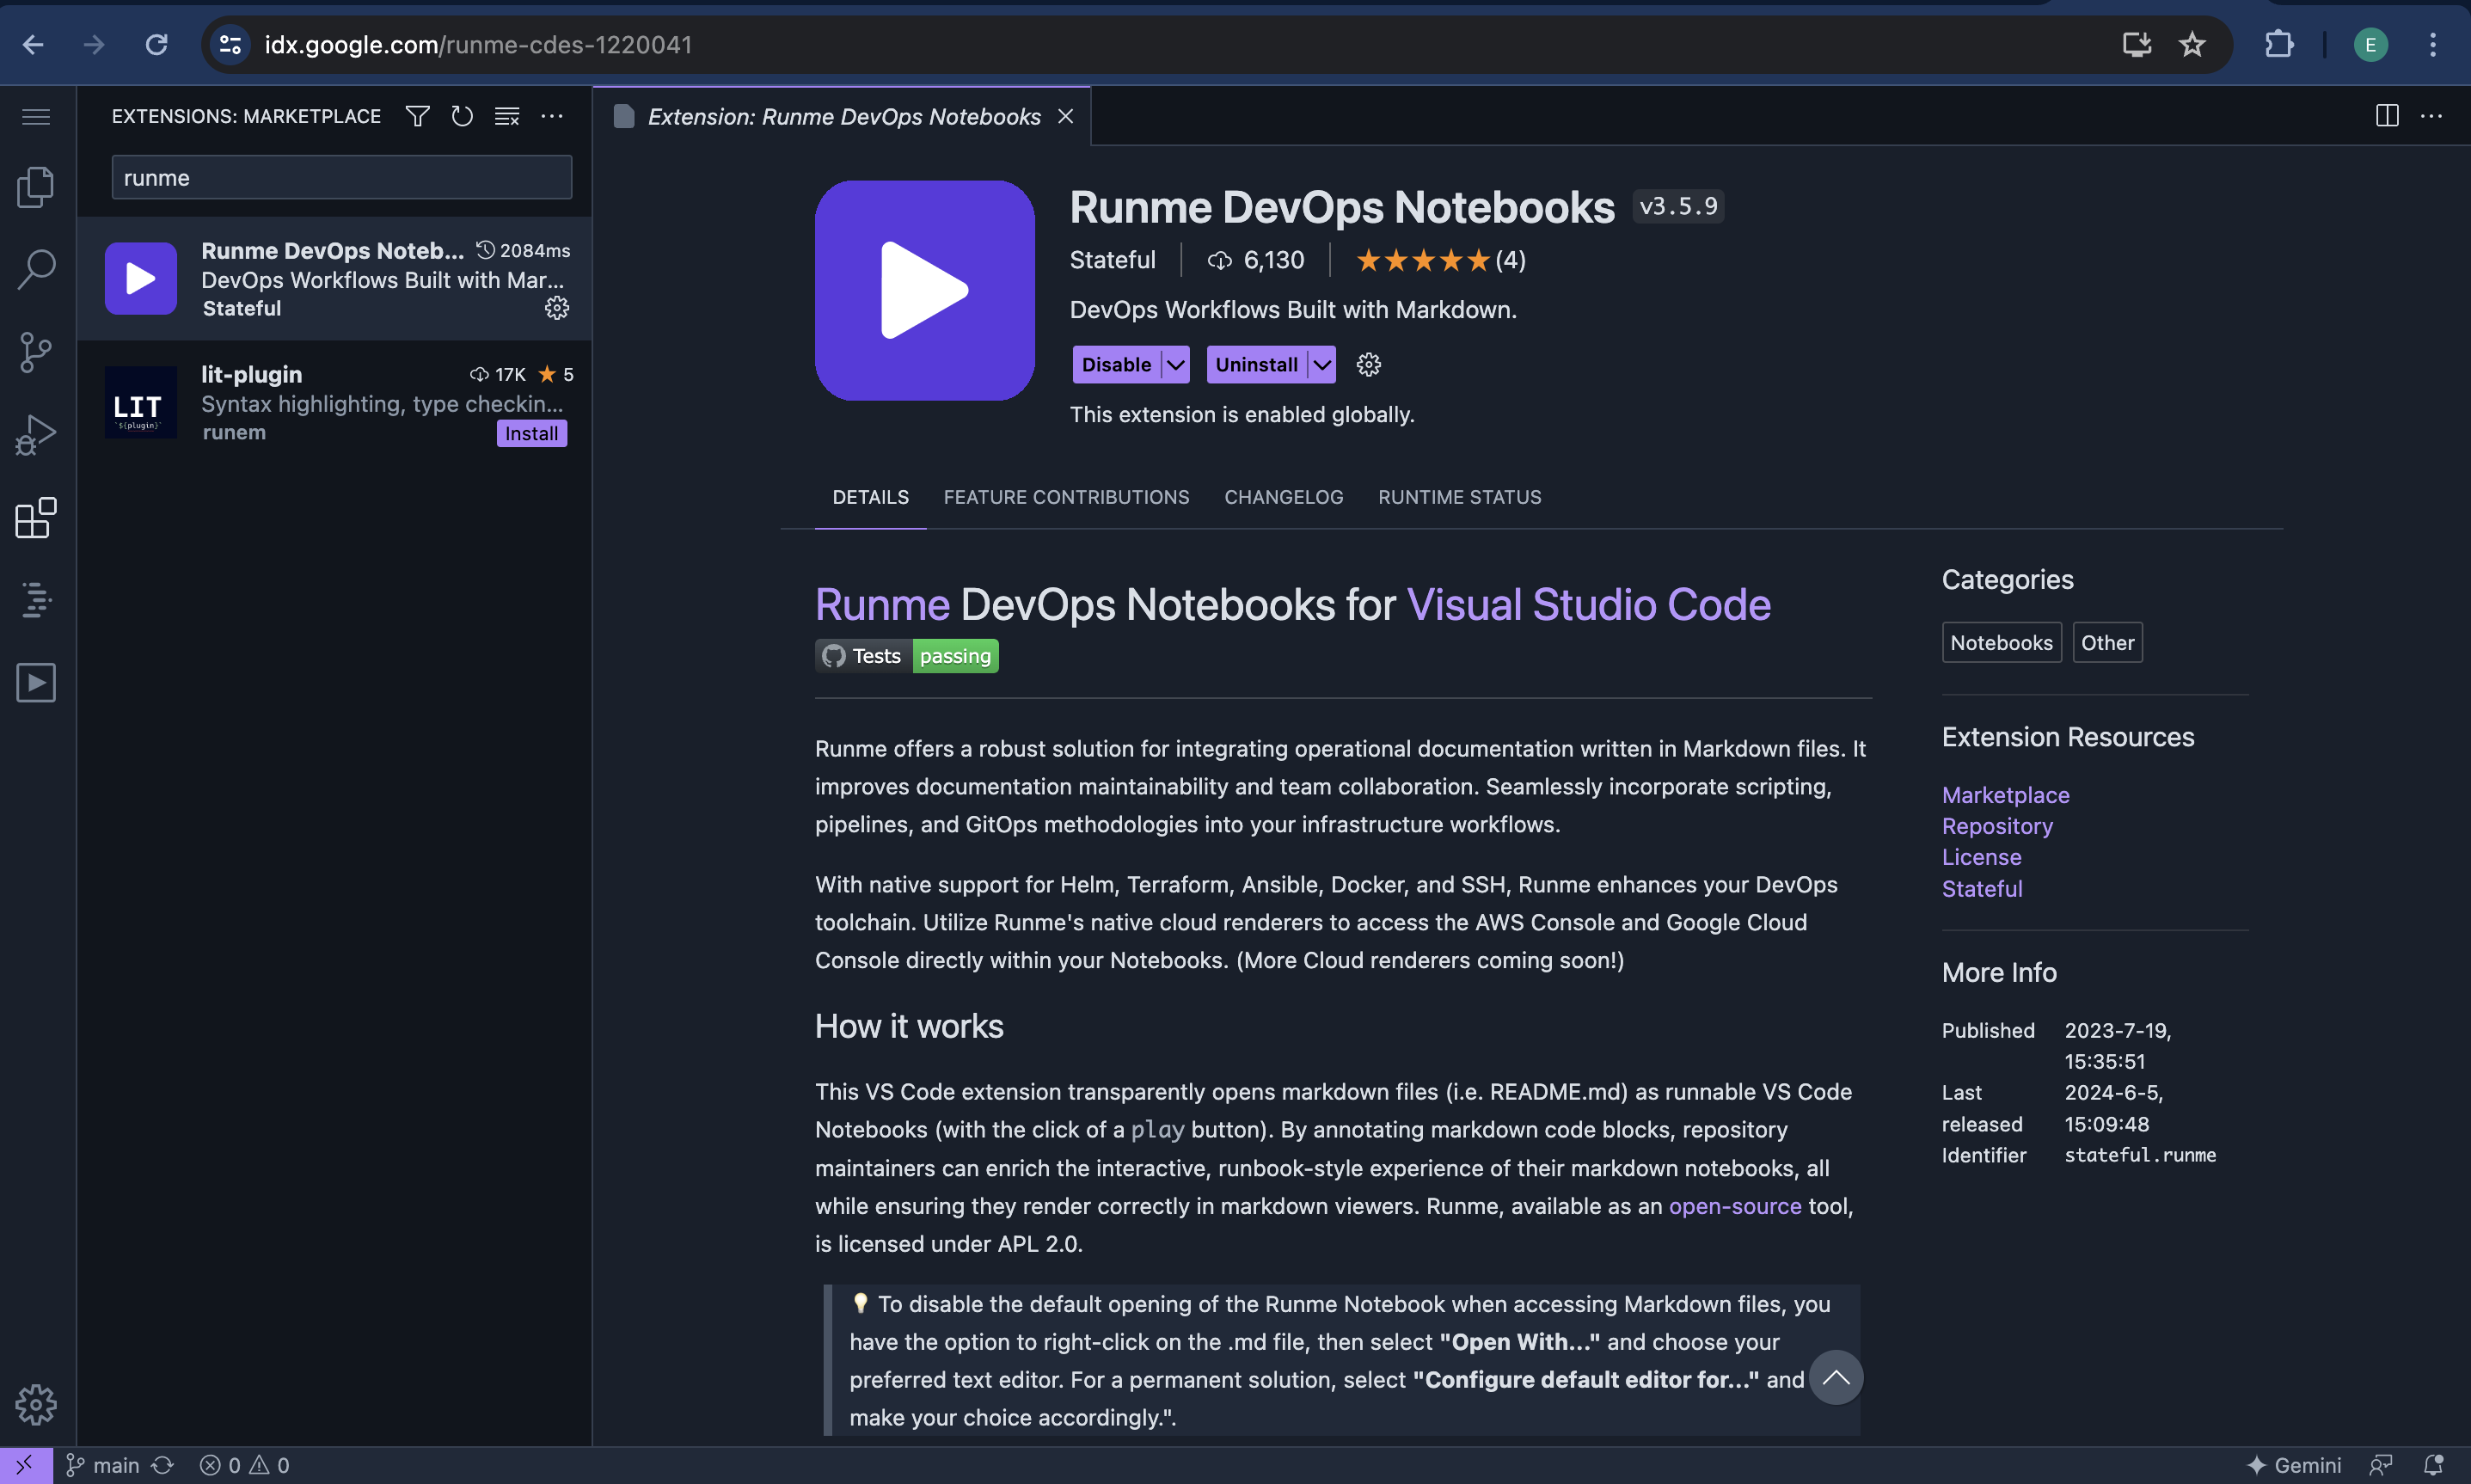
Installing Runme in Project IDX
- Once your project environment is set up, click on the Extensions view icon on the sidebar or press
Ctrl+Shift+Xto open the Extensions view. - In the search bar, type
Runmeand press Enter. - Locate the Runme extension in the search results and click on
Install.
- Once installed, you can use the Runme extension to manage and run your scripts directly from your codebase.
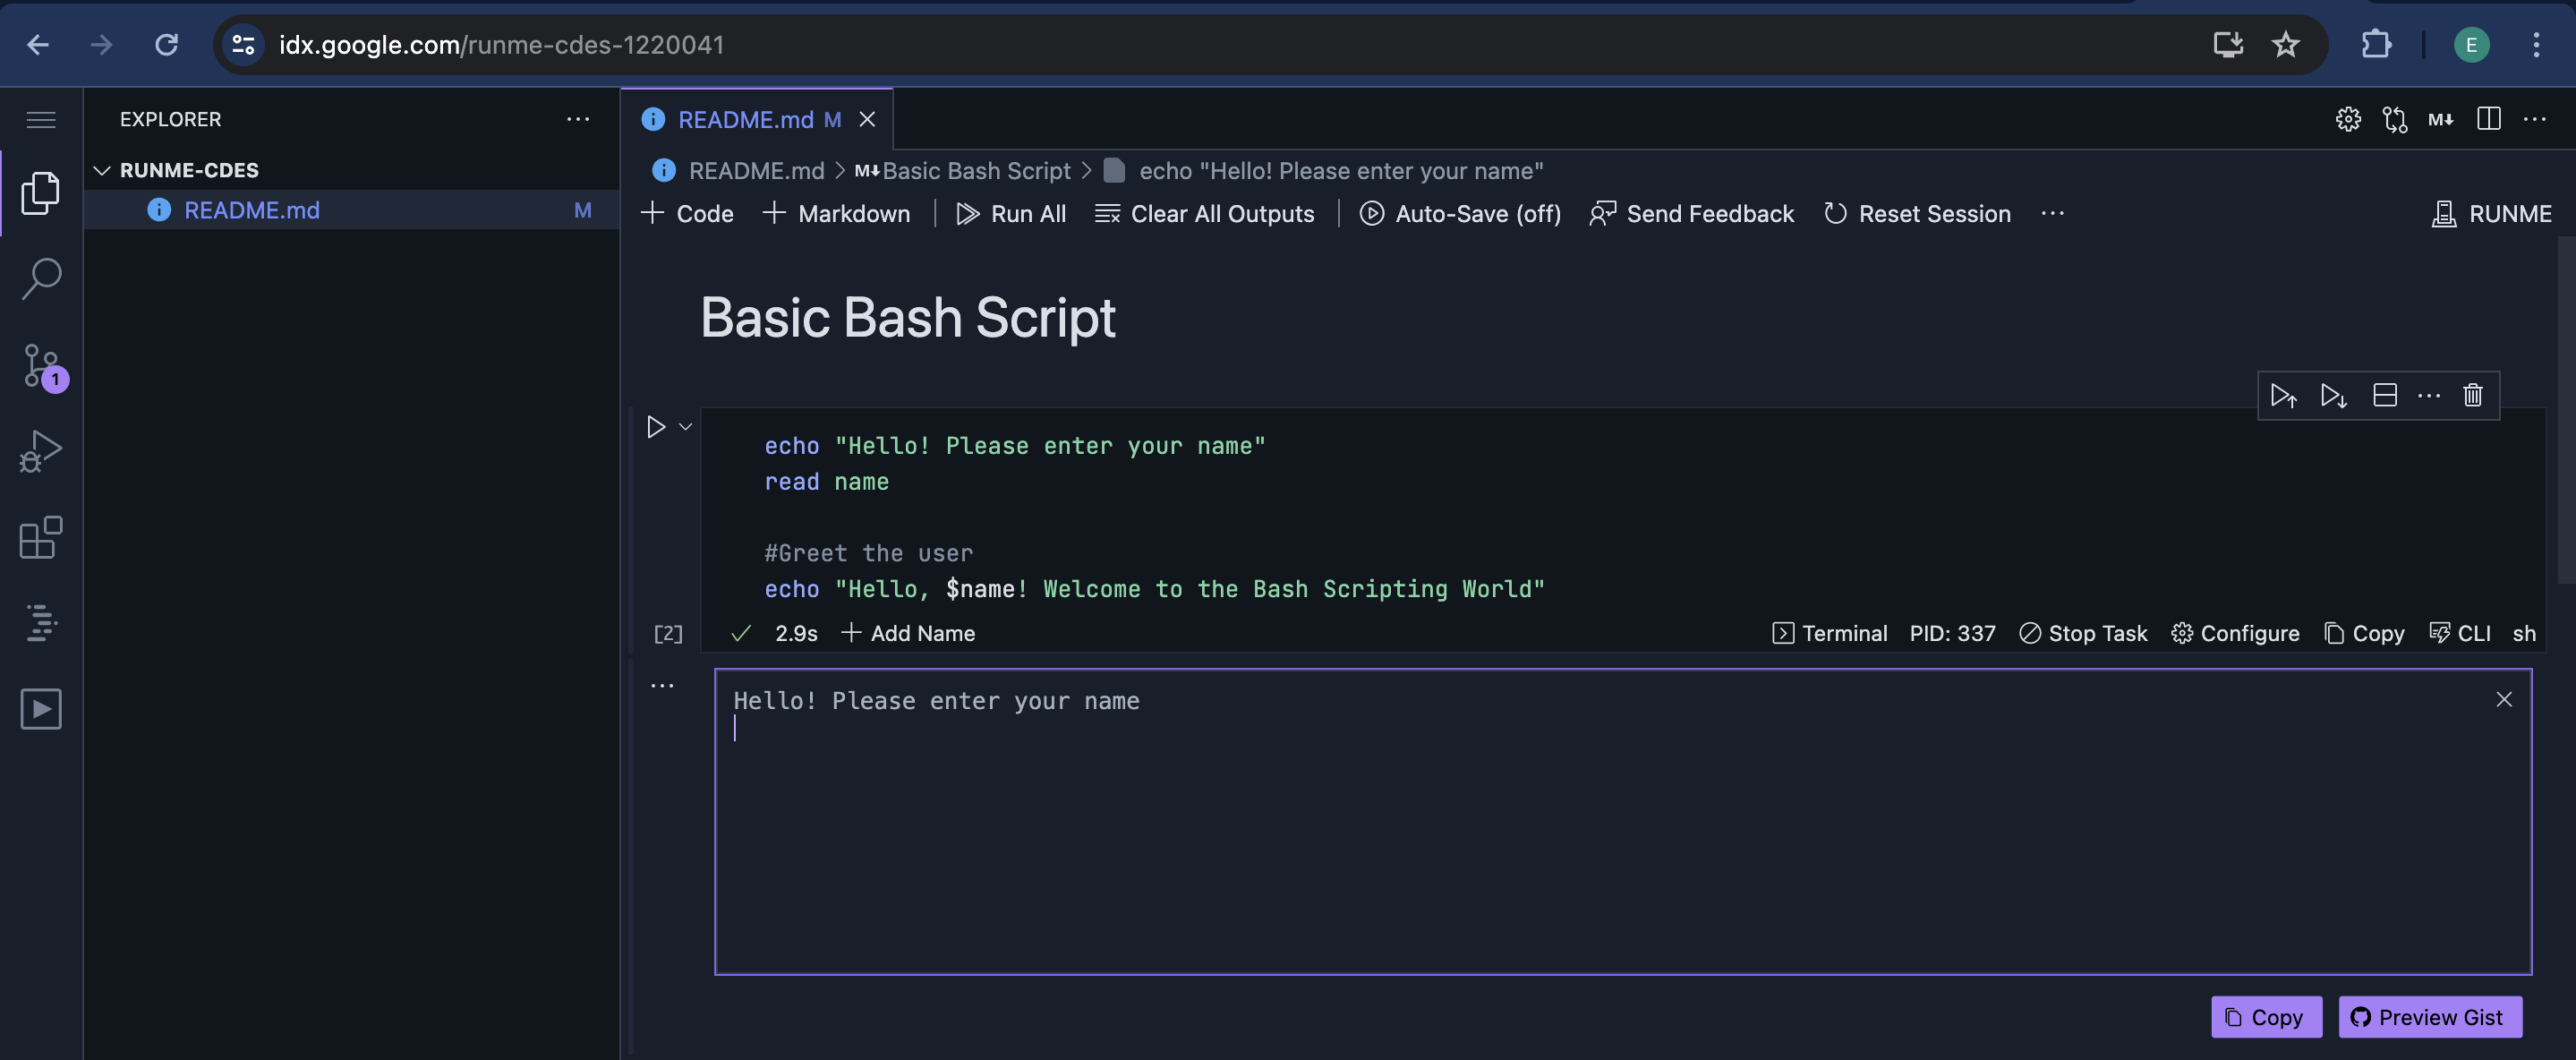
With these instructions, you can easily install the Runme extension in GitHub Codespaces, Gitpod, and Project IDX.
Next Steps
Runme offers more benefits. You can achieve so much more with the Runme, and your Markdown will also benefit from its features. Explore Our documentation to get more details on how this works.